Love this? Save it for later!
Share the inspiration with your friends
Meringue cookies and I had a long-standing feud. For years, I swore they were nothing more than sugary Styrofoam—pretty to look at but completely unsatisfying to eat. “They’re just egg whites and sugar,” I’d argue, “why bother?” Then my friend Leah invited me over to help her test Halloween recipes last October. She had this little piping bag set aside, looking all innocent on the counter. “Those are just for me,” she said, “I know you don’t like meringues.” I found myself sneaking one about twenty minutes later, and honestly, let me tell you—I nearly ate the entire batch. The texture was this impossible thing: crisp on the outside with a tiny, marshmallow-y center that melted in a way I didn’t know sugar could. I had to ask for the recipe, which felt like admitting defeat. But some defeats taste pretty sweet.
These Light & Crispy Ghost Meringue Cookies changed my mind completely. They’re not just Halloween decorations—they’re genuinely good cookies that happen to look adorable. The trick, I learned, is in the technique. You have to get the meringue to that perfect stiff peak stage where it holds its shape like a cloud that decided to stay put. And the ghost shapes? Pure whimsy. I mean, who can resist a cookie that looks like a tiny ghost floating on your baking sheet?
Maybe you’ve been there too—dismissing a recipe for years only to discover you were missing out on something special. These ghost meringues are that kind of recipe. They’re the underdog of the cookie world, and I’m here to tell you they deserve a second chance. The best part? They only need four ingredients, and you probably have three of them right now. Let me show you why these little ghosts are worth the effort.
Why You’ll Love This Recipe
These Light & Crispy Ghost Meringue Cookies aren’t just another Halloween treat. They’re the kind of cookie that makes people stop and smile before they even take a bite. Here’s why they’ve become my go-to for spooky season:
- Only 4 Ingredients : Egg whites, sugar, vanilla, and a pinch of cream of tartar. That’s it. No butter, no flour, no complicated shopping list.
- Naturally Gluten-Free & Low-Fat : Perfect for guests with dietary restrictions. Each cookie is practically air, so you can enjoy a handful without the guilt.
- Incredibly Fun to Make : Piping ghost shapes is oddly satisfying. It’s like edible art that tastes amazing.
- Lasts for Weeks : Store them in an airtight container, and they’ll stay crisp for up to two weeks. Great for make-ahead Halloween parties.
- Kid-Friendly Activity : My niece helped me pipe these last weekend, and she was obsessed. The ghost shapes are forgiving, so little hands can join in.
- Impressive Without Effort : They look like you spent hours, but the active prep time is about 15 minutes.
What makes these different from other meringue recipes? It’s the double-baking technique. I bake them low and slow, then let them rest in the turned-off oven overnight. This ensures that ethereal crispness without any sticky, chewy centers. The ghost shapes also mean you can get creative with faces—some are happy, some are spooky, some look mildly confused. Every batch has its own personality.
There’s something magical about watching a meringue transform in the oven. The glossy white peaks turn into these delicate, airy cookies that literally melt on your tongue. And when you add those tiny chocolate chip eyes? Honestly, it’s hard not to feel a little proud of yourself. These cookies are comfort food for the soul—light, sweet, and full of Halloween spirit without being overwhelming.
What Ingredients You Will Need
This recipe uses simple, pantry-friendly ingredients to create something truly special. Each one plays a specific role in achieving that perfect light and crispy texture. Here’s what you’ll need:
For the Meringue Base
- 3 large egg whites, at room temperature (cold eggs don’t whip as well—trust me on this)
- ¾ cup (150g) granulated sugar (use superfine if you have it, but regular works fine)
- ¼ teaspoon cream of tartar (stabilizes the meringue and helps it hold its shape)
- ½ teaspoon vanilla extract (pure vanilla, not imitation—the flavor difference is real)
For the Ghost Faces
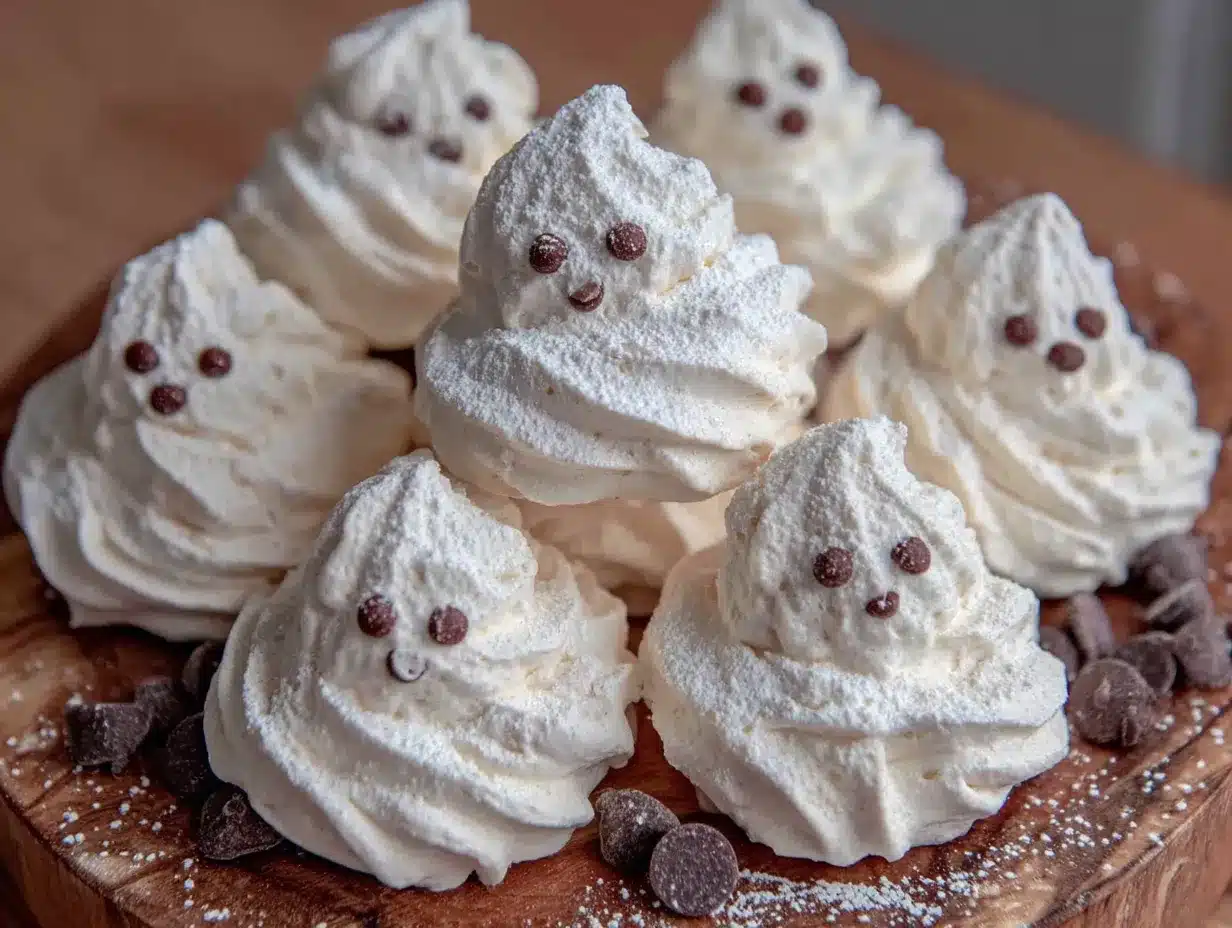
- ¼ cup mini chocolate chips (or candy eyes if you want them extra cute)
Ingredient Tips & Substitutions : I recommend using fresh eggs for the best volume. Older eggs actually whip better because they have slightly thinner whites, but fresh eggs give a cleaner flavor. For the sugar, I’ve used both organic cane sugar and regular white sugar with equal success. Just avoid powdered sugar—it contains cornstarch that can make the meringue dense.
If you want to get creative with colors, add a drop of gel food coloring after the meringue reaches stiff peaks. Gel coloring works better than liquid because it doesn’t add extra moisture. For a spooky twist, try adding a tiny pinch of black cocoa powder to half the batch for gray ghosts. I did that last year, and they looked like ghosts from an old black-and-white movie.
The cream of tartar is non-negotiable in my kitchen. I’ve tried making meringues without it, and the results were weepy and flat. If you don’t have cream of tartar, you can substitute ½ teaspoon of lemon juice or white vinegar per egg white. Both acids serve the same stabilizing function.
One more thing—make sure your bowl and whisk are completely clean and free of any grease. Even a tiny bit of oil can prevent the egg whites from whipping properly. I wipe my mixing bowl with a little lemon juice on a paper towel before starting, just to be safe.
Equipment Needed
You don’t need fancy equipment for these ghost meringues, but a few key tools make the process much easier. Here’s what I use:
- Stand mixer or hand mixer : Whipping meringue by hand is possible but exhausting. A stand mixer with the whisk attachment is my preference because it frees up my hands.
- Large mixing bowl : Glass or metal works best. Avoid plastic bowls—they can retain oils even after washing.
- Piping bag with a round tip : A ½-inch round tip creates the perfect ghost shape. No piping bag? A sturdy zip-top bag with the corner snipped off works in a pinch.
- Baking sheets lined with parchment paper : Parchment is essential—wax paper will stick, and silicone mats can sometimes cause spreading.
- Cooling rack : For letting the ghosts rest before baking.
- Small offset spatula : Helpful for testing meringue stiffness and scraping the bowl.
I bought a cheap piping bag set from the grocery store years ago, and it’s still going strong. You don’t need the expensive French linen ones for this recipe. The key is having a clean, dry bag with a secure tip. If you’re using a zip-top bag, double-bag it to prevent blowouts—learned that one the hard way when a bag burst mid-pipe and I had meringue everywhere.
Preparation Method
Making these ghost meringues requires a little patience, but the process is straightforward. Follow these steps carefully, and you’ll have perfect little ghosts floating off your baking sheet.
Step 1: Prep Your Equipment
Preheat your oven to 200°F (93°C). Line two large baking sheets with parchment paper. Make sure your mixing bowl and whisk attachment are spotless—wipe them with a bit of lemon juice if you’re worried about grease. Separate your eggs while they’re cold (it’s easier), then let the whites come to room temperature for about 30 minutes. Room temperature egg whites whip to a higher volume.
Step 2: Start Whipping
Add the egg whites to your clean mixing bowl. Begin whipping on medium speed until they become foamy and start to look like soap bubbles—about 1 minute. Add the cream of tartar and continue whipping until soft peaks form. You’ll know it’s ready when you lift the whisk and the peaks flop over slightly.
Step 3: Add the Sugar Slowly
With the mixer running on medium-high, start adding the sugar one tablespoon at a time. This is the most important step—adding sugar too quickly can deflate the meringue. Each addition should be fully incorporated before adding the next. The whole process takes about 5-7 minutes. Be patient here, honestly, it makes all the difference.
Step 4: Whip to Stiff Peaks
Once all the sugar is added, increase the speed to high and whip until the meringue is glossy and forms stiff peaks. Rub a tiny bit between your fingers—if it feels gritty, keep whipping. The sugar needs to dissolve completely. When it’s ready, the meringue should be thick, shiny, and hold its shape without any drooping. Add the vanilla extract and whip for another 30 seconds.
Step 5: Pipe the Ghosts
Transfer the meringue to your piping bag fitted with the round tip. Hold the bag perpendicular to the baking sheet, about ½ inch above the surface. Pipe a small mound, then pull straight up to create a teardrop shape. Release pressure and pull away quickly to create a little peak on top—that’s the ghost’s head. Leave about 1 inch between each ghost. Don’t worry if they look uneven; ghost shapes are supposed to be a little wonky.
Step 6: Add the Faces
Before the meringue starts to dry, gently press two mini chocolate chips into each ghost for eyes. You can add a third chip for a mouth if you want, but I prefer just eyes—it looks cuter. Work quickly because the meringue will start to form a skin within a few minutes.
Step 7: Bake Low and Slow
Place the baking sheets in the preheated oven. Bake for 60-75 minutes, rotating the pans halfway through. The meringues are done when they’re dry to the touch and can be lifted off the parchment without sticking. They should be pale and crisp, not browned at all. If they start to turn golden, your oven is too hot.
Step 8: Cool in the Oven
Turn off the oven and crack the door open slightly. Let the meringues cool completely inside the oven—this can take 2-3 hours or overnight. This step ensures they stay crisp and don’t develop sticky centers. I usually make them before bed and leave them in the oven overnight.
Step 9: Store Properly
Once completely cool, transfer the ghost meringues to an airtight container. Layer them between sheets of parchment paper to prevent breakage. They’ll stay fresh for up to two weeks—if they last that long.
Cooking Tips & Techniques
After making these ghost meringues more times than I can count, I’ve collected a few tricks that make the process foolproof. Here’s what I’ve learned the hard way so you don’t have to.
Humidity is the enemy. Meringue hates moisture. If it’s raining or super humid outside, your meringues might turn out sticky or weeping. Wait for a dry day, or use a dehumidifier in your kitchen. I made the mistake of trying these during a summer thunderstorm once, and the ghosts looked like they melted in terror.
Don’t overbake or underbake. The perfect meringue should lift cleanly off the parchment. If they stick, they need more time. If they crack excessively, your oven might be too hot. Every oven runs differently, so start checking at the 60-minute mark. My friend’s oven takes 90 minutes, while mine is done in 65.
Test for sugar dissolution. Before you start piping, rub a tiny bit of meringue between your thumb and forefinger. If it feels smooth, you’re good. If it’s gritty, keep whipping. Gritty meringue means undissolved sugar, which can cause weeping (those little sugar droplets that form on baked meringues).
Pipe with confidence. Don’t overthink the ghost shapes. Squeeze, pull up, release. Imperfect ghosts look more authentic anyway. Some of my favorite batches were the ones where I stopped trying to make them perfect and just let them be their own little ghostly selves.
Double-check your oven temperature. An oven thermometer is worth its weight in gold here. I thought my oven was accurate until I checked and discovered it runs 25 degrees hot. That explained a lot of failed meringues. Set your oven to 200°F and verify with a thermometer.
Variations & Adaptations
Once you master the basic ghost meringue, you can play around with different flavors and looks. Here are some of my favorite variations:
Chocolate Ghosts : Replace 2 tablespoons of sugar with unsweetened cocoa powder. Sift it with the sugar before adding to the egg whites. The ghosts turn a pale brown color that looks like they’ve been haunting a chocolate factory. My kids love these.
Peppermint Specters : Add ¼ teaspoon peppermint extract along with the vanilla. Crush a few candy canes and sprinkle the pieces on top before baking. These smell like Christmas and Halloween had a baby.
Lemon Wraiths : Swap the vanilla for 1 teaspoon of lemon extract and add a tiny drop of yellow gel food coloring. The subtle citrus flavor is surprisingly perfect with the sweet meringue. These taste like sunshine trapped in ghost form.
Vegan Option : Use aquafaba (the liquid from a can of chickpeas) instead of egg whites. 3 tablespoons of aquafaba replaces one egg white. Whip it the same way, though it takes a little longer to reach stiff peaks. The texture is slightly different but still delicious.
Spooky Colors : Divide the meringue into separate bowls and add different gel colors. Pipe purple, green, and orange ghosts for a full Halloween spectrum. I did this for a party last year, and they were the hit of the dessert table.
Giant Ghosts : Instead of small cookies, pipe one large ghost on each baking sheet. Bake for 90-100 minutes. These make amazing centerpieces for Halloween dessert tables. Just be careful when removing them—they’re fragile.
Serving & Storage Suggestions
These ghost meringues are at their best when served with a little flair. Here’s how I like to present them and keep them fresh.
Serving Ideas : Arrange the ghosts on a dark platter or black cake stand for maximum spooky effect. They look amazing floating on a bed of chocolate pudding or dark chocolate mousse. For Halloween parties, I stick them upright in a bowl of popcorn or candy corn—they look like they’re rising from a graveyard. Serve them at room temperature, and watch your guests’ faces light up.
Pairing Suggestions : These meringues pair beautifully with hot chocolate, coffee, or a glass of cold milk. For an adult twist, serve them alongside a dessert wine like Moscato or a creamy stout beer. The sweetness of the meringue balances the bitterness of coffee perfectly.
Storage Instructions : Store in an airtight container at room temperature for up to two weeks. Do NOT refrigerate—the moisture will ruin them. If you’re layering them in a container, place parchment paper between each layer to prevent breakage. They’re fragile little things.
Freezing Tips : You can freeze baked meringues for up to three months. Place them in a single layer in a freezer-safe container with parchment between layers. Thaw at room temperature for about 30 minutes before serving. The texture remains surprisingly good after freezing.
Flavor Development : Meringues actually taste better after a day or two. The flavors meld together, and the texture becomes even more delicate. I always try to make them at least 24 hours before I plan to serve them. It’s like they need a little time to settle into their ghostly existence.
Nutritional Information & Benefits
While these ghost meringues are definitely a treat, they’re lighter than most cookies. Here’s the breakdown per ghost (based on 30 cookies per batch):
- Calories : 25-30
- Fat : 0g
- Carbohydrates : 6g
- Protein : 0.5g
- Sugar : 6g
Health Highlights : Meringues are naturally fat-free and low in calories compared to traditional cookies. Egg whites provide a small amount of protein without any saturated fat. The sugar content is the main consideration, but because these are so light and airy, you get more cookies for fewer calories than most desserts.
Dietary Notes : This recipe is naturally gluten-free, dairy-free, and nut-free. For a vegan version, use aquafaba as mentioned in the variations section. The only potential allergen is eggs, so be mindful of that when serving guests.
My Take : I love that these cookies let me enjoy something sweet and fun without feeling heavy afterward. They’re the perfect end to a Halloween meal—satisfying but not overwhelming. Plus, the portion control is built-in since each ghost is so tiny. I can have five and still feel good about it.
Conclusion
These Light & Crispy Ghost Meringue Cookies have completely changed my mind about meringue. They’re not the bland, Styrofoam-like cookies I once dismissed. They’re delicate, sweet, and full of personality. Every batch brings a smile to my face, from the moment the glossy peaks form in the bowl to the final reveal of crisp little ghosts ready to haunt my kitchen.
I love how simple they are—four ingredients, fifteen minutes of active work, and then the oven does the rest. They’re forgiving enough for beginners but impressive enough for experienced bakers. And the ghost shapes? Honestly, they’re just fun. There’s something deeply satisfying about piping a tiny ghost and seeing it come to life in the oven.
I hope you give these a try, whether you’re a meringue skeptic like I was or a longtime fan. Play with the variations, make them your own, and don’t stress about perfection. The wonky ghosts are always the most charming. If you make them, I’d love to hear how they turn out. Drop a comment below or tag me in your photos—nothing makes my day like seeing your ghost creations floating across my feed. Happy haunting, and happy baking!
Frequently Asked Questions
Can I make these ghost meringues on a rainy day?
It’s not ideal, but you can. If you must bake on a humid day, increase the baking time by 10-15 minutes and let them cool completely in the turned-off oven with the door cracked. The extra drying time helps combat the moisture in the air. Just don’t expect them to be quite as crisp as on a dry day.
Why did my meringue turn out sticky and chewy instead of crisp?
This usually happens for one of three reasons: the meringue wasn’t baked long enough, the oven temperature was too high, or it was a humid day. Make sure you’re baking at 200°F (93°C) for the full time, and always cool the meringues in the turned-off oven. If they’re still sticky after cooling, pop them back in a 200°F oven for another 15-20 minutes.
Can I use liquid food coloring instead of gel?
I don’t recommend it. Liquid food coloring adds extra moisture to the meringue, which can cause it to deflate or become sticky. Gel food coloring is much more concentrated and doesn’t affect the texture. If liquid is all you have, use just one or two drops and expect slightly longer baking time.
How do I prevent my ghost meringues from cracking?
Small cracks are normal and actually add character to the ghosts. But if you want to minimize cracking, make sure your meringue isn’t over-whipped (stop at stiff but not dry peaks), and don’t open the oven door during baking. Sudden temperature changes cause cracks. Also, cooling them slowly in the turned-off oven helps prevent stress cracks.
Can I double this recipe?
Absolutely! This recipe doubles beautifully. Just make sure your mixing bowl is large enough to accommodate the increased volume—meringue expands a lot during whipping. You’ll also need additional baking sheets or you’ll have to bake in batches. The baking time stays the same, but you might need to rotate the pans more frequently for even drying.
Pin This Recipe!
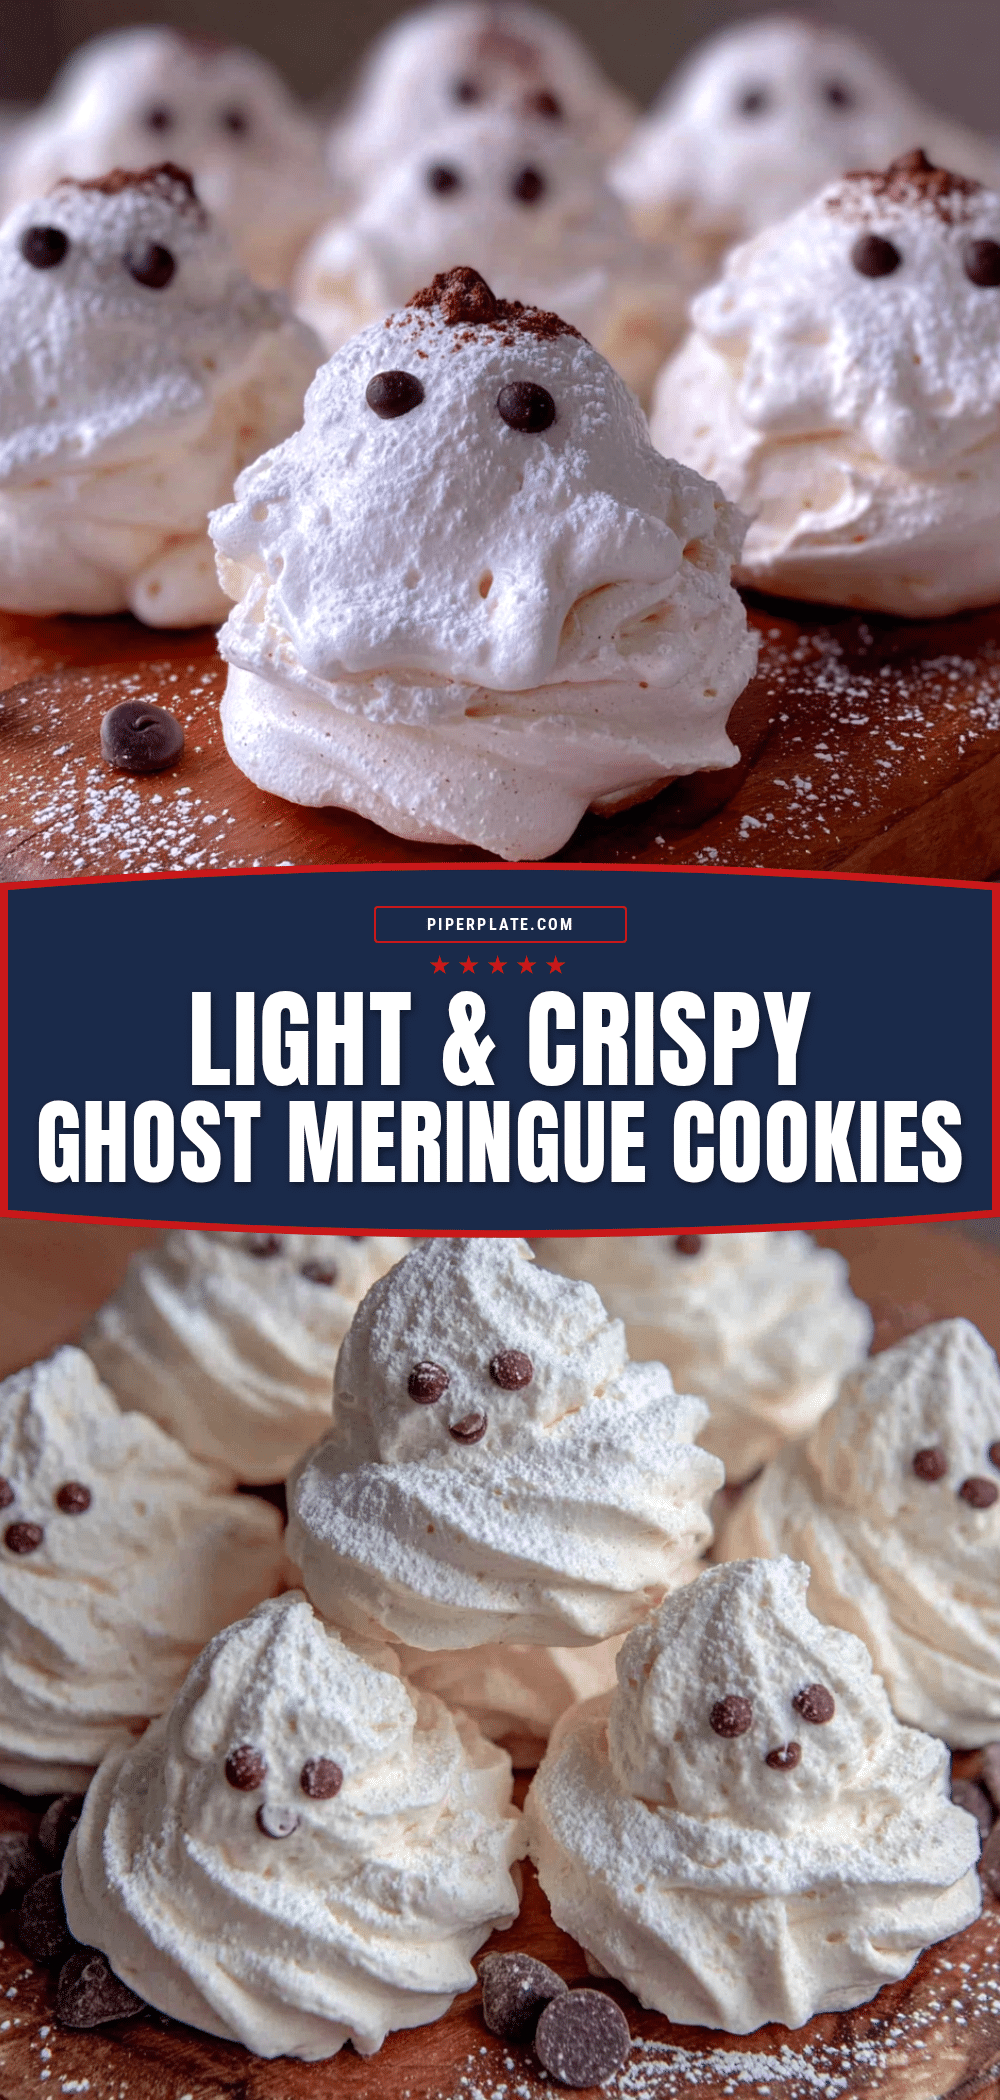
Light & Crispy Ghost Meringue Cookies
These Light & Crispy Ghost Meringue Cookies are a fun, 4-ingredient Halloween treat that’s naturally gluten-free and low-fat. With a crisp exterior and marshmallow-y center, they’re perfect for spooky season and only require 15 minutes of active prep time.
- Prep Time: 15 minutes
- Cook Time: 60-75 minutes
- Total Time: 2 hours 15 minutes to 3 hours 30 minutes (including cooling)
- Yield: 30 cookies 1x
- Category: Dessert
- Cuisine: American
Ingredients
- 3 large egg whites, at room temperature
- ¾ cup (150g) granulated sugar
- ¼ teaspoon cream of tartar
- ½ teaspoon vanilla extract
- ¼ cup mini chocolate chips
Instructions
- Preheat oven to 200°F (93°C). Line two large baking sheets with parchment paper. Ensure mixing bowl and whisk are spotless; wipe with lemon juice if needed. Separate eggs while cold, then let whites come to room temperature for 30 minutes.
- Add egg whites to clean mixing bowl. Whip on medium speed until foamy, about 1 minute. Add cream of tartar and continue whipping until soft peaks form.
- With mixer on medium-high, add sugar one tablespoon at a time, fully incorporating each addition. This takes 5-7 minutes.
- Increase speed to high and whip until meringue is glossy and forms stiff peaks. Rub a bit between fingers; if gritty, keep whipping. Add vanilla and whip 30 seconds more.
- Transfer meringue to piping bag fitted with a ½-inch round tip. Hold bag perpendicular to baking sheet, ½ inch above surface. Pipe small mounds, pulling straight up to create teardrop shapes with peaks. Leave 1 inch between ghosts.
- Before meringue dries, gently press two mini chocolate chips into each ghost for eyes. Work quickly.
- Bake for 60-75 minutes, rotating pans halfway. Meringues are done when dry to touch and lift off parchment without sticking.
- Turn off oven and crack door open. Let meringues cool completely inside oven, 2-3 hours or overnight.
- Store in airtight container at room temperature with parchment between layers for up to two weeks.
Notes
Humidity is the enemy; bake on dry days. Ensure bowl and whisk are grease-free. Don’t overbake or underbake; test for sugar dissolution before piping. Pipe with confidence; imperfect ghosts look more authentic. Use an oven thermometer to verify temperature. Meringues taste better after a day or two.
Nutrition
- Serving Size: 1 ghost cookie
- Calories: 2530
- Sugar: 6
- Sodium: 10
- Carbohydrates: 6
- Protein: 0.5
Keywords: ghost meringue cookies, Halloween cookies, meringue cookies, gluten-free cookies, low-fat cookies, 4-ingredient recipe, spooky treats


