Love this? Save it for later!
Share the inspiration with your friends
There used to be a little bakery on Main Street in my hometown called The Rolling Pin that made a pumpkin roll so light it practically floated off the plate. When they closed their doors three years ago after the owner retired, I actually stood outside the window and felt a little pang of loss. I mean, that sounds dramatic, but their pumpkin roll was the thing I looked forward to every October. After twelve tries — and one particularly sad attempt that looked more like a pumpkin-shaped biscuit — I finally got it. This is that recipe.
The secret, honestly, is all in how you treat the eggs and the flour. Most pumpkin rolls come out dense and heavy, like a log you could use to prop a door open. But this one? It’s different. It’s the kind of dessert that makes people close their eyes after the first bite and go quiet for a second. Maybe you’ve been there — chasing a flavor from your past that you just can’t seem to replicate at home. Let me tell you, it’s worth the effort.
I remember the first time I nailed it. It was a Tuesday night, and I’d almost given up for the season. The kitchen was a mess, there was flour on my glasses, and I was using a spatula that had seen better days. But when I unrolled that cake and saw the perfect spiral of cream cheese filling staring back at me, I actually laughed out loud. This recipe brings back that feeling every single time.
Why You’ll Love This Recipe
This isn’t just another pumpkin roll recipe floating around the internet. I’ve tested this version more times than I care to admit, and I can tell you with confidence that it solves the two biggest problems people face: cracking and density. Here’s why this one stands out:
- Light as air texture: Unlike traditional pumpkin rolls that can feel heavy, this one uses a clever technique with the egg whites to create a cake that practically melts in your mouth.
- Simple ingredients: You probably have everything in your pantry right now. No weird flours or specialty extracts — just real, honest ingredients.
- Perfect for fall gatherings: This is the dessert that disappears first at Thanksgiving, Friendsgiving, or any cozy autumn dinner.
- Crowd-pleaser guaranteed: I’ve served this to everyone from picky toddlers to my grandmother who claims she “doesn’t like pumpkin.” They all ask for seconds.
- Make-ahead friendly: Actually, this roll tastes even better the next day after the flavors have had time to meld together in the fridge.
What makes this recipe different from the dozens of others out there is the technique. Most recipes tell you to fold everything together and hope for the best. I’m going to show you exactly how to separate your eggs, whip those whites to the perfect consistency, and roll the cake while it’s still warm so it doesn’t crack. It’s the kind of insider knowledge that comes from messing up enough times to know what actually works.
This is the pumpkin roll that makes you feel like a pastry chef without actually having to go to culinary school. It’s comfort food that looks impressive but is secretly forgiving. And honestly? That first bite of creamy, spiced, perfectly swirled cake is worth every single minute you spend in the kitchen.
What Ingredients You Will Need
This recipe uses simple, wholesome ingredients to create something that tastes far more complicated than it actually is. Here’s what you’ll need and why each ingredient matters:
For the Pumpkin Cake
- 3 large eggs, separated (room temperature is crucial here — cold eggs won’t whip properly)
- 2/3 cup pumpkin puree (not pumpkin pie filling — I prefer Libby’s brand for its consistent texture and moisture content)
- 3/4 cup granulated sugar (divided — part goes in the yolk mixture, part goes into the egg whites)
- 3/4 cup all-purpose flour (spoon and level it — don’t scoop directly from the bag or you’ll end up with too much)
- 1 teaspoon baking powder (make sure it’s fresh — test it by dropping a bit in hot water; if it fizzes, you’re good)
- 1/2 teaspoon baking soda
- 1/2 teaspoon salt
- 2 teaspoons pumpkin pie spice (or make your own with 1 teaspoon cinnamon, 1/2 teaspoon ginger, 1/4 teaspoon nutmeg, and 1/4 teaspoon cloves)
- 1 teaspoon ground cinnamon (I use Saigon cinnamon for its warm, almost floral notes)
- 1 teaspoon vanilla extract
- Powdered sugar for dusting (this is non-negotiable — it prevents sticking and adds sweetness)
For the Cream Cheese Filling
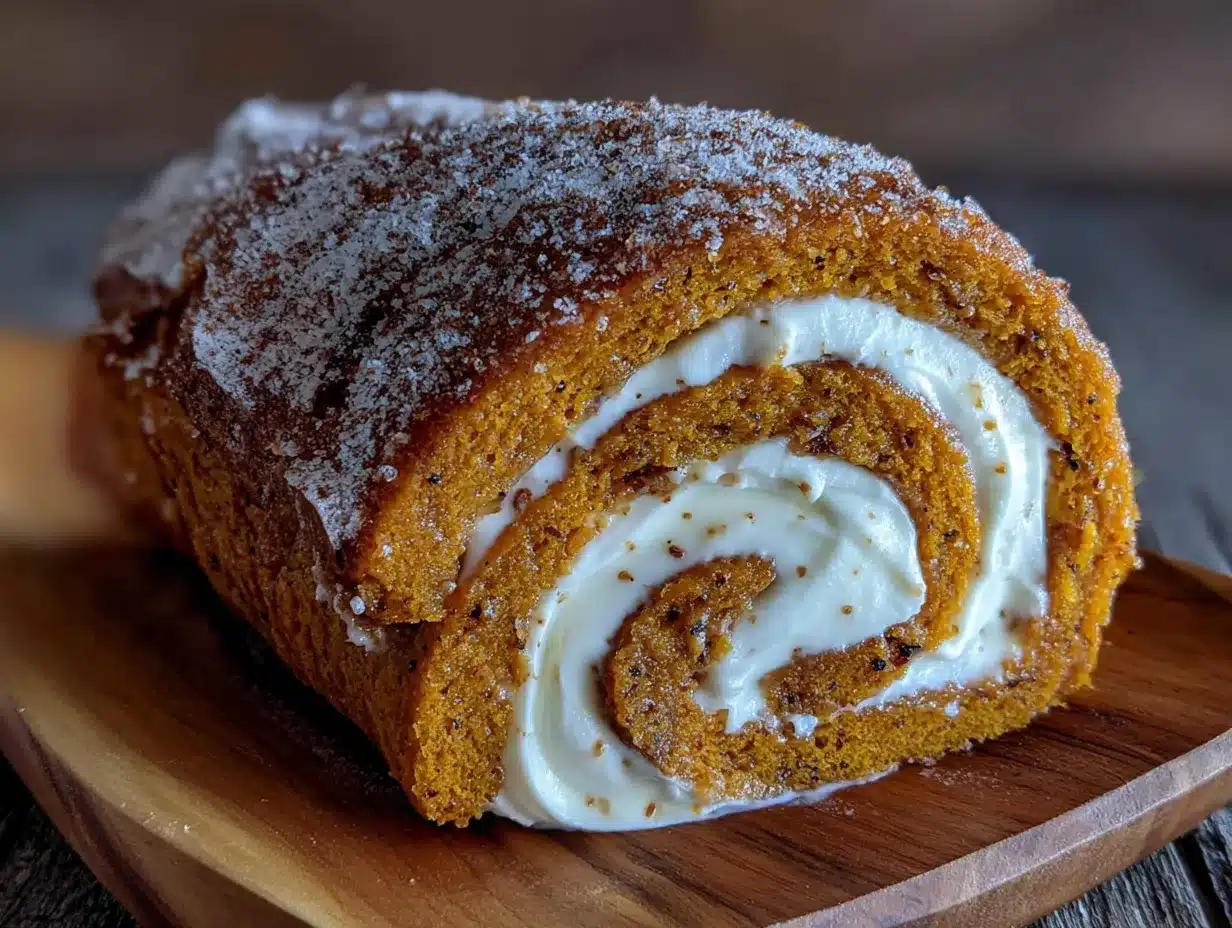
- 8 ounces cream cheese, softened (full-fat is best here — low-fat versions can make the filling runny)
- 1/4 cup unsalted butter, softened (let it sit out for at least an hour)
- 1 cup powdered sugar, sifted (sifting prevents lumps — trust me, nobody wants lumpy filling)
- 1 teaspoon vanilla extract
- Pinch of salt (this balances the sweetness and enhances the cream cheese flavor)
A few notes on ingredient choices: When it comes to pumpkin puree, stick with 100% pure pumpkin. The canned stuff labeled “pumpkin pie filling” already has sugar and spices added, which will throw off the balance of this recipe. I’ve tested this with homemade pumpkin puree too, and while it works, you’ll need to squeeze out some of the excess moisture with a clean kitchen towel first.
For the eggs, room temperature is absolutely critical. Cold eggs don’t whip to the same volume, and that volume is what gives this cake its light texture. If you forgot to take them out ahead of time, place them in a bowl of warm water for about 5 minutes before using.
The cream cheese should be full-fat and softened. I’ve tried this with Neufchâtel (the lower-fat version) and the filling just doesn’t hold its shape as well. Save yourself the frustration and go with the real thing.
Equipment Needed
You don’t need a professional pastry kitchen for this recipe, but having the right tools makes a world of difference:
- 15×10-inch jelly roll pan (also called a half-sheet pan — this specific size is important for getting the right thickness)
- Parchment paper (don’t skip this — it’s what makes the roll release cleanly)
- Electric mixer (stand mixer or hand mixer both work — I’ve used my trusty KitchenAid for years, but a hand mixer is actually easier for whipping small amounts of egg whites)
- Large mixing bowls (at least two — one for the yolk mixture and one for the egg whites)
- Rubber spatula (for folding — a metal spoon can deflate the batter)
- Clean kitchen towel (a thin, lint-free one works best — I use an old flour sack towel)
- Wire cooling rack
- Sifter or fine-mesh strainer (for powdered sugar and for sifting dry ingredients)
- Offset spatula (makes spreading the batter and filling much easier, but a regular spatula works too)
If you don’t have a jelly roll pan, you can use a 9×13-inch baking dish, but the cake will be thicker and harder to roll. The texture will still be good, but the spiral won’t be as tight. Also, make sure your towel is clean and doesn’t have any fabric softener residue — that can transfer to the cake and affect the taste.
Preparation Method
Let’s walk through this step by step. I promise, if you follow these instructions exactly, you’ll end up with a beautiful, crack-free pumpkin roll.
- Preheat your oven to 375°F (190°C). Position the rack in the center of the oven. Line your jelly roll pan with parchment paper, leaving a little overhang on the long sides — this gives you handles to lift the cake out later. Lightly spray the parchment with cooking spray.
- Separate your eggs carefully. Put the whites in a clean, dry mixing bowl and the yolks in a separate large bowl. Make sure no yolk gets into the whites — even a tiny bit of fat will prevent them from whipping properly. If you’re nervous, separate each egg into a small bowl first, then transfer.
- Make the yolk mixture. To the bowl with the egg yolks, add the pumpkin puree, 1/2 cup of the granulated sugar, and the vanilla extract. Beat with your electric mixer on medium speed for about 2 minutes until the mixture is smooth and slightly thickened. It should look pale orange and creamy.
- Whisk the dry ingredients. In a separate small bowl, whisk together the flour, baking powder, baking soda, salt, pumpkin pie spice, and cinnamon. This ensures everything is evenly distributed before you add it to the batter.
- Combine the dry and wet mixtures. Gradually add the dry ingredients to the pumpkin-yolk mixture, mixing on low speed just until combined. Don’t overmix here — a few streaks of flour are okay. The batter will be thick and smell amazing at this point.
- Whip the egg whites. Using clean beaters, whip the egg whites on medium speed until they become foamy. Gradually add the remaining 1/4 cup of sugar, a tablespoon at a time, while continuing to whip. Increase the speed to high and whip until stiff, glossy peaks form. This usually takes about 3-4 minutes. The peaks should stand straight up when you lift the beaters — not flop over.
- Fold everything together. Take about one-third of the whipped egg whites and stir them into the pumpkin mixture to lighten it. Then gently fold in the remaining whites using a rubber spatula. Use a cutting motion down through the center, then scrape along the bottom and up the side. Rotate the bowl as you go. Stop when you can’t see any white streaks — about 15 to 20 folds. Be gentle but efficient; you don’t want to deflate all that air you just whipped in.
- Spread the batter. Pour the batter into your prepared pan and use your offset spatula to spread it evenly into all corners. It will seem like a thin layer — that’s exactly what you want. Give the pan a gentle tap on the counter to release any air bubbles.
- Bake for 12 to 14 minutes. The cake is done when the top springs back when lightly touched and the edges start to pull away from the pan. Don’t overbake! A dry cake will crack when you roll it. The center should look set but still feel slightly soft.
- Prepare for rolling. While the cake bakes, lay out your clean kitchen towel on a flat surface and dust it generously with powdered sugar. Use a sifter for even coverage. When the cake comes out of the oven, immediately run a knife around the edges to loosen it.
- Flip and roll while hot. Carefully invert the cake onto the prepared towel. Peel off the parchment paper slowly. Starting at one of the short ends, roll the cake up tightly in the towel. Don’t press too hard — let the cake guide the roll. Place it seam-side down on a wire rack and let it cool completely. This usually takes about 1 hour. Don’t rush this step. If you try to fill a warm cake, the cream cheese will melt and turn into a soupy mess.
- Make the filling. While the cake cools, beat the softened cream cheese and butter together until smooth and creamy — about 2 minutes. Add the sifted powdered sugar, vanilla, and salt, and beat until combined. Scrape down the bowl and beat for another minute until the filling is light and fluffy.
- Unroll and fill. Once the cake is completely cool, gently unroll it. It might want to curl back up a bit — that’s normal. Spread the cream cheese filling evenly over the cake, leaving about a 1/2-inch border around the edges. Don’t skimp on the filling, but don’t pile it on too thick either.
- Roll it back up. Reroll the cake, this time without the towel. Use the towel to help guide the roll if needed. Wrap the finished roll tightly in plastic wrap and refrigerate for at least 2 hours before serving. This firms up the filling and makes slicing much easier.
- Slice and serve. When you’re ready to serve, trim the ends for a clean look (the baker’s tax!), then slice into 1-inch rounds. Dust with a little extra powdered sugar right before serving for that picture-perfect finish.
Cooking Tips & Techniques
I’ve made this pumpkin roll more times than I can count, and I’ve learned a few things the hard way. Here are the tips that made the biggest difference:
Don’t skip the towel rolling step. I know it seems fussy, but rolling the cake while it’s still warm in a powdered sugar-dusted towel is what trains the cake to hold that shape. If you skip this, the cake will crack when you try to roll it with the filling. I learned this the hard way on attempt number four, which looked more like a pumpkin pile than a pumpkin roll.
Watch the baking time like a hawk. Every oven runs differently, so start checking at 11 minutes. The cake should be golden on top and spring back when gently pressed. If you see it starting to brown around the edges, it’s probably done. An overbaked cake is a dry cake, and dry cakes crack. Period.
Use room temperature ingredients for the filling. Cold cream cheese creates lumpy filling. Cold butter won’t incorporate properly. Set these out at least an hour before you start. If you forget, cut the cream cheese into small cubes and microwave it in 10-second bursts until softened but not melted.
Let it chill before slicing. This is the hardest part — waiting. But that time in the fridge allows the filling to set and the cake to absorb a little moisture from the cream cheese. A properly chilled roll slices cleanly with beautiful spirals. A warm roll turns into a squishy mess. Trust the process.
If it cracks, don’t panic. Even experienced bakers get cracks sometimes. A little extra powdered sugar dusted on top hides a multitude of sins. You can also cover cracks with a dollop of whipped cream or a drizzle of caramel sauce. Nobody will know.
Variations & Adaptations
One of the best things about this recipe is how adaptable it is. Here are some variations I’ve tried and loved:
Gluten-free version: Substitute the all-purpose flour with a good quality gluten-free flour blend that contains xanthan gum. I’ve had great results with Bob’s Red Mill 1-to-1 Baking Flour. The texture is slightly more delicate, so be extra gentle when folding and rolling.
Dairy-free option: Use dairy-free cream cheese (Kite Hill makes a good one) and vegan butter. The filling won’t be quite as firm, so chill it for at least 4 hours before serving. I’d also recommend using coconut cream instead of cream cheese for a different but delicious twist.
Spice it up: Add 1/4 teaspoon of cayenne pepper or chipotle powder to the flour mixture for a subtle heat that pairs beautifully with the sweet cream cheese filling. It’s unexpected but absolutely addictive.
Chocolate pumpkin roll: Replace 2 tablespoons of the flour with unsweetened cocoa powder. The chocolate-pumpkin combination is fantastic, and the dark color makes the cream cheese filling really pop visually.
Maple cream cheese filling: Substitute 2 tablespoons of the powdered sugar with maple syrup and reduce the vanilla to 1/2 teaspoon. The maple flavor pairs perfectly with the pumpkin spices and gives the filling a slightly softer texture.
I once made a version with candied ginger folded into the filling for a holiday party, and it was gone in about ten minutes. Don’t be afraid to experiment — this recipe is surprisingly forgiving.
Serving & Storage Suggestions
This pumpkin roll is best served chilled, straight from the refrigerator. The cold filling contrasts beautifully with the tender cake. Here are my favorite ways to serve it:
Serving temperature: Remove the roll from the fridge about 10 minutes before slicing. This takes the chill off just enough without making the filling soft. Slice with a sharp, thin-bladed knife, wiping it clean between cuts for the neatest slices.
Presentation ideas: Arrange slices on a platter with a light dusting of powdered sugar and a few fresh cranberries or small rosemary sprigs for color. For a more decadent presentation, drizzle with caramel sauce and add a dollop of whipped cream.
Complementary pairings: This roll is wonderful with a cup of hot coffee, spiced chai, or a glass of cold milk. For a dessert spread, serve it alongside apple crisp, pecan pie, or a simple vanilla panna cotta.
Storage instructions: Store the wrapped roll in the refrigerator for up to 5 days. Keep it tightly wrapped in plastic wrap to prevent it from drying out. You can also freeze the un-sliced roll for up to 3 months. Wrap it first in plastic wrap, then in a layer of aluminum foil. Thaw overnight in the refrigerator before serving.
Flavor development: Honestly, this roll tastes even better on day two. The spices have time to meld with the filling, and the cake becomes even more tender. If you can resist eating it all on day one, you’re in for a treat.
Nutritional Information & Benefits
While this is definitely a treat, it’s not as heavy as you might think. Here’s the approximate nutritional breakdown per slice (based on 10 slices):
- Calories: Approximately 280
- Total Fat: 14g
- Saturated Fat: 8g
- Cholesterol: 95mg
- Sodium: 290mg
- Total Carbohydrates: 35g
- Dietary Fiber: 1g
- Sugars: 24g
- Protein: 5g
Pumpkin is packed with vitamin A (great for eye health), fiber, and antioxidants. The eggs provide high-quality protein, and the cream cheese offers calcium and a little protein too. While I wouldn’t call this a health food, it’s certainly a more wholesome option than many store-bought desserts. Plus, making it from scratch means you know exactly what’s going into it — no preservatives, no artificial flavors, just real food.
For those watching their sugar intake, you can reduce the sugar in the cake to 1/2 cup total and use a sugar substitute in the filling. The texture will be slightly different, but it will still be delicious.
Conclusion
This pumpkin roll has become my signature fall dessert, the one people request year after year. It’s the recipe that made me stop chasing that memory of The Rolling Pin and start creating new ones in my own kitchen. And honestly? That’s better than any bakery could ever be.
I hope you give this recipe a try. Don’t be intimidated by the rolling process — it’s easier than it looks, and even a slightly imperfect roll tastes absolutely wonderful. The first time you slice into that beautiful spiral and see the cream cheese peeking through, you’ll feel like a rockstar.
If you make this, I’d love to hear how it turns out. Leave a comment below and let me know if you tried any variations or if this became a new family favorite. And if you’re looking for more fall dessert inspiration, check out my pumpkin cheesecake bars or this apple cider donut cake — both are perfect for the season.
Happy baking, friends. May your rolls be light, your filling be creamy, and your kitchen smell like autumn.
Frequently Asked Questions
Why did my pumpkin roll crack when I rolled it?
Cracking usually happens for one of three reasons: the cake was overbaked (making it too dry), it wasn’t rolled while still warm, or it cooled too quickly. Make sure you roll it in the towel immediately after removing the parchment paper, and check your oven temperature with an oven thermometer to ensure accuracy.
Can I make this pumpkin roll ahead of time?
Absolutely! In fact, I recommend it. The roll actually tastes better after sitting in the fridge overnight because the flavors have time to meld. You can make it up to 2 days in advance and keep it wrapped tightly in the refrigerator.
Can I freeze pumpkin roll with cream cheese filling?
Yes! Wrap the unfilled roll tightly in plastic wrap and freeze for up to 3 months. Thaw it in the refrigerator overnight, then fill and roll as directed. You can also freeze the completely assembled roll, but the texture of the cream cheese filling may change slightly upon thawing.
How do I get clean slices without smearing the filling?
Use a sharp, thin-bladed knife and wipe it clean with a damp paper towel between each cut. Chilling the roll thoroughly before slicing also helps. For the cleanest cuts, use a serrated knife with a gentle sawing motion rather than pressing down.
Can I use fresh pumpkin instead of canned?
Yes, but you’ll need to remove excess moisture first. After roasting and pureeing your fresh pumpkin, spread it on a paper towel-lined baking sheet, cover with another layer of paper towels, and press gently to absorb extra liquid. Let it sit for about 15 minutes before using. Fresh pumpkin can vary widely in moisture content, so this step is crucial for success.
Pin This Recipe!
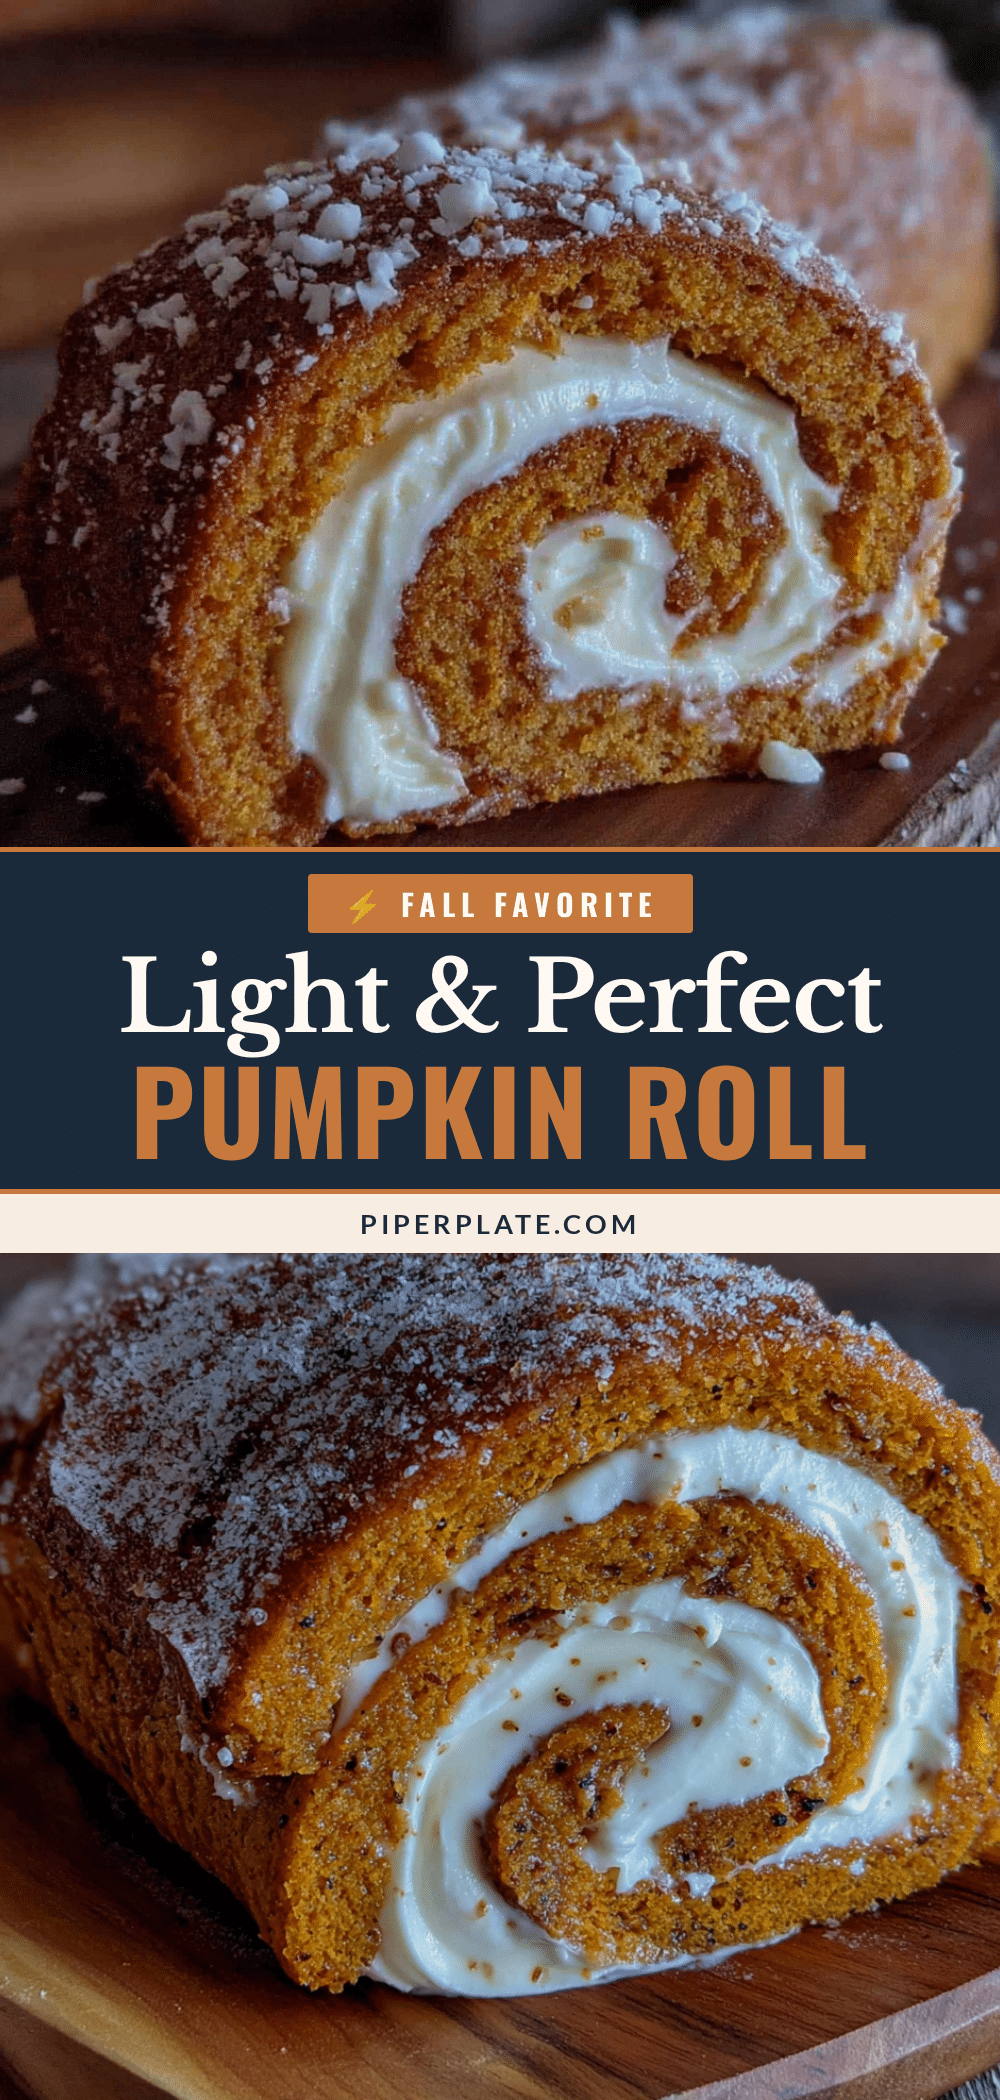
Light & Perfect Pumpkin Roll with Cream Cheese Filling

This pumpkin roll is incredibly light and airy, with a perfect cream cheese filling. It solves the common problems of cracking and density, making it a crowd-pleaser for fall gatherings.
- Prep Time: 20 minutes
- Cook Time: 14 minutes
- Total Time: 1 hour 34 minutes (plus 2 hours chilling)
- Yield: 10 servings 1x
- Category: Dessert
- Cuisine: American
Ingredients
- 3 large eggs, separated (room temperature)
- 2/3 cup pumpkin puree (not pumpkin pie filling)
- 3/4 cup granulated sugar, divided
- 3/4 cup all-purpose flour
- 1 teaspoon baking powder
- 1/2 teaspoon baking soda
- 1/2 teaspoon salt
- 2 teaspoons pumpkin pie spice
- 1 teaspoon ground cinnamon
- 1 teaspoon vanilla extract
- Powdered sugar for dusting
- 8 ounces cream cheese, softened
- 1/4 cup unsalted butter, softened
- 1 cup powdered sugar, sifted
- 1 teaspoon vanilla extract
- Pinch of salt
Instructions
- Preheat your oven to 375°F (190°C). Position the rack in the center of the oven. Line your jelly roll pan with parchment paper, leaving a little overhang on the long sides. Lightly spray the parchment with cooking spray.
- Separate your eggs carefully. Put the whites in a clean, dry mixing bowl and the yolks in a separate large bowl.
- To the bowl with the egg yolks, add the pumpkin puree, 1/2 cup of the granulated sugar, and the vanilla extract. Beat with your electric mixer on medium speed for about 2 minutes until the mixture is smooth and slightly thickened.
- In a separate small bowl, whisk together the flour, baking powder, baking soda, salt, pumpkin pie spice, and cinnamon.
- Gradually add the dry ingredients to the pumpkin-yolk mixture, mixing on low speed just until combined.
- Using clean beaters, whip the egg whites on medium speed until they become foamy. Gradually add the remaining 1/4 cup of sugar, a tablespoon at a time, while continuing to whip. Increase the speed to high and whip until stiff, glossy peaks form, about 3-4 minutes.
- Take about one-third of the whipped egg whites and stir them into the pumpkin mixture to lighten it. Then gently fold in the remaining whites using a rubber spatula until no white streaks remain.
- Pour the batter into your prepared pan and use your offset spatula to spread it evenly into all corners. Give the pan a gentle tap on the counter to release any air bubbles.
- Bake for 12 to 14 minutes. The cake is done when the top springs back when lightly touched and the edges start to pull away from the pan.
- While the cake bakes, lay out your clean kitchen towel on a flat surface and dust it generously with powdered sugar. When the cake comes out of the oven, immediately run a knife around the edges to loosen it.
- Carefully invert the cake onto the prepared towel. Peel off the parchment paper slowly. Starting at one of the short ends, roll the cake up tightly in the towel. Place it seam-side down on a wire rack and let it cool completely, about 1 hour.
- While the cake cools, beat the softened cream cheese and butter together until smooth and creamy, about 2 minutes. Add the sifted powdered sugar, vanilla, and salt, and beat until combined. Scrape down the bowl and beat for another minute until the filling is light and fluffy.
- Once the cake is completely cool, gently unroll it. Spread the cream cheese filling evenly over the cake, leaving about a 1/2-inch border around the edges.
- Reroll the cake, this time without the towel. Wrap the finished roll tightly in plastic wrap and refrigerate for at least 2 hours before serving.
- When ready to serve, trim the ends for a clean look, then slice into 1-inch rounds. Dust with a little extra powdered sugar right before serving.
Notes
Roll the cake while it’s still warm in a powdered sugar-dusted towel to prevent cracking. Watch the baking time carefully to avoid overbaking. Use room temperature ingredients for the filling. Chill the roll before slicing for clean cuts. If it cracks, dust with powdered sugar or cover with whipped cream.
Nutrition
- Serving Size: 1 slice
- Calories: 280
- Sugar: 24
- Sodium: 290
- Fat: 14
- Saturated Fat: 8
- Carbohydrates: 35
- Fiber: 1
- Protein: 5
Keywords: pumpkin roll, cream cheese filling, fall dessert, Thanksgiving, pumpkin dessert, jelly roll


