Love this? Save it for later!
Share the inspiration with your friends
“The firework crackled just as I was setting the last blueberry on the cheesecake tart,” I remember thinking, “this is going to be one memorable Fourth of July dessert.” It all started when I was at a neighborhood block party last summer. The host, an unexpected genius with desserts, pulled out this red, white, and blue cheesecake flag tart that looked too perfect to be no-bake. Honestly, I was skeptical at first — no-bake desserts can sometimes be a little too soft or bland for my taste. But this one? It had that cool, creamy texture with a crisp crust that held up beautifully in the summer heat.
Maybe you’ve been there — scrambling last minute for a dessert that looks festive but doesn’t require turning on the oven during the hottest week of the year. I know I have. This no-bake patriotic cheesecake flag tart was that happy accident for me. I jotted down the recipe on a napkin, spilled a bit of cream cheese on my shirt, and promised myself I’d make it for next July 4th. Fast forward a year, and here I am, sharing this tried-and-true favorite that brings smiles, sticky fingers, and a little sparkle to every Independence Day gathering.
Let me tell you, this recipe stuck with me because it’s simple, stunning, and seriously delicious. Whether you’re hosting a big backyard barbecue or just want a sweet nod to the stars and stripes, this cheesecake tart is an absolute winner. You’ll find it balances creamy, tangy, and fresh flavors in a way that feels both nostalgic and fresh. Plus, it’s made without an oven, so your kitchen stays cool — which, trust me, is a game-changer on a summer day.
Why You’ll Love This Recipe
I’ve made countless desserts over the years, but this no-bake patriotic cheesecake flag tart has earned a special place in my recipe book. It’s not just about the looks (though, come on, it’s pretty eye-catching). It’s about the ease, the flavors, and how it brings everyone together without any stress. Here’s why this recipe is a keeper:
- Quick & Easy: You can whip this up in under 30 minutes, which is perfect for those last-minute party plans or when the kids decide they want dessert right now.
- Simple Ingredients: No need for a special trip to the store — everything you need is probably already in your pantry or fridge.
- Perfect for July 4th: Its vibrant red, white, and blue layers make it a festive centerpiece for any Independence Day celebration.
- Crowd-Pleaser: I’ve seen picky eaters and cheesecake lovers alike go back for seconds — the creamy texture with fresh berries wins hearts every time.
- Unbelievably Delicious: The smooth, tangy cheesecake paired with a buttery graham cracker crust and juicy berries hits that comfort food sweet spot.
What really sets this recipe apart? The no-bake method means the texture is luxuriously creamy without that dense oven-baked feel. Plus, the flag design isn’t just decorative — it’s an easy way to showcase fresh fruit that adds brightness and natural sweetness. I’ve even swapped in coconut yogurt for a dairy-free twist, and it still came out fantastic. Honestly, it’s the kind of dessert that makes you close your eyes on the first bite and think, “Yep, this is summer on a plate.”
What Ingredients You Will Need
This no-bake patriotic cheesecake flag tart uses simple, wholesome ingredients to deliver bold flavor and satisfying texture without the fuss. Most are pantry staples, and the fresh berries bring that seasonal pop of color and taste. Here’s what you’ll need:
- For the crust:
- 1 ½ cups graham cracker crumbs (about 10 full sheets) – I recommend Honey Maid for a classic flavor
- 5 tbsp unsalted butter, melted (adds richness and helps bind the crust)
- 2 tbsp granulated sugar (balances the buttery crust)
- For the cheesecake filling:
- 16 oz (450g) cream cheese, softened to room temperature
- ⅔ cup powdered sugar (for just the right sweetness)
- 1 tsp pure vanilla extract
- 1 cup heavy whipping cream, chilled (whipped to stiff peaks)
- For the topping/decoration:
- 1 cup fresh strawberries, sliced (for the red stripes)
- 1 cup fresh blueberries (for the blue field)
- Optional: ½ cup raspberries or red currants to add depth to the red stripes
If you want to keep it dairy-free, swapping the cream cheese for a plant-based alternative and using coconut cream whipped to peaks works beautifully. For gluten-free, substitute the graham crackers with gluten-free cracker crumbs or crushed nuts. In summer, fresh berries are the star, but frozen can work if fresh aren’t available—just thaw and drain excess moisture before using.
Equipment Needed
To make this no-bake patriotic cheesecake flag tart, you won’t need much — which is part of the charm. Here’s what I use every time:
- 9-inch (23 cm) tart pan with a removable bottom — makes it easy to slice and serve. If you don’t have a tart pan, a springform pan works well too.
- Mixing bowls — one large for the filling and one smaller for whipping cream.
- Electric mixer or a sturdy hand whisk — whipping the cream by hand is possible but takes some elbow grease.
- Measuring cups and spoons — for precise ingredient amounts.
- Spatula — for folding the whipped cream gently into the cream cheese mixture.
If you don’t own a tart pan, no worries! A pie dish or even a small cake pan will do. Just keep in mind, a pan with removable sides makes presentation easier. I’ve had luck with budget-friendly tart pans from local stores that hold up well over time. After use, give your tart pan a gentle hand wash and dry thoroughly to keep that removable bottom smooth and easy to handle.
Preparation Method
- Prepare the crust: In a medium bowl, combine the graham cracker crumbs, melted butter, and granulated sugar. Stir until the mixture looks like wet sand and holds together when pressed. (About 3-4 minutes)
- Press crust into pan: Transfer the crumb mixture into your 9-inch tart pan. Use the back of a spoon or a flat-bottomed glass to press the crumbs firmly and evenly across the bottom and slightly up the sides. Don’t forget to get those edges! Chill the crust in the fridge for 10-15 minutes while you prepare the filling.
- Make the cheesecake filling: In a large bowl, beat the softened cream cheese and powdered sugar with an electric mixer until smooth and creamy — no lumps! Add the vanilla extract and mix to combine. (About 2-3 minutes)
- Whip the cream: In a separate chilled bowl, whip the heavy cream until stiff peaks form. This means when you lift the whisk, the cream holds its shape firmly.
- Fold cream into cream cheese: Gently fold about a third of the whipped cream into the cream cheese mixture to lighten it. Then fold in the rest carefully, so you keep that airy texture. (Don’t overmix or you’ll lose the fluffiness!)
- Assemble the tart: Spoon the cheesecake filling onto the chilled crust and spread evenly with a spatula. Smooth the top for a clean canvas.
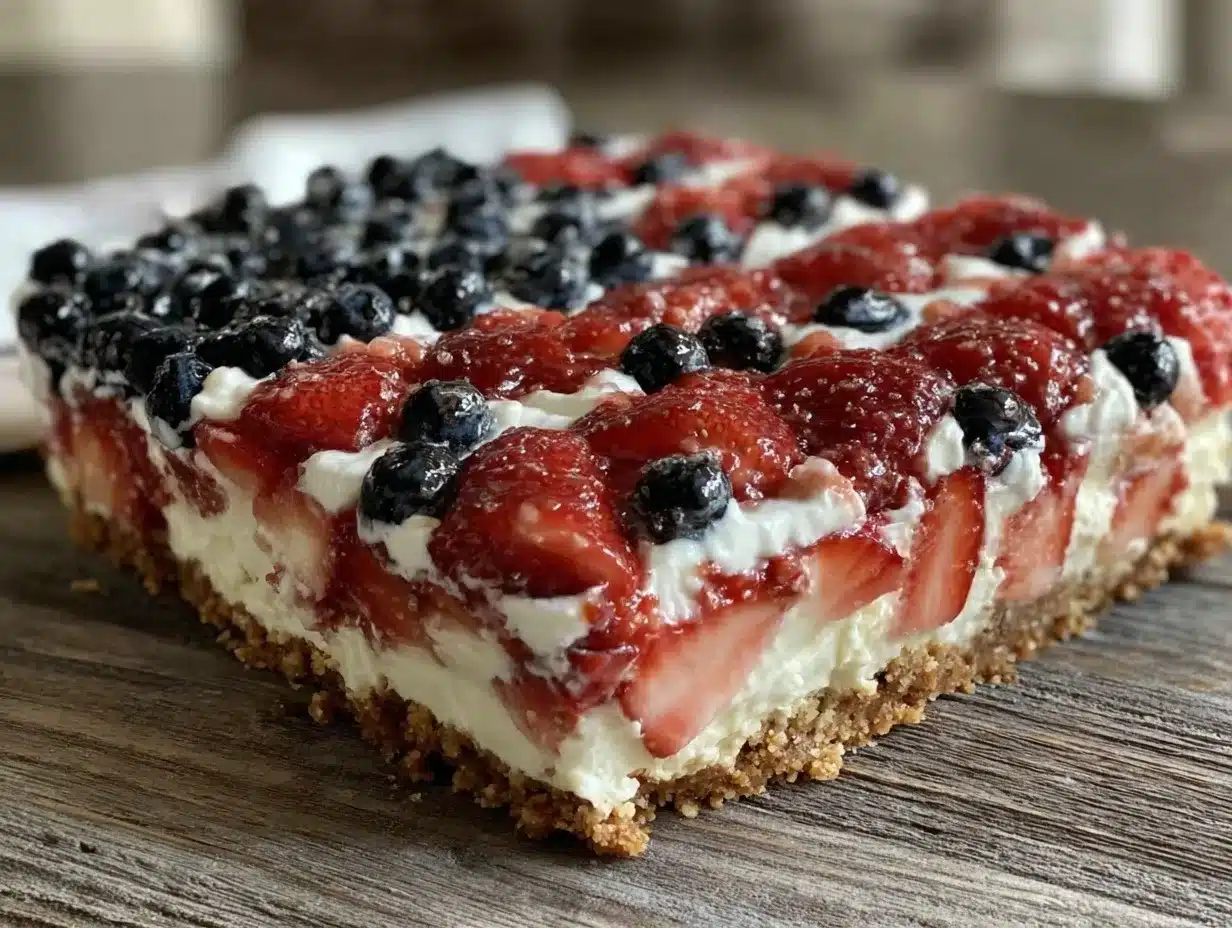
- Create the flag design: Arrange sliced strawberries in neat horizontal stripes across the tart, leaving a square in the upper left corner. Fill that square with blueberries to represent the stars. Take your time here — the visual impact is worth it! (I like to work from left to right, placing berries close but not squished.)
- Chill before serving: Refrigerate the tart for at least 3 hours, preferably overnight. This allows the filling to set perfectly and flavors to meld.
A quick tip: If you find the crust softening too much, a quick 10-minute chill in the freezer before adding the filling helps keep it crisp. Also, if you accidentally forget to soften your cream cheese, a few 10-second bursts in the microwave (wrapped in plastic) will do the trick.
Cooking Tips & Techniques
When it comes to making the perfect no-bake patriotic cheesecake flag tart, a few tricks can make all the difference. First, patience is key — letting the tart chill long enough is what gives you that clean slice and creamy texture that isn’t too runny.
One mistake I made early on was overmixing the whipped cream into the cream cheese. You want to fold gently — think of it like tucking in a delicate blanket rather than stirring a pot. This keeps the filling light and fluffy instead of dense.
Also, using room temperature cream cheese is crucial. Cold cream cheese will clump and make for a lumpy filling. If you’re pressed for time, cut it into small cubes to soften faster.
For berry placement, don’t rush. The flag design is simple but visually striking. If some berries start to turn watery, pat them dry with a paper towel before placing. This keeps the tart from getting soggy.
Finally, multitasking helps. While the crust chills, whip the cream and prep berries. That way, assembly feels smooth and efficient. I often prepare the crust the night before, which really lightens my day-of load.
Variations & Adaptations
This cheesecake tart is versatile and welcoming to your creative spin. Here are some variations to consider:
- Flavor twists: Add a tablespoon of lemon zest to the cream cheese mixture for a refreshing citrus note that pairs beautifully with berries.
- Alternative crusts: Swap graham crackers for crushed digestive biscuits or even pretzel crumbs for a sweet-salty contrast.
- Dairy-free option: Use vegan cream cheese and coconut cream whipped to stiff peaks. The texture is slightly different but still delightful.
- Different fruit: For a seasonal touch, try using kiwi and mango slices to create tropical flag colors or raspberries and blackberries for a richer red and blue.
- Mini tartlets: Use a muffin tin or mini tart pans to make individual servings — perfect for potlucks and kid-friendly portions.
One time, I made a version with a chocolate cookie crust and swapped blueberries with blackberries. It was a hit at a neighborhood picnic, and honestly, the chocolate added a decadent surprise that balanced the tartness of the berries wonderfully.
Serving & Storage Suggestions
This no-bake patriotic cheesecake flag tart is best served chilled — straight from the fridge so it holds its shape and the flavors shine. I like to slice it into generous wedges and serve with a side of whipped cream or a drizzle of honey for extra sweetness.
For drinks, it pairs beautifully with iced tea, lemonade, or even a light rosé if you’re feeling festive. The fresh berry topping makes it a perfect complement to summer beverages.
Store leftovers tightly covered in the refrigerator for up to 3 days. If you want to prep in advance, you can freeze the assembled tart (without berries) wrapped well in plastic wrap and foil for up to a month. Thaw in the fridge overnight before decorating with fresh berries.
Pro tip: The flavors actually develop and meld after a day in the fridge, so making it a day ahead can be a real time-saver and flavor booster.
Nutritional Information & Benefits
This no-bake patriotic cheesecake flag tart offers a balance of indulgence and fresh nutrition. Each serving (about 1/8 of the tart) contains roughly 350 calories, with moderate protein from cream cheese and cream, and natural sugars from berries.
The fresh strawberries and blueberries are packed with antioxidants, vitamin C, and fiber, making this dessert a bit more wholesome than your typical sugary treat. The graham cracker crust adds a comforting crunch with minimal added sugar.
If you’re mindful of allergens, this recipe contains dairy and gluten (unless you substitute the crust). The no-bake method also retains the nutrients in the fresh fruit, so you get a little health boost with every festive bite.
Conclusion
Making this perfect no-bake patriotic cheesecake flag tart has become a highlight of my July 4th celebrations. It’s simple, fast, and stunning enough to wow any crowd without the fuss of baking in summer heat. What I love most is how it brings people together — kids marvel at the flag design, and grown-ups appreciate the fresh, creamy flavors.
Feel free to tweak the berries or crust to suit your taste or dietary needs. This recipe is a blank canvas for your creativity, and honestly, it’s hard to go wrong. Next time you’re planning a summer party, keep this dessert in your back pocket — it’s guaranteed to be a conversation starter and a crowd favorite.
I’d love to hear how you make it your own! Share your berry swaps, crust secrets, or any fun patriotic twists you try in the comments below. Let’s keep the summer dessert magic going!
Frequently Asked Questions
Can I make this cheesecake tart ahead of time?
Yes! You can prepare the crust and filling a day before, then add the berries just before serving to keep them fresh and vibrant.
What if I don’t have a tart pan with a removable bottom?
No worries. A springform pan or pie dish works just fine. Just be careful when slicing to keep the tart intact.
Can I use frozen berries for the topping?
Frozen berries can work if thawed and drained well to avoid excess moisture that might make the crust soggy.
Is there a way to make this recipe vegan?
Absolutely. Use vegan cream cheese and coconut cream whipped to stiff peaks, and substitute the crust with vegan-friendly cookies or nuts.
How do I get the whipped cream to stiff peaks?
Chill your bowl and beaters before whipping cream. Start slow, then increase speed until the cream holds firm peaks when you lift the whisk.
By the way, if you’re interested in other easy no-bake desserts, you might enjoy my no-bake chocolate peanut butter bars or the light and fluffy lemon mousse dessert perfect for summer afternoons.
Pin This Recipe!
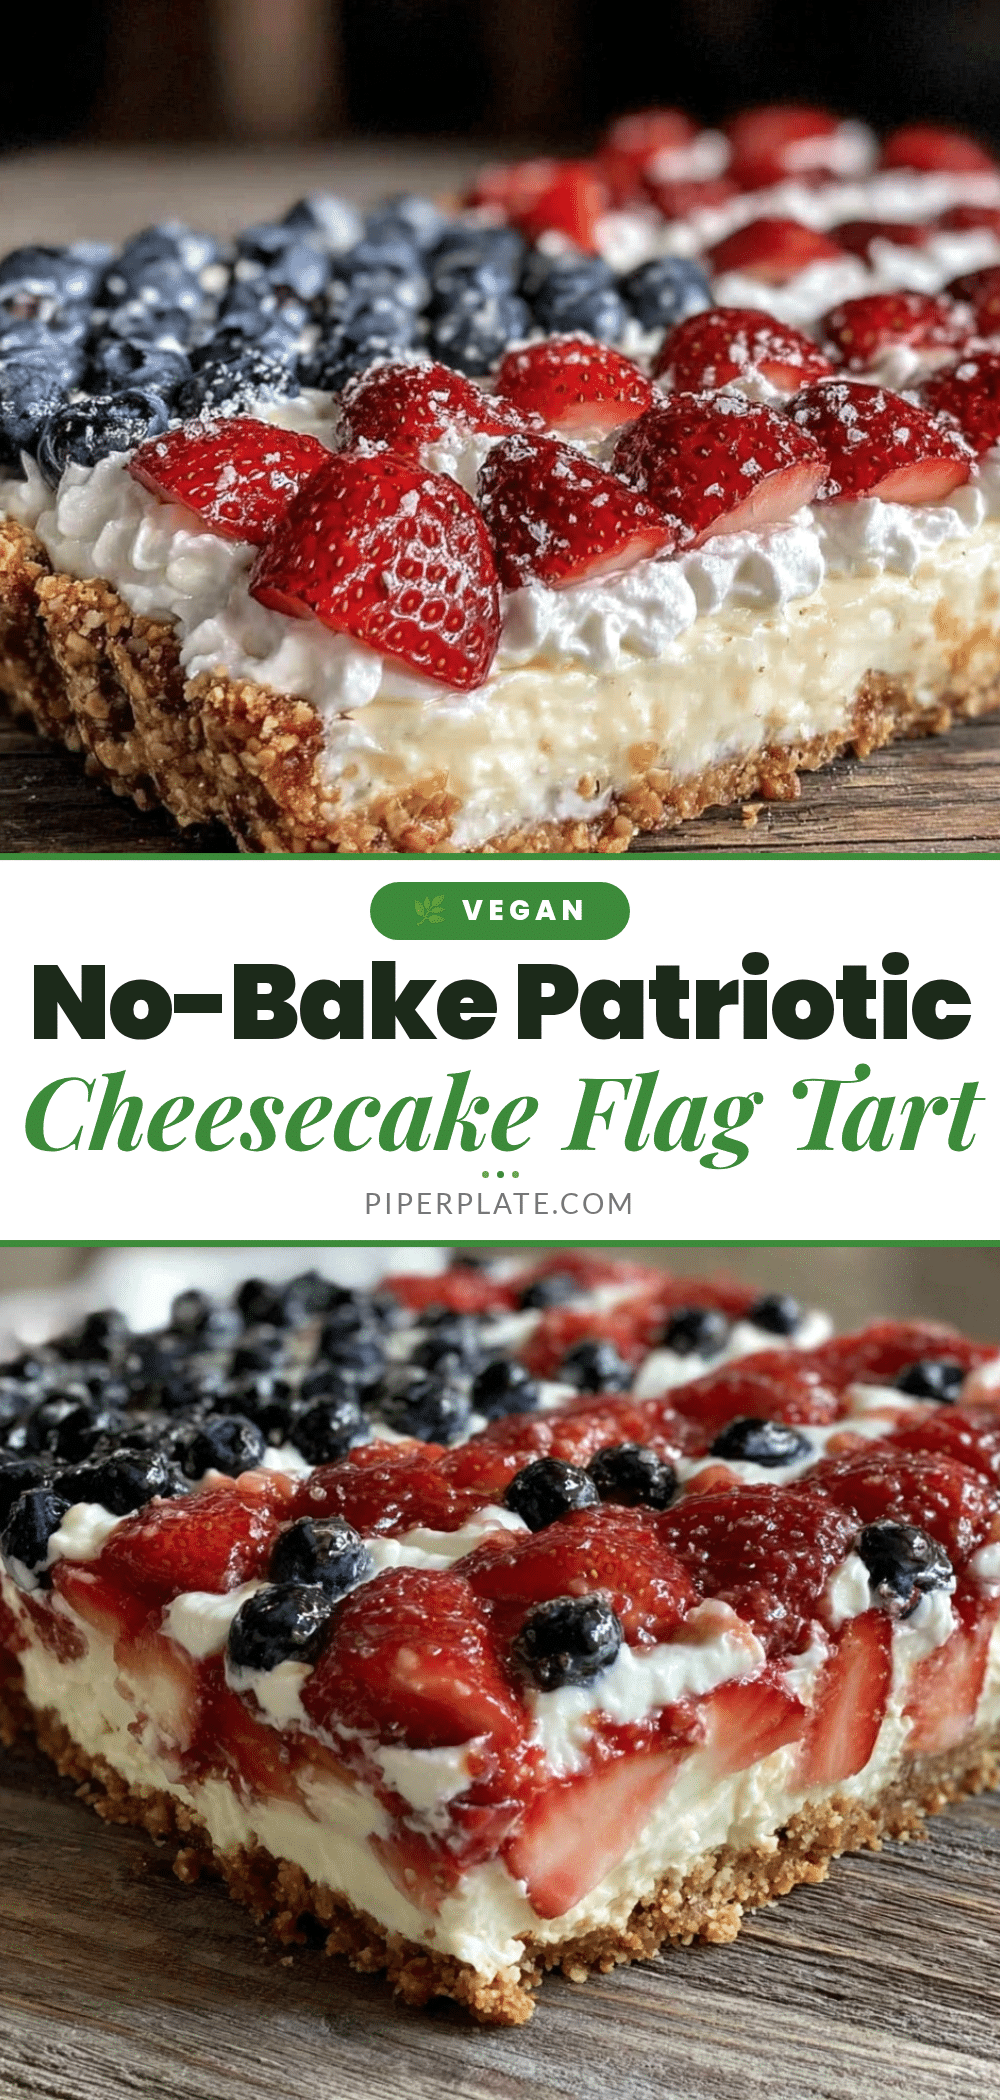
Perfect No-Bake Patriotic Cheesecake Flag Tart
A simple, stunning no-bake cheesecake tart decorated with fresh strawberries and blueberries to resemble the American flag, perfect for July 4th celebrations.
- Prep Time: 20 minutes
- Cook Time: 0 minutes
- Total Time: 3 hours 20 minutes
- Yield: 8 servings 1x
- Category: Dessert
- Cuisine: American
Ingredients
- 1 ½ cups graham cracker crumbs (about 10 full sheets)
- 5 tbsp unsalted butter, melted
- 2 tbsp granulated sugar
- 16 oz (450g) cream cheese, softened to room temperature
- ⅔ cup powdered sugar
- 1 tsp pure vanilla extract
- 1 cup heavy whipping cream, chilled
- 1 cup fresh strawberries, sliced
- 1 cup fresh blueberries
- Optional: ½ cup raspberries or red currants
Instructions
- In a medium bowl, combine graham cracker crumbs, melted butter, and granulated sugar until mixture resembles wet sand and holds together when pressed (about 3-4 minutes).
- Press the crumb mixture firmly and evenly into the bottom and slightly up the sides of a 9-inch tart pan. Chill the crust in the fridge for 10-15 minutes.
- In a large bowl, beat softened cream cheese and powdered sugar with an electric mixer until smooth and creamy (2-3 minutes). Add vanilla extract and mix to combine.
- In a separate chilled bowl, whip heavy cream until stiff peaks form.
- Gently fold about one-third of the whipped cream into the cream cheese mixture to lighten it, then fold in the remaining whipped cream carefully to keep the airy texture.
- Spoon the cheesecake filling onto the chilled crust and spread evenly with a spatula.
- Arrange sliced strawberries in horizontal stripes across the tart, leaving a square in the upper left corner. Fill that square with blueberries to represent the stars.
- Refrigerate the tart for at least 3 hours, preferably overnight, to allow the filling to set and flavors to meld.
Notes
If crust softens too much, chill in freezer for 10 minutes before adding filling. Use room temperature cream cheese for smooth filling. Fold whipped cream gently to keep filling light and fluffy. Pat berries dry if watery before placing to avoid soggy tart. Can substitute dairy-free and gluten-free ingredients as needed.
Nutrition
- Serving Size: 1/8 of tart
- Calories: 350
- Sugar: 18
- Sodium: 220
- Fat: 24
- Saturated Fat: 14
- Carbohydrates: 28
- Fiber: 2
- Protein: 5
Keywords: no-bake cheesecake, patriotic dessert, July 4th dessert, cheesecake tart, berry tart, summer dessert