Love this? Save it for later!
Share the inspiration with your friends
I was trying to make a simple loaf of pumpkin bread. That was the plan, anyway. I had the can of pumpkin open, the spices measured out, and my favorite mixing bowl ready to go. Then my phone rang, I got distracted, and I completely misread the flour measurement. I dumped in what I thought was two cups, but it was closer to two and a quarter. The dough was stiff, not like a batter at all. I stood there, staring at this thick, orange-speckled blob, thinking I had just ruined a perfectly good can of pumpkin. I was already running late for a weekend baking session I had promised my neighbor, and I did not have time to start over.
Honestly, I almost threw it in the trash. But something stopped me. Maybe it was the smell of the cinnamon and nutmeg already in the bowl—it was too good to waste. So I did the only thing I could think of: I patted the dough out on the counter, cut it into triangles, and baked it anyway. I figured I would have some dense, ugly biscuits that I could at least cover in butter and call it a win. What came out of the oven was nothing like the plan—and better. They were tender, flaky, and absolutely bursting with fall flavor. I drizzled a quick maple glaze over the top, and let me tell you, I almost cried. It was one of those happy little kitchen accidents that you never forget. Maybe you have been there—when a mistake turns into something you end up making on purpose for years to come. That is exactly how these Perfect Pumpkin Scones with Maple Glaze were born, and I have been making them every fall since.
Why You Will Love This Recipe
These pumpkin scones are not just another fall baking recipe. They are the result of a happy accident, and I have tweaked them over the years to make sure they work perfectly every single time. I have tested this recipe at least a dozen times, adjusting the moisture level, the spice balance, and the baking temperature until the texture was just right. Let me tell you why you will fall in love with them.
- Quick & Easy: From start to finish, these scones come together in under 30 minutes. No chilling the dough, no complicated folding. Just mix, pat, cut, and bake. Perfect for a lazy Saturday morning or a last-minute treat for guests.
- Simple Ingredients: You probably already have everything in your pantry. Canned pumpkin, flour, butter, sugar, and a few warm spices. No fancy extracts or hard-to-find items. I use basic grocery store staples, and they work beautifully.
- Perfect for Fall Mornings: These scones are made for cozy autumn days. They pair perfectly with a hot cup of coffee or apple cider. I love making them for Thanksgiving brunch or a simple weekend breakfast when the leaves are changing.
- Crowd-Pleaser: Every time I bring these to a gathering, they disappear within minutes. Kids love the sweet maple glaze, and adults appreciate the warm, spiced flavor. They are a guaranteed hit.
- Unbelievably Delicious: The texture is the real star here. The outside has a slight crunch, while the inside is soft, tender, and almost biscuit-like. The maple glaze adds the perfect amount of sweetness without being overpowering. It is comfort food at its finest.
What makes this recipe different from all the other pumpkin scone recipes out there is the technique. I use a slightly higher ratio of butter to flour, and I grate the cold butter into the dry ingredients instead of cutting it in. This creates tiny pockets of butter that steam as they bake, giving you the flakiest, most tender scones you have ever had. It is a small change that makes a huge difference. Honestly, this recipe is the kind that makes you close your eyes after the first bite. It is fall in a pastry form, and I am so excited for you to try it.
What Ingredients You Will Need
This recipe uses simple, wholesome ingredients to create scones that are bursting with fall flavor. Most of these are pantry staples, so you can whip up a batch anytime the craving hits. Here is everything you need, along with a few notes from my own kitchen trials.
For the Scones
- All-purpose flour: 2 cups (250 grams). I use Gold Medal or King Arthur Flour for consistent results. Spoon and level your flour—do not scoop directly from the bag, or you will end up with dry scones.
- Granulated sugar: 1/3 cup (65 grams). This adds just enough sweetness to balance the pumpkin and spices. You can reduce it to 1/4 cup if you prefer a less sweet scone.
- Baking powder: 1 tablespoon. Make sure it is fresh! Old baking powder will result in flat, dense scones. I always check the expiration date before I start.
- Ground cinnamon: 1 teaspoon. This is the backbone of the spice blend. I prefer Saigon cinnamon for its bold, warm flavor.
- Ground nutmeg: 1/2 teaspoon. Freshly grated nutmeg is amazing here, but pre-ground works perfectly fine.
- Ground ginger: 1/2 teaspoon. Adds a little kick that complements the pumpkin beautifully.
- Ground cloves: 1/4 teaspoon. A tiny amount goes a long way. Do not skip it—it adds that classic pumpkin pie warmth.
- Salt: 1/2 teaspoon. Enhances all the flavors and balances the sweetness.
- Cold unsalted butter: 1/2 cup (113 grams), cut into small cubes. This is the secret to flaky scones. Keep it cold until the very last minute. I pop my butter in the freezer for 10 minutes before grating it.
- Canned pumpkin puree: 1/2 cup (120 grams). Use 100% pure pumpkin, not pumpkin pie filling. I recommend Libby’s brand for its consistent thickness. If your pumpkin looks watery, pat it dry with a paper towel before using.
- Heavy cream: 1/4 cup (60 ml), plus extra for brushing. Whole milk works in a pinch, but heavy cream gives the scones a richer texture.
- Vanilla extract: 1 teaspoon. Pure vanilla extract is best, but imitation works fine too.
For the Maple Glaze
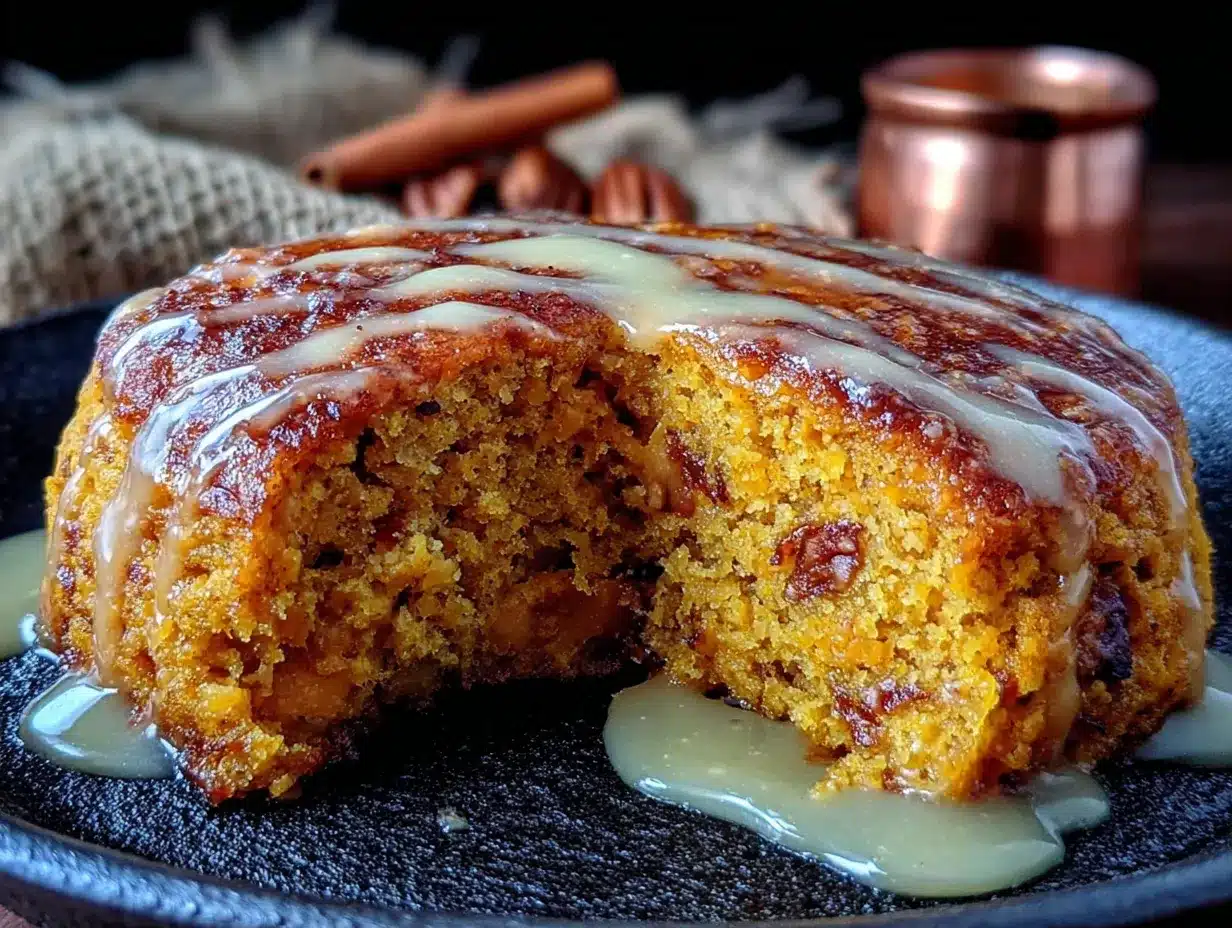
- Powdered sugar: 1 cup (120 grams), sifted. Sifting prevents lumps and gives you a silky smooth glaze.
- Pure maple syrup: 2 tablespoons. Do not use pancake syrup! Real maple syrup is essential for that deep, authentic flavor. I use Grade A dark amber for a stronger maple taste.
- Heavy cream or milk: 1-2 tablespoons. Adjust the amount to reach your desired consistency. Start with 1 tablespoon and add more if needed.
- Vanilla extract: 1/2 teaspoon. A tiny splash rounds out the maple flavor nicely.
That is it! No weird ingredients, no complicated shopping list. You can find everything at your local grocery store. If you want to mix up the spices, feel free to use 2 teaspoons of pumpkin pie spice instead of the individual spices. I have done it both ways, and it works beautifully.
Equipment Needed
You do not need a lot of fancy equipment to make these scones. I have made them in my tiny apartment kitchen and in a friend’s fully stocked farmhouse kitchen, and they turn out great either way. Here is what you will need:
- Large mixing bowl: For combining the dry ingredients. Any bowl will do, but a wide one makes mixing easier.
- Pastry cutter or box grater: To cut the butter into the flour. I actually prefer using a box grater for the butter—it creates tiny, even pieces that distribute perfectly. If you do not have a grater, a pastry cutter or even two forks work fine.
- Whisk: For mixing the dry ingredients together. A fork works in a pinch.
- Baking sheet: Line it with parchment paper for easy cleanup. I use a standard half-sheet pan.
- Bench scraper or sharp knife: To cut the dough into triangles. A bench scraper is my favorite tool for this—it cuts cleanly without dragging the dough.
- Pastry brush: For brushing the tops with cream before baking. If you do not have one, you can use a paper towel or your fingers.
- Cooling rack: To let the scones cool before glazing. This prevents the glaze from melting into a puddle.
- Small bowl and whisk: For making the glaze. A fork works too.
If you do not have a pastry brush, do not stress. I have used a clean paintbrush from my art supplies in a pinch—just make sure it is unused! And if you do not have a cooling rack, you can let the scones cool on the baking sheet, but they might get a little soggy on the bottom. It is not the end of the world, trust me.
Preparation Method
Now for the fun part—making the scones! Follow these steps carefully, and you will have perfect pumpkin scones every time. I have included all my little tricks and sensory cues so you know exactly what to look for.
- Preheat your oven to 400°F (200°C). Line a baking sheet with parchment paper. Getting the oven hot is important—the high heat helps the butter create steam, which makes the scones rise and get flaky.
- Mix the dry ingredients. In a large bowl, whisk together 2 cups of all-purpose flour, 1/3 cup of granulated sugar, 1 tablespoon of baking powder, 1 teaspoon of cinnamon, 1/2 teaspoon of nutmeg, 1/2 teaspoon of ginger, 1/4 teaspoon of cloves, and 1/2 teaspoon of salt. Make sure everything is evenly distributed. The smell at this point is already amazing—you know fall is coming.
- Grate the cold butter. Take your 1/2 cup of cold butter and grate it using the large holes of a box grater. Work quickly so the butter stays cold. Toss the grated butter into the flour mixture. Use your fingers or a fork to gently coat the butter pieces with flour. The mixture should look like coarse crumbs with some pea-sized butter pieces still visible. Do not overwork it—you want those butter chunks to stay intact.
- Combine the wet ingredients. In a small bowl, whisk together 1/2 cup of pumpkin puree, 1/4 cup of heavy cream, and 1 teaspoon of vanilla extract. Make sure the pumpkin is well incorporated. If your pumpkin looks watery, pat it with a paper towel first to remove excess moisture.
- Bring the dough together. Pour the wet ingredients into the dry ingredients. Use a fork or a spatula to stir until just combined. The dough will look shaggy and a little dry—that is exactly what you want. Do not overmix, or the scones will be tough. If there are a few dry bits at the bottom of the bowl, use your hands to gently press them into the dough.
- Shape the dough. Turn the dough out onto a lightly floured surface. Gently bring it together with your hands, patting it into a circle about 3/4-inch thick. Do not knead it—just press it together. The dough should feel soft but not sticky. If it is too sticky, sprinkle a little more flour on top.
- Cut the scones. Use a bench scraper or a sharp knife to cut the circle into 8 equal wedges, like a pizza. If you want smaller scones, cut the circle into 10 or 12 wedges. Place the wedges on the prepared baking sheet, spacing them about 2 inches apart. They will spread a little, so give them room.
- Brush with cream. Brush the tops of the scones with a little extra heavy cream. This helps them turn golden brown and gives them a slightly crisp crust. If you want a little sparkle, sprinkle some coarse sugar on top. I love using turbinado sugar for a nice crunch.
- Bake. Bake for 14-16 minutes, or until the scones are golden brown on the bottom and lightly browned on top. The tops should look set and feel firm to the touch. Every oven is different, so start checking at 12 minutes. My oven runs a little hot, so I usually bake mine for exactly 14 minutes.
- Cool completely. Transfer the scones to a cooling rack and let them cool completely before glazing. This is important—if the scones are still warm, the glaze will melt and run off. I know it is hard to wait, but trust me, it is worth it.
- Make the glaze. While the scones are cooling, make the maple glaze. In a small bowl, whisk together 1 cup of sifted powdered sugar, 2 tablespoons of pure maple syrup, 1/2 teaspoon of vanilla extract, and 1 tablespoon of heavy cream. Whisk until smooth. If the glaze is too thick, add another tablespoon of cream. If it is too thin, add a little more powdered sugar. The glaze should be thick but pourable.
- Glaze the scones. Once the scones are completely cool, drizzle the glaze over the tops using a spoon or a piping bag. I like to drizzle it in a zigzag pattern for a pretty look. Let the glaze set for about 10 minutes before serving. The glaze will harden slightly, creating a beautiful, crackly top.
And there you have it—perfect pumpkin scones with a dreamy maple glaze. The first time I made these, I ate three in one sitting. No regrets.
Cooking Tips & Techniques
Over the years, I have learned a few things that make these scones even better. Here are my best tips, straight from my kitchen to yours.
- Keep everything cold. This is the number one rule for flaky scones. Cold butter creates steam as it bakes, which creates those beautiful layers. If your kitchen is warm, pop the shaped scones in the fridge for 10 minutes before baking. I have forgotten to do this on a hot summer day, and the scones spread out flat instead of rising up. Learn from my mistake!
- Do not overmix. Overmixing develops gluten, which makes scones tough and chewy. You want them to be tender and crumbly, so mix until the dough just comes together. A few dry spots are totally fine. I used to overmix because I wanted a smooth dough, but I learned the hard way that shaggy is better.
- Grate your butter. I cannot stress this enough. Grating cold butter creates tiny, even pieces that distribute perfectly through the flour. It is much easier than trying to cut butter in with a pastry cutter. I learned this trick from a pastry chef friend, and I have never gone back.
- Use a bench scraper. A bench scraper is a game-changer for cutting scones. It cuts cleanly without dragging the dough, which helps the scones rise evenly. If you do not have one, use a sharp knife and press straight down—do not saw back and forth.
- Check your pumpkin. Canned pumpkin can vary in moisture content. If your pumpkin looks watery, blot it with a paper towel before using. Too much moisture will make the scones dense and gummy. I learned this after a batch of scones that came out like hockey pucks. Not my finest moment.
- Let them cool completely. I know it is tempting to glaze warm scones, but please resist. The glaze will melt into a sticky mess and soak into the scones, making them soggy. Patience is key here. I usually make the glaze while the scones are cooling so I am ready to go.
Variations & Adaptations
One of the best things about this recipe is how versatile it is. Here are some of my favorite variations, all tested and approved by my family.
- Gluten-Free Version: Substitute the all-purpose flour with a 1:1 gluten-free baking flour blend. I use Bob’s Red Mill 1:1 Baking Flour, and it works perfectly. Add an extra tablespoon of cream if the dough seems too dry. The texture is slightly more delicate, but the flavor is spot on.
- Vegan Version: Use cold vegan butter (I like Miyoko’s) and replace the heavy cream with full-fat coconut cream or oat milk. For the glaze, use a vegan powdered sugar and maple syrup. The scones will be a little less flaky, but they are still delicious. I made these for a vegan friend, and she asked for the recipe immediately.
- Chocolate Chip Pumpkin Scones: Fold in 1/2 cup of semi-sweet chocolate chips before shaping the dough. The chocolate pairs beautifully with the warm spices. I accidentally added chocolate chips one time when I was making these for a bake sale, and they sold out in 10 minutes.
- Spiced Maple Glaze: Add a pinch of cinnamon or nutmeg to the glaze for an extra layer of warmth. I love doing this in the fall when I want the scones to taste even cozier.
- Savory Pumpkin Scones: Omit the sugar and maple glaze, and add 1/2 cup of shredded cheddar cheese, 1/4 cup of chopped fresh sage, and a pinch of black pepper. These are incredible with soup or chili. I made a batch for a friend’s soup night, and everyone was shocked that pumpkin could be savory.
- Mini Scones: Cut the dough into smaller wedges (12-16 pieces) and reduce the baking time to 10-12 minutes. Perfect for brunch buffets or tea parties. I love making mini scones for holiday gatherings because they are easy to grab and eat.
Serving & Storage Suggestions
These scones are best enjoyed fresh, but they store surprisingly well. Here is how I serve and store them.
Serving Suggestions: Serve the scones warm or at room temperature. I love them with a hot cup of coffee or chai tea. For an extra treat, split a scone in half and toast it lightly, then spread with butter or apple butter. The warmth makes the maple glaze slightly melty—heavenly. These scones also pair beautifully with a bowl of butternut squash soup or a simple fall salad. I have even served them as a dessert with a scoop of vanilla ice cream, and it was amazing.
Storage Instructions: Store leftover scones in an airtight container at room temperature for up to 3 days. Place a paper towel in the bottom of the container to absorb any excess moisture. If you stack the scones, place a piece of parchment paper between the layers to prevent the glaze from sticking. After day 2, the scones will start to lose their crispness, but they are still delicious.
Freezer Instructions: You can freeze the unbaked scones for up to 3 months. Cut the scones, place them on a baking sheet, and freeze until solid. Transfer the frozen scones to a freezer bag. When you are ready to bake, place the frozen scones on a lined baking sheet and bake at 400°F for 18-20 minutes. No need to thaw! I do this all the time for holiday prep. You can also freeze the baked, unglazed scones for up to 2 months. Thaw at room temperature, then glaze before serving.
Reheating Tips: To refresh day-old scones, warm them in a 300°F oven for 5-7 minutes. This brings back some of the crispness. Avoid the microwave, as it will make the scones soft and chewy. I learned that one the hard way.
Nutritional Information & Benefits
Here is the approximate nutritional information for one scone (based on 8 servings). Please note that these values are estimates and may vary based on specific ingredients used.
| Nutrient | Amount per Serving |
|---|---|
| Calories | 320 |
| Total Fat | 14g |
| Saturated Fat | 9g |
| Cholesterol | 45mg |
| Sodium | 280mg |
| Total Carbohydrates | 46g |
| Dietary Fiber | 2g |
| Sugars | 24g |
| Protein | 4g |
These scones are a treat, but they do have some redeeming qualities. Pumpkin is packed with vitamin A, which is great for eye health and immune function. It also contains fiber and antioxidants. The cinnamon and ginger in the recipe have anti-inflammatory properties. Plus, the maple syrup in the glaze provides small amounts of minerals like zinc and manganese. Of course, these scones are not a health food, but they are a lovely indulgence that also happens to include some nutritious ingredients. If you are looking for a lower-sugar option, you can reduce the sugar in the scones to 1/4 cup and use a lighter glaze. I have done this, and they are still delicious—just a little less sweet.
Potential allergens include dairy (butter, cream), gluten (flour), and tree nuts (if using certain milk alternatives). Always check your ingredient labels if you are cooking for someone with allergies.
Conclusion
These Perfect Pumpkin Scones with Maple Glaze are everything I love about fall baking. They are warm, spiced, and incredibly comforting, with a texture that is both tender and flaky. What started as a kitchen mistake has become one of my most-requested recipes, and I am so glad I did not throw that dough away. I hope you make these scones and love them as much as I do. Feel free to customize them based on your preferences—add chocolate chips, make them gluten-free, or double the glaze if you are feeling extra indulgent. The recipe is forgiving, and I have tested it enough to know it works.
If you try this recipe, I would love to hear about it. Leave a comment below and let me know how they turned out. Did you try a variation? Did you eat three in one sitting like I did? Share your photos and tag me on social media—I love seeing your baking adventures. Thank you for stopping by, and happy fall baking!
Frequently Asked Questions
Can I use fresh pumpkin instead of canned?
Yes, you can use fresh pumpkin puree, but you will need to make sure it is well-drained. Fresh pumpkin tends to be more watery than canned, which can make the dough too wet. Roast the pumpkin, puree it, and then strain it through a cheesecloth or paper towel to remove excess moisture. I have done this with sugar pumpkins, and it works great, but it is a little extra work.
Why did my scones turn out dry?
Dry scones are usually the result of overmixing or too much flour. Make sure you measure your flour correctly by spooning it into the measuring cup and leveling it off. Also, do not overmix the dough—stop as soon as it comes together. If your dough feels dry, add a tablespoon of cream at a time until it comes together.
Can I make the dough ahead of time?
Absolutely! You can prepare the dough, shape the scones, and refrigerate them for up to 24 hours before baking. Just cover them tightly with plastic wrap. You can also freeze the unbaked scones for up to 3 months. Bake from frozen, adding a few extra minutes to the baking time.
How do I get a thicker maple glaze?
If your glaze is too thin, add more sifted powdered sugar, one tablespoon at a time, until it reaches your desired consistency. If it is too thick, add a little more cream or milk. The glaze should be thick enough to hold its shape when drizzled but still pourable.
Can I use pumpkin pie spice instead of individual spices?
Yes, you can substitute 2 teaspoons of pumpkin pie spice for the cinnamon, nutmeg, ginger, and cloves. I have done this many times, and the scones turn out perfectly. Pumpkin pie spice has a slightly different balance, but it is still delicious and very convenient.
Pin This Recipe!
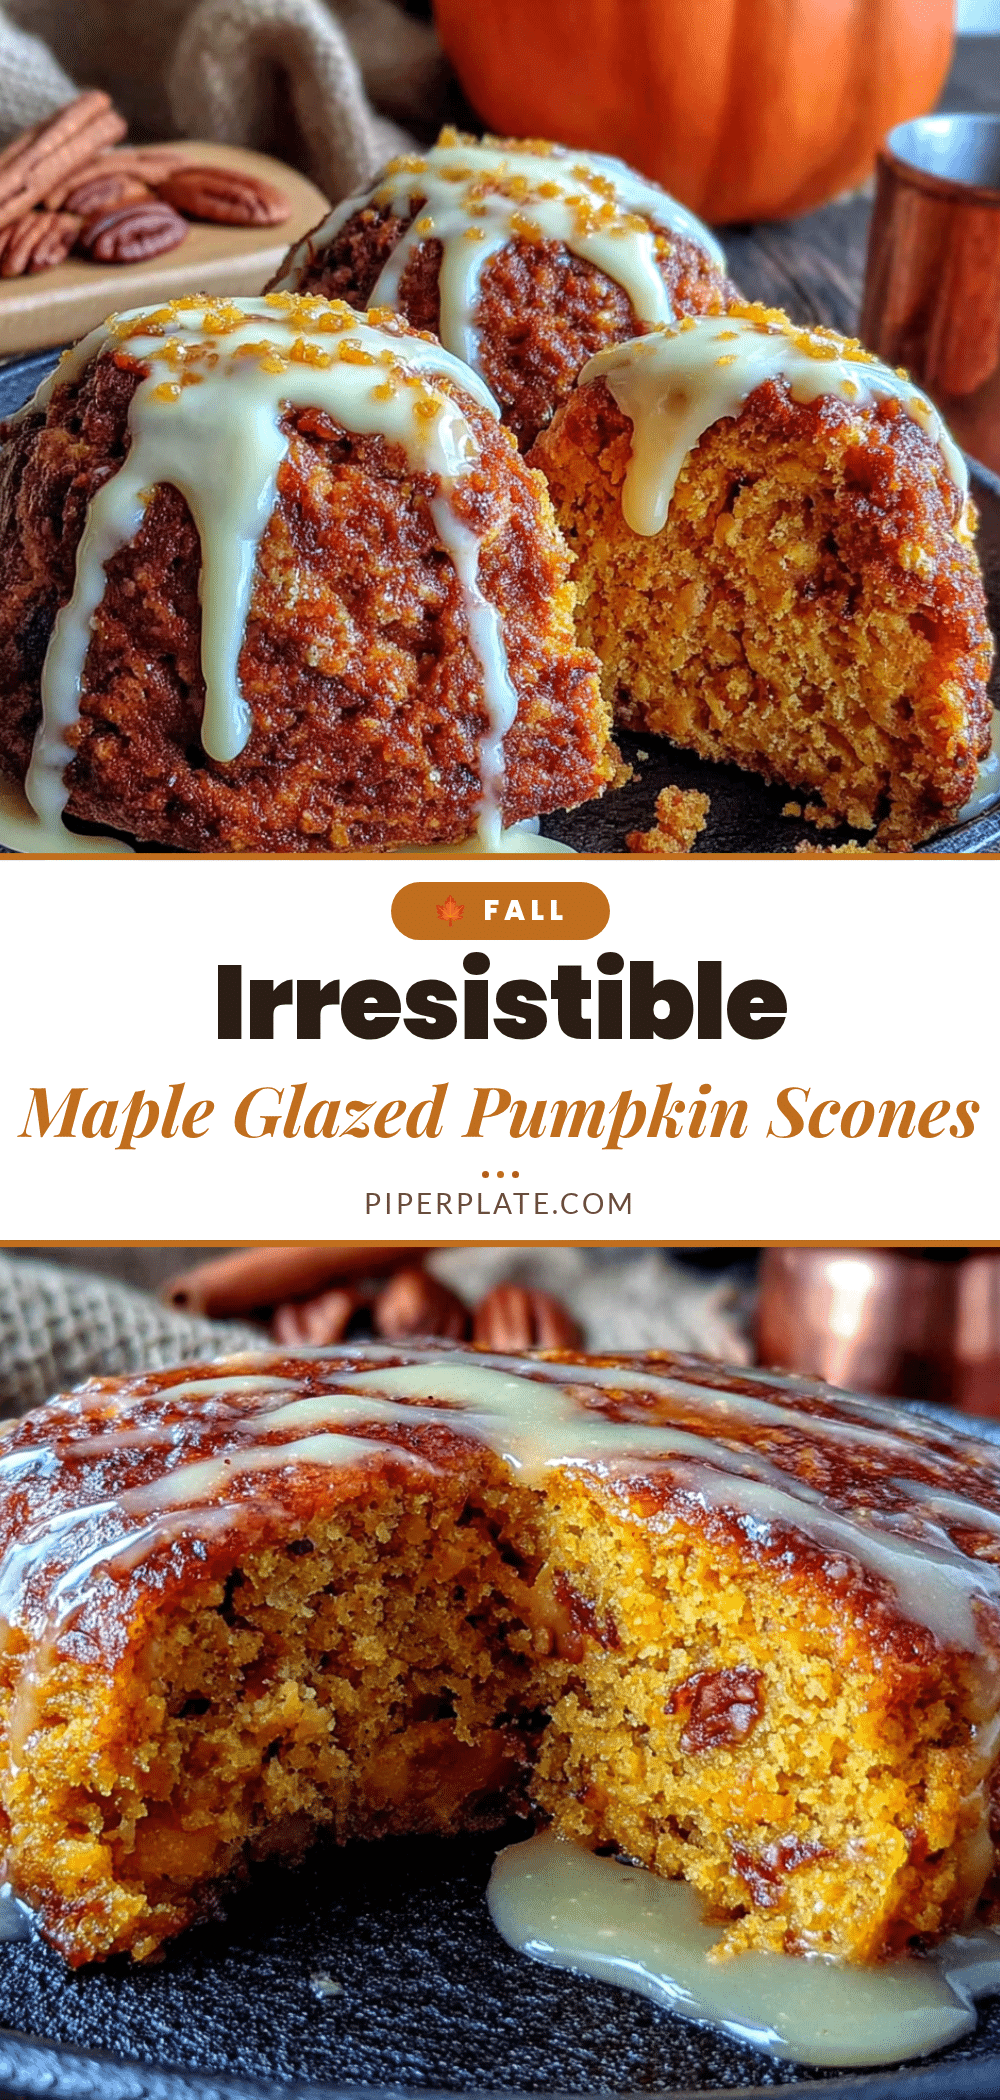
Perfect Pumpkin Scones with Maple Glaze: Easy Fall Recipe
These tender, flaky pumpkin scones are bursting with warm fall spices and topped with a dreamy maple glaze. A happy kitchen accident turned into a beloved seasonal treat that comes together in under 30 minutes.
- Prep Time: 15 minutes
- Cook Time: 16 minutes
- Total Time: 31 minutes
- Yield: 8 servings 1x
- Category: Breakfast, Dessert
- Cuisine: American
Ingredients
- 2 cups (250g) all-purpose flour
- 1/3 cup (65g) granulated sugar
- 1 tablespoon baking powder
- 1 teaspoon ground cinnamon
- 1/2 teaspoon ground nutmeg
- 1/2 teaspoon ground ginger
- 1/4 teaspoon ground cloves
- 1/2 teaspoon salt
- 1/2 cup (113g) cold unsalted butter, grated
- 1/2 cup (120g) canned pumpkin puree
- 1/4 cup (60ml) heavy cream, plus extra for brushing
- 1 teaspoon vanilla extract
- 1 cup (120g) powdered sugar, sifted
- 2 tablespoons pure maple syrup
- 1–2 tablespoons heavy cream or milk
- 1/2 teaspoon vanilla extract
Instructions
- Preheat oven to 400°F (200°C). Line a baking sheet with parchment paper.
- In a large bowl, whisk together flour, sugar, baking powder, cinnamon, nutmeg, ginger, cloves, and salt.
- Grate cold butter using the large holes of a box grater. Toss into flour mixture until coated and mixture resembles coarse crumbs with some pea-sized butter pieces.
- In a small bowl, whisk together pumpkin puree, 1/4 cup heavy cream, and 1 teaspoon vanilla extract.
- Pour wet ingredients into dry ingredients. Stir with a fork until just combined. Dough will be shaggy and slightly dry.
- Turn dough onto a lightly floured surface. Gently pat into a 3/4-inch thick circle. Do not knead.
- Cut circle into 8 equal wedges. Place on prepared baking sheet, spacing 2 inches apart.
- Brush tops with extra heavy cream. Optional: sprinkle with coarse sugar.
- Bake for 14-16 minutes until golden brown on bottom and lightly browned on top. Cool completely on a wire rack.
- For glaze: whisk together sifted powdered sugar, maple syrup, 1/2 teaspoon vanilla, and 1 tablespoon heavy cream until smooth. Adjust consistency with additional cream or powdered sugar as needed.
- Drizzle glaze over cooled scones. Let set for 10 minutes before serving.
Notes
Keep butter and ingredients cold for flakiest scones. Do not overmix. Let scones cool completely before glazing. For gluten-free, use 1:1 gluten-free flour blend. For vegan, use cold vegan butter and coconut cream or oat milk.
Nutrition
- Serving Size: 1 scone
- Calories: 320
- Sugar: 24
- Sodium: 280
- Fat: 14
- Saturated Fat: 9
- Carbohydrates: 46
- Fiber: 2
- Protein: 4
Keywords: pumpkin scones, maple glaze, fall baking, easy scone recipe, pumpkin recipes, autumn breakfast


