Love this? Save it for later!
Share the inspiration with your friends
My aunt asked why I couldn’t just roll the cake while it was still warm. I started to explain why that wouldn’t work — then stopped. I had been so sure she was wrong. Every blog post I’d read, every video I’d watched, every recipe card I’d scribbled notes on said the same thing: let the cake cool completely before rolling. That was the rule. The non-negotiable. The hill I was prepared to die on.
But there she stood, leaning against my kitchen counter with a cup of coffee and that look. You know the one — when someone who’s been cooking since before you were born just waits for you to figure it out. I handed her the towel and the warm cake and said, “Fine, you show me.”
She rolled it perfectly. No cracks. No crumbling edges. No swearing under my breath while I picked bits of pumpkin cake out of a kitchen towel. I felt like an idiot, honestly. All that time I’d spent being precious about cooling times and exact temperatures, and the secret was just… doing it while it was warm and pliable.
This pumpkin roll recipe is the one I’ve been making ever since that afternoon. I tweaked the cream cheese filling to be a little less sweet and a little more tangy, because that’s how I like it. And I stopped being so rigid about the rolling process. The result is a pumpkin roll that actually works — no cracks, no stress, no lying about how it came out when you bring it to Thanksgiving dinner.
Why You’ll Love This Recipe
Let me tell you why this particular pumpkin roll earns a permanent spot in your fall baking rotation. I’ve tested this recipe about seven times — yes, seven — to get the cake-to-filling ratio exactly right and to make sure the rolling technique actually works for normal people in normal kitchens.
- No Crack Guarantee : The warm-rolling method practically eliminates cracks. I’ve made this for three Thanksgivings and two office potlucks without a single broken cake.
- Simple Ingredients : You probably have everything already. Canned pumpkin, eggs, sugar, flour, cream cheese, butter — nothing weird or expensive.
- Perfect for Fall Gatherings : It looks impressive on a platter but comes together in about an hour. People think you spent all day on it. Let them think that.
- Crowd-Pleaser : Even people who swear they don’t like pumpkin desserts go back for seconds. The cream cheese filling is the real star here.
- Freezes Beautifully : Make it a week ahead, freeze it, and pull it out when you need a showstopper dessert without the last-minute panic.
This isn’t just another pumpkin roll recipe. The texture is lighter than most — almost like a sponge cake — and the filling has enough tang to cut through the sweetness. I spent a whole afternoon testing different ratios of cream cheese to butter to powdered sugar, and this version hits that sweet spot where it’s rich but not cloying.
What Ingredients You Will Need
This recipe uses straightforward ingredients that work together to create a tender, flexible cake and a luscious filling. I’ve noted a few specifics that make a real difference in the final result.
For the Pumpkin Cake
- ¾ cup all-purpose flour — Spoon and level it. Scooping directly from the bag packs in too much flour and makes the cake dense.
- 1 teaspoon baking powder — Make sure it’s fresh. Old baking powder won’t give the cake enough lift.
- ½ teaspoon baking soda — Reacts with the pumpkin’s acidity to create a tender crumb.
- ½ teaspoon salt — Balances the sweetness and enhances the pumpkin flavor.
- 2 teaspoons pumpkin pie spice — I use McCormick, but any blend works. You can make your own with cinnamon, nutmeg, ginger, and cloves.
- 1 teaspoon ground cinnamon — Extra warmth. Never skip this.
- 3 large eggs, room temperature — Cold eggs seize the batter. Let them sit on the counter for 30 minutes before starting.
- 1 cup granulated sugar — White sugar gives the cake structure and a clean sweetness.
- ⅔ cup canned pumpkin puree — Not pumpkin pie filling. Libby’s is my go-to because it’s consistent and not too watery.
- 1 teaspoon vanilla extract — Pure vanilla, not imitation. It matters here.
For the Cream Cheese Filling
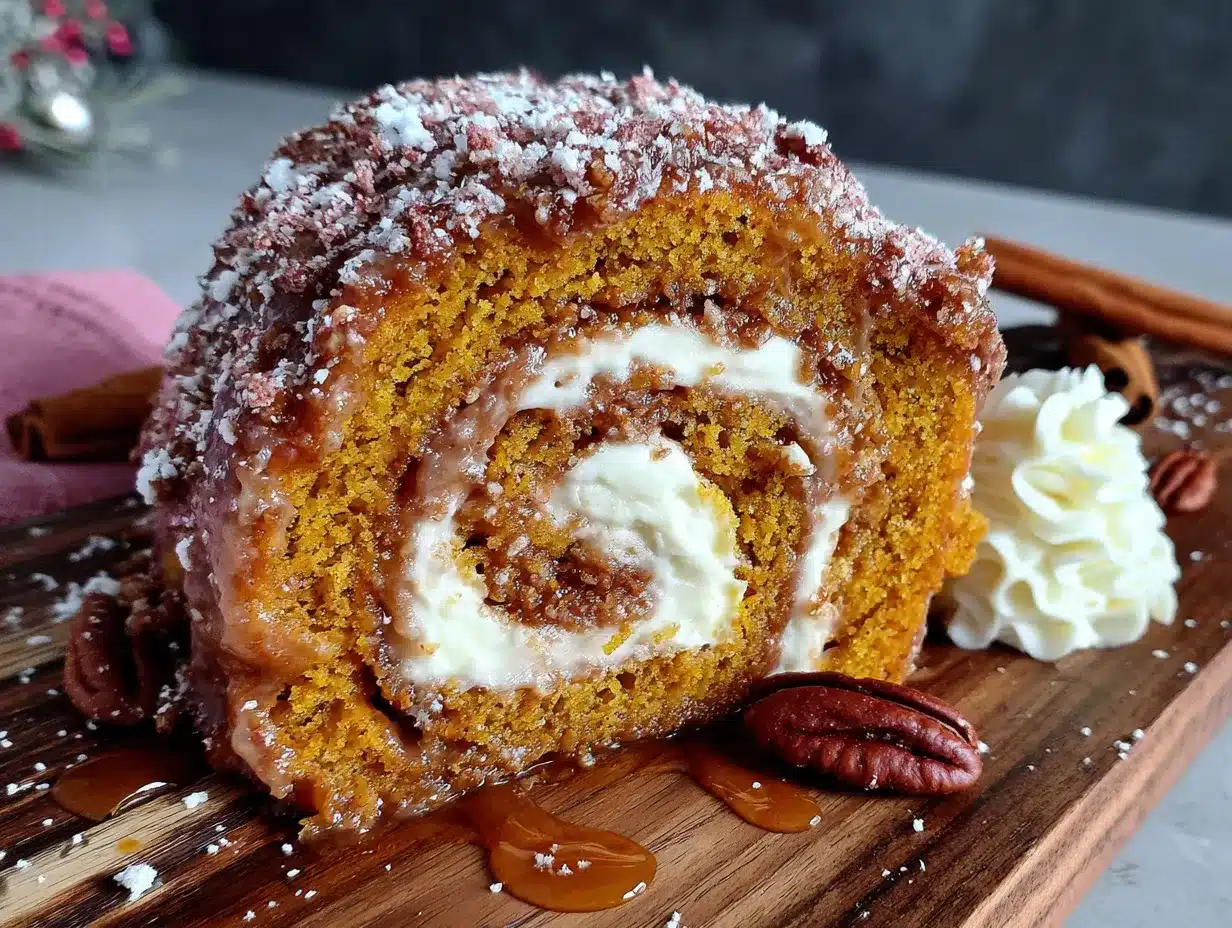
- 8 ounces cream cheese, softened — Full-fat block cream cheese. Not the spreadable kind from a tub. Philadelphia is my standard.
- 6 tablespoons unsalted butter, softened — Let it soften completely. Cold butter makes lumpy filling.
- 1 cup powdered sugar, sifted — Sifting prevents those tiny white lumps that ruin a smooth filling.
- 1 teaspoon vanilla extract — Same rule. Pure vanilla.
- Pinch of salt — Just a tiny one. It balances the sweetness without making the filling taste salty.
For Dusting
- Powdered sugar — For the towel and for the final presentation. You’ll need about ¼ cup total.
Equipment Needed
You don’t need a fancy kitchen for this recipe, but a few specific tools make the process much smoother.
- 15×10-inch jelly roll pan — This is non-negotiable. A different size will change the thickness of the cake and affect rolling. They’re cheap — about $12 at most kitchen stores.
- Parchment paper — Line the pan completely. Let the paper hang over the edges so you can lift the cake out easily.
- Clean kitchen towel — A thin cotton one works best. Terry cloth or textured towels leave marks on the cake. I ruined my first attempt using a fancy waffle-weave towel — don’t do it.
- Electric mixer — Hand mixer or stand mixer, either works. You need decent speed to whip the eggs and sugar properly.
- Sifter or fine-mesh strainer — For the powdered sugar. A strainer works fine if you don’t own a sifter.
- Spatula — Offset spatula is ideal for spreading the batter evenly, but a regular one works too.
- Wire cooling rack — Helps the cake cool evenly before filling.
Preparation Method
Step 1: Prep Your Pan and Oven
Preheat your oven to 375°F (190°C). Line your jelly roll pan with parchment paper, leaving about 2 inches of overhang on the short sides. Lightly grease the parchment with cooking spray or butter. This seems like overkill, but I’ve had cake stick to ungreased parchment before, and it’s heartbreaking.
Step 2: Mix the Dry Ingredients
In a medium bowl, whisk together the flour, baking powder, baking soda, salt, pumpkin pie spice, and cinnamon. Set this aside. Whisking aerates the flour and distributes the leaveners evenly — no lumps hiding in the corner.
Step 3: Beat the Eggs and Sugar
In a large bowl, beat the eggs and granulated sugar with your electric mixer on medium-high speed for 3 to 4 minutes. The mixture should become thick, pale, and fall in ribbons when you lift the beaters. This step is crucial — it builds structure in the cake so it can hold up during rolling. I used to rush this and ended up with flat, crack-prone cakes.
Step 4: Add Pumpkin and Vanilla
Beat in the pumpkin puree and vanilla extract on low speed until just combined. Don’t overmix here. The batter will look a little thin and that’s fine.
Step 5: Fold in the Dry Ingredients
Add the dry ingredients in two additions, folding gently with a spatula after each. Fold until you can’t see any more streaks of flour. Overmixing at this stage develops gluten and makes the cake tough. You want tender, not tough.
Step 6: Bake
Pour the batter into the prepared pan and spread it evenly with a spatula. It will seem like a thin layer — that’s correct. Bake for 13 to 15 minutes, until the cake springs back when lightly touched and the edges just start to pull away from the pan. Don’t overbake. Dry cake cracks. I learned this the hard way when I left mine in for 17 minutes and got a crumbly mess.
Step 7: The Warm Roll (This Is the Magic)
While the cake bakes, lay your clean kitchen towel flat on the counter and dust it generously with powdered sugar. As soon as the cake comes out of the oven, run a knife around the edges to loosen it. Invert the cake onto the sugared towel and carefully peel off the parchment paper.
Starting at one short end, roll the cake and towel together into a tight log. Don’t press too hard — just a gentle, even roll. Let it cool completely in this rolled position, seam-side down. This takes about 45 minutes to an hour. The warm cake sets in the rolled shape and becomes flexible, which is why you won’t get cracks later.
Step 8: Make the Filling
While the cake cools, beat the softened cream cheese and butter together until smooth and fluffy — about 2 minutes. Beat in the sifted powdered sugar, vanilla, and salt until combined. Scrape the bowl well. The filling should be spreadable but not runny. If it seems too soft, refrigerate it for 15 minutes.
Step 9: Fill and Roll Again
Once the cake is completely cool, gently unroll it. Spread the cream cheese filling evenly over the cake, leaving about a ½-inch border around the edges. Re-roll the cake (without the towel this time) using the same gentle pressure. Wrap the finished roll tightly in plastic wrap and refrigerate for at least 1 hour before slicing. This sets the filling and makes clean slices possible.
Step 10: Serve
Dust with powdered sugar just before serving. Slice with a sharp serrated knife for the cleanest cuts. Wipe the blade between slices for picture-perfect pieces.
Cooking Tips & Techniques
Here are the things I wish someone had told me before my first few attempts.
Use room temperature eggs. Cold eggs don’t whip up as well, and the cake won’t have the same structure. Set them out 30 minutes before you start. If you forget, place them in a bowl of warm water for 5 minutes.
Don’t skip the parchment overhang. I know it seems fussy, but when it’s time to flip the hot cake onto the towel, those paper handles are a lifesaver. Your fingers will thank you.
Roll while it’s warm. I cannot stress this enough. The warm cake is flexible and forgiving. A cold cake is brittle and cracks. My aunt was right. I was wrong. Let that sink in.
Use a thin towel. A thick or textured towel leaves imprints on the cake surface. A basic cotton kitchen towel from the grocery store works perfectly.
Chill before slicing. I know you want to cut into it immediately. Don’t. The filling needs time to firm up, or it will squish out the sides and make a mess. One hour minimum, two is better.
Variations & Adaptations
This recipe is flexible, and I’ve tried several variations over the years.
Gluten-Free Version: Substitute the all-purpose flour with a 1:1 gluten-free baking blend that contains xanthan gum. I’ve used King Arthur Measure for Measure with good results. The cake will be slightly more delicate, so handle it gently during rolling.
Dairy-Free Filling: Use dairy-free cream cheese (Miyoko’s or Kite Hill work well) and vegan butter. The filling won’t be quite as firm, so chill it longer before serving.
Spice It Up: Add ¼ teaspoon of cayenne pepper or a pinch of black pepper to the dry ingredients. The heat plays beautifully against the sweet cream cheese filling. I tried this on a whim last year and now I can’t go back.
Chocolate Pumpkin Roll: Replace ¼ cup of the flour with unsweetened cocoa powder. The chocolate-pumpkin combination is underrated and absolutely delicious.
Maple Cream Cheese Filling: Replace the vanilla extract in the filling with 2 tablespoons of pure maple syrup. It adds a cozy fall flavor that pairs perfectly with the pumpkin.
Serving & Storage Suggestions
This pumpkin roll is best served chilled or at cool room temperature. Slice it into ½-inch to ¾-inch rounds and arrange them on a platter. A light dusting of powdered sugar just before serving makes it look professional without any extra effort.
For a full dessert spread, pair it with a cup of hot apple cider or a spiced chai latte. It also works beautifully alongside a simple vanilla ice cream or a dollop of whipped cream.
Storage: Wrap the uncut roll tightly in plastic wrap and store it in the refrigerator for up to 5 days. The flavors actually improve after a day or two as the filling softens into the cake.
Freezing: This freezes exceptionally well. Wrap the fully assembled and chilled roll in plastic wrap, then in a layer of aluminum foil. Freeze for up to 3 months. Thaw overnight in the refrigerator before serving. Dust with fresh powdered sugar after thawing.
Reheating: Don’t. This is a chilled dessert. If you want it warm, you’re making the wrong recipe. Just let it sit at room temperature for 10 minutes before serving if you want to take the chill off.
Nutritional Information & Benefits
One slice (based on 10 servings) contains approximately 290 calories, 14g fat, 38g carbohydrates, and 5g protein. These are estimates and will vary based on specific ingredients and portion sizes.
Pumpkin is rich in vitamin A and fiber, which adds a small nutritional boost to this dessert. The cream cheese filling provides calcium and a bit of protein, though let’s be honest — this is a treat, not a health food.
Dietary Considerations: This recipe contains gluten, dairy, and eggs. For gluten-free or dairy-free options, see the variations section above. It is nut-free as written, making it a safe option for many school or office gatherings.
I personally love that this dessert feels indulgent without being overly heavy. One slice satisfies a sweet craving without sending you into a sugar coma. That’s my kind of balance.
Frequently Asked Questions
Why did my pumpkin roll crack?
The most common reason is letting the cake cool completely before the first roll. Rolling while the cake is still warm trains it into shape. Overbaking is another culprit — dry cake cracks easily. Check for doneness at 13 minutes.
Can I use fresh pumpkin instead of canned?
Technically yes, but fresh pumpkin puree has more water than canned. You’ll need to strain it through cheesecloth or a clean kitchen towel to remove excess moisture. Otherwise, the cake will be too wet and won’t hold together. Canned pumpkin is more consistent and reliable for this recipe.
How do I get clean slices without squishing the filling?
Use a sharp serrated knife and wipe the blade clean between each cut. Chill the roll for at least an hour before slicing. A warm roll will squish the filling out the sides every time.
Can I make this ahead of time?
Absolutely. This is actually a great make-ahead dessert. Assemble the roll completely, wrap it tightly, and refrigerate for up to 3 days before serving. You can also freeze it for up to 3 months.
What if I don’t have pumpkin pie spice?
Make your own: mix 1 teaspoon cinnamon, ½ teaspoon ginger, ¼ teaspoon nutmeg, and ¼ teaspoon cloves. That’s enough for this recipe. Store any extra in a small jar for future use.
Conclusion
This pumpkin roll recipe is the one I keep coming back to because it actually works. No fussy techniques, no special equipment, no crossed fingers while you unroll it hoping for the best. The warm-rolling method changed everything for me, and I hope it does the same for you.
Feel free to play around with the spices, try different fillings, or make it ahead for your next holiday gathering. The recipe is forgiving once you understand the basic technique. And if your first roll isn’t perfect? That’s fine. Mine wasn’t either. Just dust it with extra powdered sugar and nobody will know.
I’d love to hear how yours turns out. Drop a comment below with your favorite variation or any questions you have. Happy baking, friends!
Pin This Recipe!
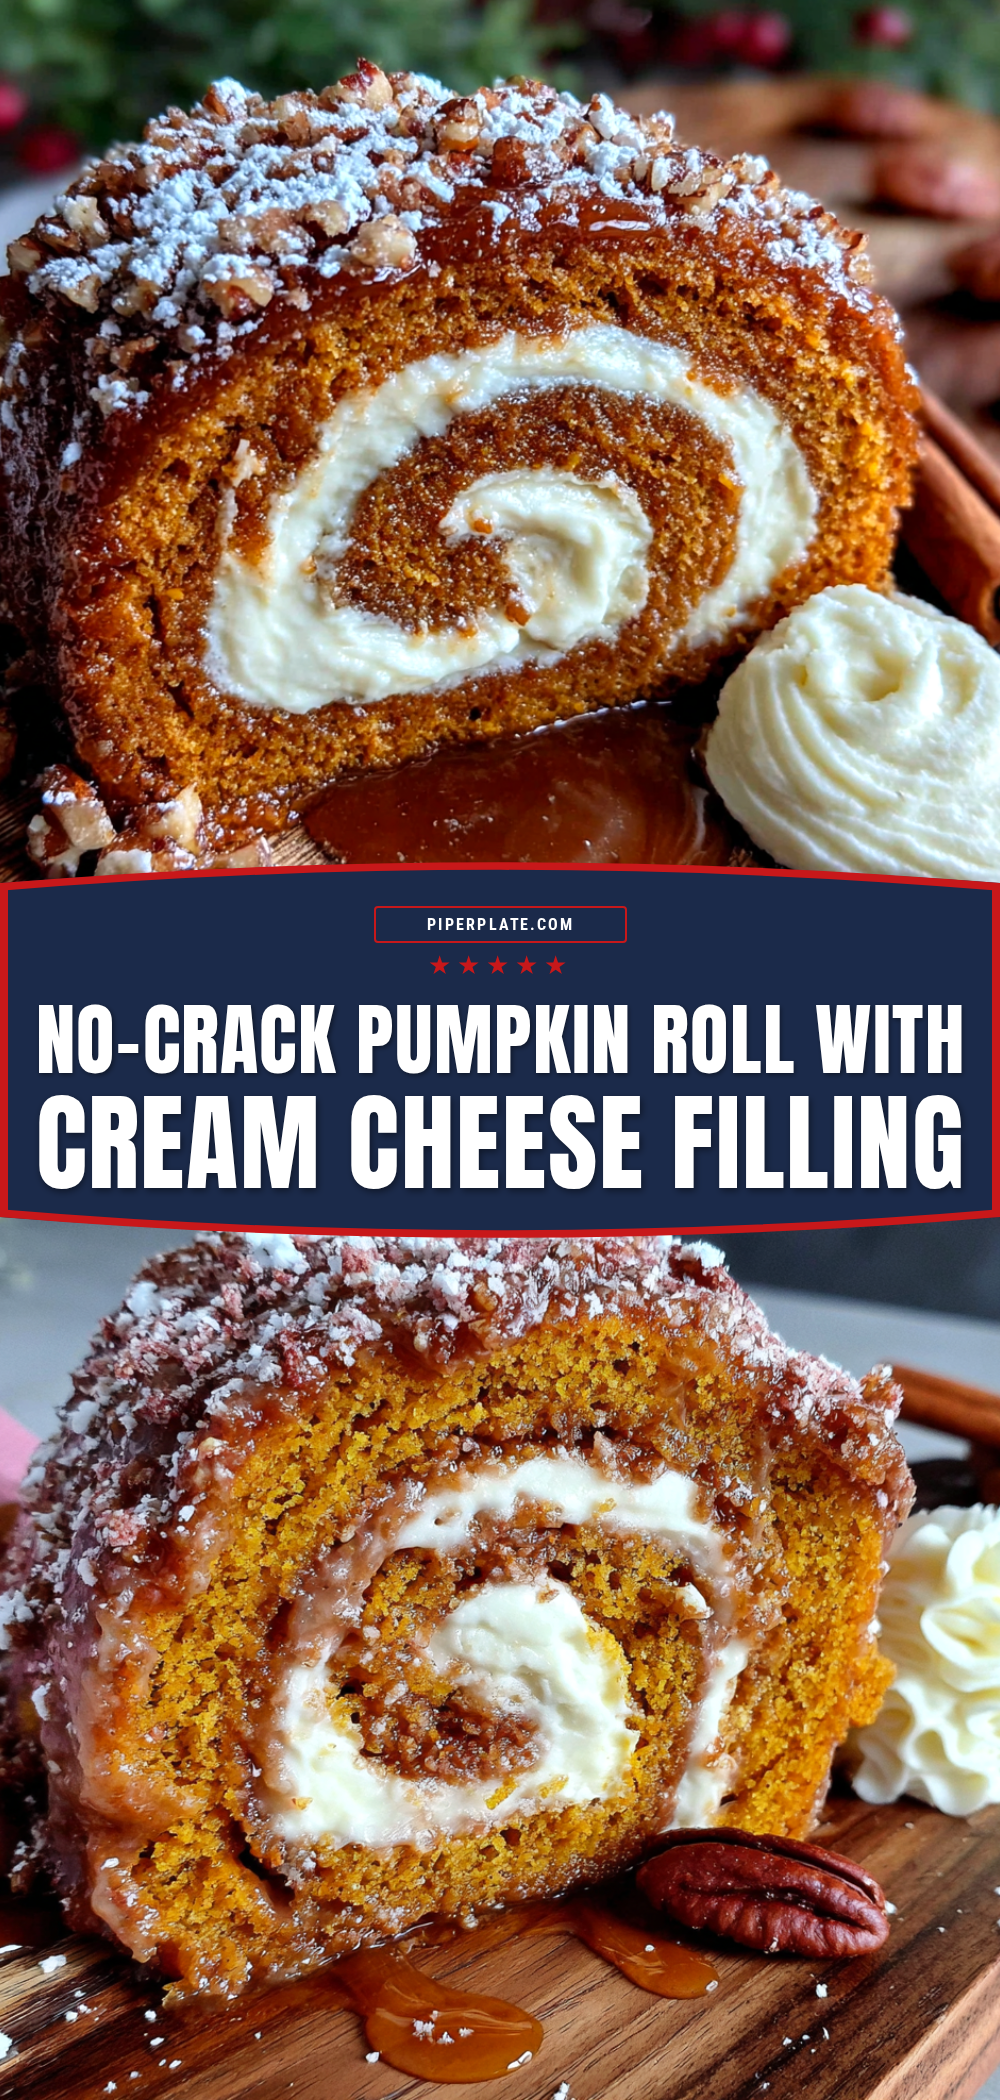
Pumpkin Roll: The Perfect No-Crack Recipe (Easy Cream Cheese Filling)
This foolproof pumpkin roll recipe uses a warm-rolling technique to prevent cracks, resulting in a tender, flexible cake filled with a tangy cream cheese filling. Perfect for fall gatherings and holiday desserts.
- Prep Time: 20 minutes
- Cook Time: 15 minutes
- Total Time: 1 hour 35 minutes (includes cooling and chilling)
- Yield: 10 servings 1x
- Category: Dessert
- Cuisine: American
Ingredients
- ¾ cup all-purpose flour
- 1 teaspoon baking powder
- ½ teaspoon baking soda
- ½ teaspoon salt
- 2 teaspoons pumpkin pie spice
- 1 teaspoon ground cinnamon
- 3 large eggs, room temperature
- 1 cup granulated sugar
- ⅔ cup canned pumpkin puree
- 1 teaspoon vanilla extract
- 8 ounces cream cheese, softened
- 6 tablespoons unsalted butter, softened
- 1 cup powdered sugar, sifted
- 1 teaspoon vanilla extract
- Pinch of salt
- Powdered sugar for dusting
Instructions
- Preheat oven to 375°F (190°C). Line a 15×10-inch jelly roll pan with parchment paper, leaving overhang on short sides. Lightly grease parchment.
- In a medium bowl, whisk together flour, baking powder, baking soda, salt, pumpkin pie spice, and cinnamon.
- In a large bowl, beat eggs and granulated sugar with an electric mixer on medium-high speed for 3-4 minutes until thick, pale, and ribbon-like.
- Beat in pumpkin puree and vanilla extract on low speed until just combined.
- Fold dry ingredients into wet mixture in two additions, folding gently until no streaks remain.
- Pour batter into prepared pan and spread evenly. Bake for 13-15 minutes until cake springs back when touched and edges pull away from pan.
- While cake bakes, lay a clean kitchen towel flat and dust generously with powdered sugar. Immediately after baking, invert cake onto sugared towel and peel off parchment.
- Starting at one short end, roll cake and towel together into a tight log. Let cool completely in rolled position, seam-side down (about 45 minutes to 1 hour).
- For filling: Beat softened cream cheese and butter together until smooth and fluffy (about 2 minutes). Beat in sifted powdered sugar, vanilla, and salt until combined. Refrigerate if too soft.
- Once cake is cool, gently unroll. Spread filling evenly over cake, leaving a ½-inch border. Re-roll cake without towel, wrap tightly in plastic wrap, and refrigerate for at least 1 hour before slicing.
- Dust with powdered sugar before serving. Slice with a sharp serrated knife, wiping blade between cuts.
Notes
Roll the cake while it is still warm to prevent cracks. Use room temperature eggs. Do not overbake. Chill the assembled roll for at least 1 hour before slicing for clean cuts. Freezes well for up to 3 months.
Nutrition
- Serving Size: 1 slice (1/10 of rol
- Calories: 290
- Sugar: 28
- Sodium: 220
- Fat: 14
- Saturated Fat: 8
- Carbohydrates: 38
- Fiber: 1
- Protein: 5
Keywords: pumpkin roll, pumpkin dessert, cream cheese filling, no-crack pumpkin roll, fall dessert, Thanksgiving dessert, pumpkin cake roll


