Love this? Save it for later!
Share the inspiration with your friends
It was 10:47 PM on a random Wednesday in October, and I had this ridiculous, very specific craving for something that tasted like a cheesy, garlicky pizza but looked like a tiny, adorable ghost. I didn’t have pizza dough—that would have required planning, and let’s be honest, my brain was fried from a long day. But I had a pack of crescent rolls in the fridge that was about to expire and a ball of fresh mozzarella staring at me from the deli drawer. The thought just arrived, like a little culinary lightbulb flickering on in a dark room: wrap the cheese in strips of dough, add some eyes, and boom—you’ve got a mummy. I wasn’t trying to be clever. I was just tired and hungry, and something about the late hour made me stop overthinking and just do it.
Honestly, the first batch was a mess. I cut the dough too thick, the cheese oozed out like a horror movie, and I used black sesame seeds for eyes that just rolled off into the abyss of my baking sheet. But the flavor was there. That warm, buttery, pizza-shop taste hit me right in the soul. I tweaked it the next night (yes, I made them again immediately), and by the third try, I had it down. These Quick Mozzarella Mummy Pizza Bites are the result of a late-night kitchen experiment that I honestly think is better than the “real” version. They take ten minutes to prep, they look spooky-cute, and they taste like pure comfort. Maybe you’ve been there—staring into the fridge, wanting something fun but not having the energy for a project. These are for you.
Why You’ll Love This Recipe
I’ve tested this recipe about seven times now (my neighbors have become very happy taste-testers), and I can confidently say this is the best version. Here is why these little mummies are going to become your new go-to for Halloween, game day, or just a fun Tuesday night.
- Quick & Easy: From fridge to table in under 20 minutes. Seriously. The hardest part is cutting the dough strips, and even that takes two minutes. Perfect for those evenings when you need a crowd-pleaser fast.
- Simple Ingredients: You only need four main ingredients: crescent rolls, mozzarella sticks, pizza sauce, and candy eyes. No fancy grocery store trips required—you probably have most of this in your kitchen right now.
- Perfect for Halloween Parties: These are the star of any spooky spread. Kids go absolutely wild for them, and adults can’t stop eating them either. They look impressive but are secretly the easiest thing on the table.
- Crowd-Pleaser: I have yet to meet a single person who doesn’t love these. They are warm, cheesy, and buttery. It’s basically pizza in the most fun form possible.
- Unbelievably Delicious: The texture is what gets me. The crescent dough gets flaky and golden, while the mozzarella gets perfectly melty and stretchy. Dip it in warm marinara, and it’s next-level comfort food.
What makes this recipe different from the countless other “mummy pizza bites” out there is the technique. I learned the hard way that you need to chill the wrapped bites for five minutes before baking. That little trick keeps the cheese from turning into a molten lava spill, so your mummies actually look like mummies and not sad cheese blobs. It’s a small step, but it makes all the difference. This isn’t just another version—it’s the one that works every single time.
This recipe is the kind that makes you close your eyes after the first bite. It’s comfort food at its finest—fast, cheesy, and ridiculously fun. Perfect for impressing a houseful of tiny goblins without any stress, or turning a simple weeknight into something a little more memorable.
What Ingredients You Will Need
This recipe uses simple, everyday ingredients to deliver big flavor and maximum cuteness without any fuss. Most of these are pantry staples, which is exactly what you want on a busy weeknight.
- 1 can (8 oz) refrigerated crescent roll dough — I prefer Pillsbury for consistent results, but any brand works. You’ll be unrolling this and separating it into triangles.
- 4 mozzarella string cheese sticks — Look for the full-fat version for the best melt and stretch. Each stick will be cut in half to make 8 mummies. (Pro tip: use the low-moisture kind, not fresh mozzarella balls, as fresh is too watery.)
- 1/4 cup pizza sauce — Use your favorite jarred brand, or whip up a quick homemade version. You’ll need this for dipping, not for inside the bites.
- 16 candy eyeballs — These are the soul of the mummy. You can find them at most grocery stores in the baking aisle or online. Wilton brand works great.
- 1 tablespoon melted butter — Optional, but highly recommended for brushing on top before baking. It gives the dough that gorgeous golden-brown color.
- 1/2 teaspoon garlic powder — Also optional, but I never skip it. It adds that pizza-shop aroma and flavor. Sprinkle it on with the butter.
- Pinch of salt — Just a tiny bit to balance the flavors.
For the dipping sauce, you can use warmed pizza sauce, marinara, or even ranch dressing if you’re feeling adventurous. I personally love a good garlic butter dip on the side too. When choosing your crescent rolls, give the can a little shake—you want the dough to feel cold and firm, not puffy or over-proofed. And for the cheese, I recommend Sargento or Kraft string cheese for the best melt without becoming a greasy mess.
Equipment Needed
You don’t need a lot of fancy tools for this recipe, which is part of its charm. Here is what you’ll need to get the job done.
- Baking sheet — A standard half-sheet pan works perfectly. Line it with parchment paper for easy cleanup. I’ve used foil in a pinch, but parchment gives the best results.
- Sharp knife or pizza cutter — You’ll be cutting the crescent roll triangles into thin strips. A pizza cutter makes this incredibly easy and fast.
- Pastry brush — For brushing the melted butter on top. If you don’t have one, you can use a spoon or even a clean finger—no judgment here.
- Small bowl — For melting the butter and mixing in the garlic powder.
- Cutting board — A clean surface for cutting the dough and cheese.
I’ve made these with just a butter knife and a fork before, and they still turned out great. The parchment paper is the one thing I’d say is non-negotiable—it prevents the cheese from sticking and makes cleanup a breeze. If you don’t have a pastry brush, a silicone basting brush is a budget-friendly option that lasts forever.
Preparation Method

Follow these steps, and you’ll have a tray of adorable, delicious mummy pizza bites in no time. I’ve included all the little tricks I learned from my late-night experiments.
- Preheat your oven to 375°F (190°C). Line a baking sheet with parchment paper. This is your golden ticket to easy cleanup—trust me on this one.
- Prepare the cheese. Unwrap your 4 mozzarella string cheese sticks and cut each one in half crosswise. You should have 8 equal pieces. Set them aside on a plate.
- Cut the dough. Unroll the crescent roll dough and separate it along the perforated lines into 8 triangles. Take one triangle and use a sharp knife or pizza cutter to slice it lengthwise into 3 thin strips. You want them to be about 1/2-inch wide. Don’t cut all the way to the top—leave the wide end intact so the strips stay connected. Repeat with all 8 triangles. This is the trickiest part, but you’ll get the hang of it after the first one.
- Wrap the mummies. Take one piece of mozzarella and place it at the wide end of a cut triangle. Start wrapping the dough strips around the cheese, overlapping them slightly as you go. Leave a small gap near the top of the cheese so you can see the “face.” The dough should look like bandages wrapping around a mummy. Don’t wrap too tightly—the dough needs room to puff up as it bakes.
- Chill the bites. Place the wrapped mummies on the prepared baking sheet, spacing them about 2 inches apart. Pop the entire sheet into the fridge for 5 minutes. I know this seems like an unnecessary step, but it is crucial. Chilling firms up the butter in the dough, which prevents the cheese from oozing out during baking. I learned this the hard way after my first batch turned into a cheese volcano.
- Brush and season. While the bites are chilling, melt the butter in a small bowl and stir in the garlic powder and a pinch of salt. After the 5 minutes are up, remove the baking sheet from the fridge and brush the tops of each mummy with the garlic butter. This gives them that beautiful golden color and incredible aroma.
- Bake. Place the baking sheet in the preheated oven and bake for 10-12 minutes, or until the dough is golden brown and puffed. The cheese should be melted but not exploding out. Your kitchen will smell like a pizzeria—it’s amazing.
- Add the eyes. Remove the baking sheet from the oven and let the mummies cool for 2-3 minutes on the pan. They will be very hot, so don’t skip this step. While they are still warm, press two candy eyeballs into the exposed cheese on each mummy. The residual heat will help them stick. If you add them too early, the eyes will slide right off into the melted cheese abyss.
- Serve immediately. Transfer the mummies to a serving platter and serve warm with a bowl of pizza sauce for dipping. Watch them disappear in minutes.
One more thing—if you notice the dough isn’t browning evenly, rotate the baking sheet halfway through the baking time. Every oven has hot spots, and this simple trick ensures all your mummies come out looking perfect.
Cooking Tips & Techniques
I’ve made plenty of mistakes with these little guys so you don’t have to. Here are the most important lessons I’ve learned.
Don’t skip the chill step. I know it adds five minutes, but it is the single most important technique in this recipe. When the cold dough hits the hot oven, the butter creates steam that makes the dough flaky. If the dough is too warm, the butter melts too fast, and the dough becomes greasy and dense. Plus, the cold cheese stays intact longer, giving the dough time to set before the cheese starts melting. It’s a win-win.
Cut the dough strips evenly. If some strips are thicker than others, they won’t bake at the same rate. The thin ones will burn while the thick ones are still doughy. Take an extra 30 seconds to make sure your strips are uniform. Your future self will thank you.
Watch the oven like a hawk. These bake fast. At the 8-minute mark, start checking them. You want the dough to be a deep golden brown, not pale. But if you leave them in too long, the cheese will start bubbling out. Pull them out the second they look done—there is no forgiveness here.
One of my biggest failures was when I tried to use fresh mozzarella balls instead of string cheese. The fresh stuff released so much water that the dough turned into a soggy, sad mess. Stick with low-moisture string cheese. It’s engineered to melt perfectly without making everything wet.
For multitasking: While the bites are chilling in the fridge, use that time to melt the butter, mix the garlic salt, and set out your dipping sauce. This way, everything is ready to go the second they come out of the oven.
Variations & Adaptations
These mummy bites are incredibly versatile. Here are a few ways I’ve adapted them for different occasions and dietary needs.
Spicy Pepperoni Mummies: Before wrapping the cheese, place a small piece of pepperoni on top of the mozzarella. Wrap the dough strips over it. When they bake, the pepperoni gets crispy and adds a spicy, smoky kick. This is my personal favorite variation.
Vegetarian Delight: Add a thin strip of roasted red pepper or a small basil leaf under the dough strips. It adds a pop of color and a fresh flavor that cuts through the richness of the cheese.
Gluten-Free Option: Use gluten-free crescent roll dough. I’ve tried the brand from Schar, and it works surprisingly well. Just note that gluten-free dough tends to brown faster, so start checking at the 8-minute mark.
Air Fryer Method: If you want an even faster option, cook these in an air fryer at 350°F (175°C) for 6-8 minutes. No need to flip them. The air fryer makes the dough extra crispy. I’ve done this on a busy weeknight, and it was a game-changer.
Dairy-Free Adaptation: Use dairy-free mozzarella shreds (I like the brand Violife) and dairy-free crescent dough. The texture will be slightly different, but the flavor is still fantastic.
For a fun Halloween party, I sometimes make a batch with pepperoni and a batch with roasted red peppers so everyone has options. They always disappear just as fast.
Serving & Storage Suggestions
These mummy pizza bites are best served warm, straight from the oven. The cheese is perfectly stretchy, and the dough is at its flakiest. Arrange them on a spooky platter—I use a black slate board—and place a small bowl of warm pizza sauce in the center for dipping. You can also serve them with ranch dressing or garlic butter for variety.
For a Halloween party spread, pair them with other easy finger foods like spiderweb dip or ghost cookies. They also go great with a simple side salad if you want to pretend you’re being healthy.
Storage: If you have leftovers (which is rare in my house), store them in an airtight container in the refrigerator for up to 3 days. The dough will soften over time, but they are still delicious.
Reheating: The best way to reheat them is in the oven or air fryer. Pop them in a 350°F (175°C) oven for 5 minutes, or in the air fryer for 3 minutes. This brings back the crispiness. Avoid the microwave—it makes the dough chewy and sad.
Make-Ahead Tip: You can assemble the mummies up to 24 hours in advance. Place them on the baking sheet, cover loosely with plastic wrap, and refrigerate. When you’re ready to bake, just brush with butter and pop them in the oven. You might need to add 1-2 minutes to the baking time since they’re starting from cold.
The flavors are best right after baking, but honestly, I’ve eaten them cold straight from the fridge at midnight, and they were still pretty great.
Nutritional Information & Benefits
Here is an approximate nutritional breakdown for one mummy pizza bite (based on 8 servings per recipe). Values will vary based on specific brands and any variations you make.
| Nutrient | Amount per Serving |
|---|---|
| Calories | 145 |
| Total Fat | 9g |
| Saturated Fat | 5g |
| Cholesterol | 20mg |
| Sodium | 350mg |
| Total Carbohydrates | 11g |
| Dietary Fiber | 0g |
| Sugars | 2g |
| Protein | 7g |
These bites provide a decent amount of protein from the mozzarella, which helps keep you full. Mozzarella is also a good source of calcium for bone health. If you use the garlic butter and fresh ingredients, you’re getting a small dose of antioxidants too. While this isn’t health food by any stretch, it’s a fun treat that fits into a balanced diet, especially when served with a veggie side or a big salad.
For those with dietary restrictions, this recipe contains gluten (from the crescent rolls) and dairy. Use the gluten-free and dairy-free substitutions mentioned in the variations section to make it work for your needs.
Conclusion
These Quick Mozzarella Mummy Pizza Bites are the kind of recipe that makes you feel like a kitchen genius without actually having to work for it. They’re cute, they’re delicious, and they come together in under 20 minutes. What more could you ask for on a busy weeknight or a Halloween party spread?
I love this recipe because it reminds me that you don’t need fancy ingredients or hours of time to create something special. Sometimes the best ideas come from staring into your fridge at 11 PM and just going for it. These mummies are proof that a little creativity and a can of crescent rolls can go a long way.
I’d love to see how your mummies turn out! Leave a comment below and tell me if you tried any fun variations. Did you add pepperoni? Use an air fryer? Make them gluten-free? Share your photos and tag me on social media—I can’t wait to see your spooky creations. Now go preheat that oven and make some magic. You’ve got this!
Frequently Asked Questions
Can I use homemade pizza dough instead of crescent rolls?
Yes, you can! Roll the dough out very thin (about 1/8-inch thick) and cut it into strips. The bake time might increase by 2-3 minutes since homemade dough is denser. Just keep an eye on them.
How do I prevent the candy eyes from falling off?
The key is patience. Let the mummies cool for 2-3 minutes after baking before adding the eyes. The cheese needs to set slightly so it’s tacky but not liquid. Press gently, and they’ll stick perfectly.
Can I freeze these before baking?
Absolutely! Assemble the mummies, place them on a baking sheet, and freeze until solid (about 1 hour). Transfer to a freezer bag. When ready to bake, place them frozen on a lined baking sheet and add 3-4 minutes to the bake time. No need to thaw.
What can I use instead of candy eyes?
If you don’t have candy eyes, you can use small dots of black olive, sliced black sesame seeds, or even tiny dollops of balsamic glaze. They won’t look as cute, but they’ll still taste great.
Can I make these in a toaster oven?
Yes! Toaster ovens work great for small batches. Preheat to 375°F (190°C) and bake for 10-12 minutes. Keep an eye on them since toaster ovens can have hot spots. Rotate the pan halfway through for even browning.
Pin This Recipe!
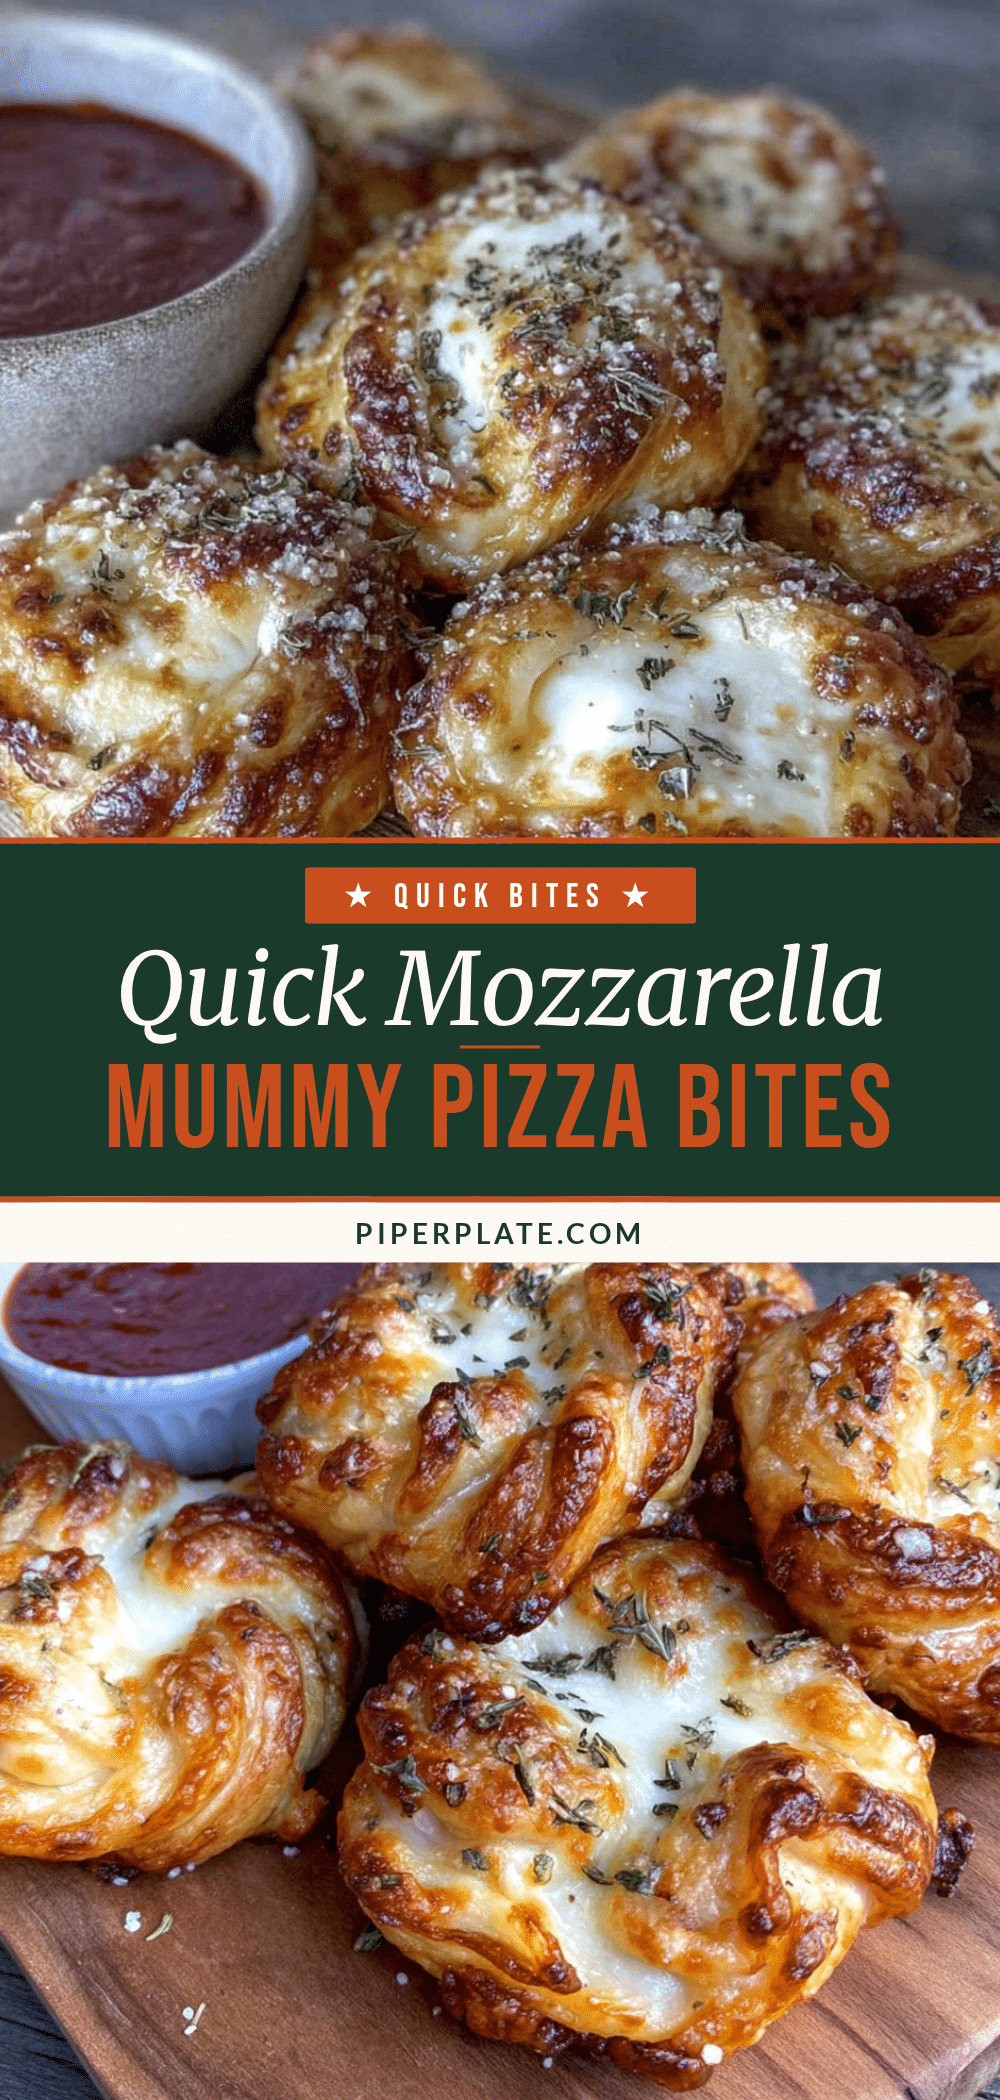
Quick Mozzarella Mummy Pizza Bites – Easy Halloween Recipe

These Quick Mozzarella Mummy Pizza Bites are a fun, spooky Halloween treat made with crescent rolls, mozzarella string cheese, and candy eyes. Ready in under 20 minutes, they’re perfect for parties or a quick weeknight snack.
- Prep Time: 10 minutes
- Cook Time: 12 minutes
- Total Time: 22 minutes
- Yield: 8 servings 1x
- Category: Appetizer
- Cuisine: American
Ingredients
- 1 can (8 oz) refrigerated crescent roll dough
- 4 mozzarella string cheese sticks
- 1/4 cup pizza sauce
- 16 candy eyeballs
- 1 tablespoon melted butter
- 1/2 teaspoon garlic powder
- Pinch of salt
Instructions
- Preheat your oven to 375°F (190°C). Line a baking sheet with parchment paper.
- Unwrap the 4 mozzarella string cheese sticks and cut each one in half crosswise to make 8 equal pieces. Set aside.
- Unroll the crescent roll dough and separate along perforations into 8 triangles. Take one triangle and use a sharp knife or pizza cutter to slice it lengthwise into 3 thin strips (about 1/2-inch wide), leaving the wide end intact so strips stay connected. Repeat with all 8 triangles.
- Place one piece of mozzarella at the wide end of a cut triangle. Wrap the dough strips around the cheese, overlapping slightly, leaving a small gap near the top for the face. Do not wrap too tightly.
- Place wrapped mummies on the prepared baking sheet, spacing about 2 inches apart. Refrigerate for 5 minutes.
- While chilling, melt butter in a small bowl and stir in garlic powder and a pinch of salt. After 5 minutes, remove baking sheet from fridge and brush tops of each mummy with garlic butter.
- Bake for 10-12 minutes, until dough is golden brown and puffed.
- Remove from oven and let cool for 2-3 minutes. While still warm, press two candy eyeballs into the exposed cheese on each mummy.
- Serve immediately with warm pizza sauce for dipping.
Notes
Chilling the wrapped bites for 5 minutes before baking is crucial to prevent cheese from oozing out. Use low-moisture string cheese, not fresh mozzarella, to avoid sogginess. For best results, add candy eyes after cooling for 2-3 minutes so they stick. Can be assembled up to 24 hours in advance and refrigerated. Reheat in oven or air fryer for best texture.
Nutrition
- Serving Size: 1 mummy bite
- Calories: 145
- Sugar: 2
- Sodium: 350
- Fat: 9
- Saturated Fat: 5
- Carbohydrates: 11
- Protein: 7
Keywords: Halloween, mummy, pizza bites, crescent rolls, mozzarella, easy, quick, party food, appetizer


