Love this? Save it for later!
Share the inspiration with your friends
My neighbor across the hall, a retired pastry chef named Dottie, watched me fumble with a piping bag one Halloween afternoon. I was trying to get a perfect blood-red drip effect on some chocolate cupcakes, and honestly, I was making a mess of epic proportions. She didn’t say anything at first, just leaned against her doorframe with a knowing smile. Then she disappeared back into her apartment, returning with a single, perfectly frosted cupcake on a small plate. It was deep, velvety red, with a tiny, glossy “bite” mark etched into the frosting, revealing a shock of bright red filling inside. “Vampire bite,” she said simply. “Much easier than that drip nonsense you’re fighting with.”
I’ll never forget the way that first bite tasted—it was less sweet than I expected, with that classic buttermilk tang and a whisper of cocoa. The filling was a simple, tart raspberry jam that cut through the richness perfectly. Dottie had this way of making complex things feel simple, like she was letting you in on a secret. She told me the trick was all in the timing and the right kind of vinegar for the red color. I mean, I’d made red velvet cakes before, but they always felt like a project. This one felt doable, even on a Tuesday night.
Maybe you’ve been there, staring at a complicated recipe and wondering if it’s worth the effort. This one is. It’s the kind of recipe that looks like you spent hours on it, but really, it comes together in a flash. The “vampire bite” effect is pure genius—it’s a shortcut that looks like a showstopper. I’ve adapted Dottie’s original just a bit, swapping her homemade jam for a good-quality store-bought one (because let’s be real, who has time to make jam on a weeknight?), and I think she’d approve. This recipe stayed with me because it’s not just a dessert; it’s a conversation starter, a little bit of Halloween magic that you can whip up without breaking a sweat.
Why You’ll Love This Recipe
Let’s be honest, most of us don’t have hours to spend on a complicated dessert. These Quick Vampire Bite Red Velvet Cupcakes are designed for the real world—where time is short and expectations are high. They deliver that wow factor without the stress, and here’s why they’ll become your new go-to.
- Quick & Easy: From start to finish, you’re looking at about 45 minutes. That’s less time than a single episode of your favorite show. The batter comes together in one bowl, and the “vampire bite” trick takes seconds to execute.
- Simple Ingredients: No hunting for obscure extracts or specialty flours. You likely have everything in your pantry right now. Cocoa powder, buttermilk, vinegar, and a box of red food coloring are the stars.
- Perfect for Halloween & Beyond: Obviously, these are a hit for Halloween parties. But the fun, spooky look works for any gathering where you want a little drama—a birthday party, a themed dinner, or just a Tuesday that needs a pick-me-up.
- Crowd-Pleaser: Red velvet is a classic for a reason. The tangy cream cheese frosting is a universal favorite, and the hidden jam center is a delightful surprise. Kids and adults alike will be fighting over the last one.
- Unbelievably Delicious: This isn’t your average dry red velvet. The buttermilk and vinegar create an incredibly tender crumb, while the cocoa adds a subtle depth. The tart raspberry jam cuts through the sweetness, making each bite perfectly balanced.
What makes this recipe different is the “vampire bite” technique itself. It’s a clever shortcut that looks like a professional pastry chef’s secret. Instead of a complicated filling and frosting process, you simply core the cupcake, fill it with jam, and pipe a small indent in the frosting. It’s genius-level simplicity. This isn’t just another red velvet cupcake—it’s a conversation piece. It’s the kind of thing that makes people say, “Wait, how did you do that?” and you get to smile and say, “It’s a secret.”
What Ingredients You Will Need
This recipe uses simple, pantry-friendly ingredients to deliver that classic red velvet flavor and a super tender crumb. The magic is in the combination of a few key players, so let’s break them down.
For the Cupcakes
- 1 ½ cups (190g) all-purpose flour: This is your base. I’ve used Gold Medal for years and it always works perfectly. Spoon and level it for the most accurate measurement.
- 1 cup (200g) granulated sugar: Adds sweetness and helps with the tender texture.
- 1 tablespoon (8g) unsweetened cocoa powder: A classic red velvet has a very subtle chocolate flavor. Don’t be tempted to add more—it’s meant to be a whisper, not a shout.
- 1 teaspoon baking soda: This reacts with the vinegar to help the cupcakes rise beautifully.
- ½ teaspoon salt: Balances the sweetness and enhances all the other flavors.
- ¾ cup (180ml) buttermilk, room temperature: This is non-negotiable for the classic tang and tender crumb. If you don’t have buttermilk, you can make a quick substitute by adding 1 tablespoon of lemon juice or white vinegar to ¾ cup of regular milk and letting it sit for 5 minutes.
- ½ cup (120ml) vegetable oil: Keeps the cupcakes incredibly moist. You can also use canola or melted coconut oil.
- 1 large egg, room temperature: Binds everything together and adds richness.
- 1 teaspoon vanilla extract: A must for flavor depth.
- 1 tablespoon (15ml) white vinegar: This is the secret to red velvet! It reacts with the baking soda for a light, fluffy texture. Don’t skip it.
- 1 tablespoon (15ml) red gel food coloring: Liquid food coloring works, but gel gives you a much deeper, more vibrant red without thinning the batter. I prefer the AmeriColor brand for its intensity.
For the Filling & Frosting
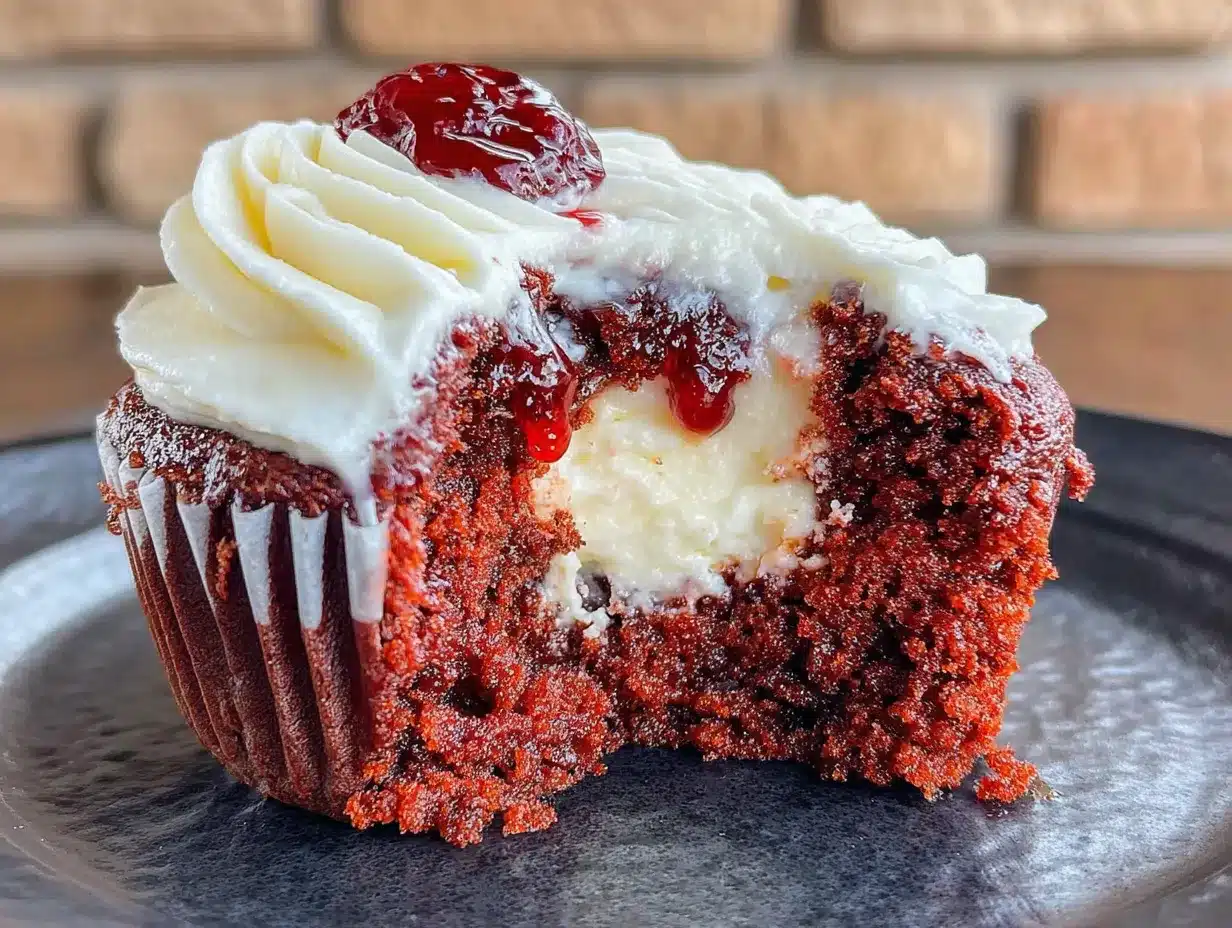
- ½ cup (160g) raspberry jam or preserves: The tartness of raspberry is a perfect contrast to the sweet frosting. Seedless jam is ideal, but I actually like the little seeds for texture. You can also use strawberry jam.
- 8 oz (226g) cream cheese, softened: Use full-fat for the best flavor and texture. Let it sit on the counter for at least 30 minutes before you start.
- ½ cup (113g) unsalted butter, softened: This gives the frosting structure and a rich mouthfeel.
- 3 cups (360g) powdered sugar: Sift it for a lump-free frosting. It’s a small step that makes a big difference.
- 1 teaspoon vanilla extract: For that classic cream cheese frosting flavor.
- Pinch of salt: To balance the sweetness.
Equipment Needed
You don’t need a professional bakery setup for these. Here’s what you’ll need to pull it off.
- Standard 12-cup muffin tin: This is your workhorse. A non-stick pan is great, but a metal one works just as well if you use liners.
- Paper cupcake liners: I love using red or black liners for Halloween, but any color works. They make cleanup a breeze.
- Two mixing bowls: One large for the dry ingredients, one medium for the wet. Honestly, you can even mix everything in one bowl if you’re careful.
- Whisk and rubber spatula: The whisk for combining, the spatula for scraping the bowl clean.
- Cookie scoop or ice cream scoop: This is my favorite trick for perfectly even cupcakes. It makes filling the liners a mess-free job.
- Small piping bag or zip-top bag: For the frosting. A zip-top bag with the corner snipped off works perfectly well. A star tip (like a 1M) gives you that classic swirl look.
- Small knife or apple corer: To carve out the “vampire bite.” A paring knife is my go-to, but a small melon baller also works wonders.
- Electric hand mixer or stand mixer: For the frosting. You can do it by hand, but your arm will thank you for the mixer.
If you don’t have a piping bag, don’t stress. A spoon and a steady hand can create a beautiful dollop of frosting. The “bite” mark can be made with the back of a small spoon. The goal is fun, not perfection.
Preparation Method
Let’s get baking. This recipe moves fast, so having everything measured out and ready to go (your mise en place) will make the whole process a breeze.
- Preheat and Prep: Preheat your oven to 350°F (175°C). Line your muffin tin with 12 paper liners. This is a non-negotiable step for easy removal.
- Whisk Dry Ingredients: In a large bowl, whisk together the flour, sugar, cocoa powder, baking soda, and salt. Make sure there are no lumps of cocoa. Give it a good 30 seconds of whisking.
- Mix Wet Ingredients: In a separate medium bowl (or a large liquid measuring cup), whisk together the buttermilk, oil, egg, vanilla extract, and white vinegar. Whisk until it’s a uniform, pale yellow mixture.
- Add the Color: Add the red gel food coloring to the wet mixture and stir until it’s fully incorporated. The batter should be a vibrant, deep red. Don’t be shy with the color—it will bake up a bit more muted.
- Combine Wet and Dry: Pour the wet ingredients into the dry ingredients. Use a rubber spatula to gently fold everything together. Mix only until you no longer see streaks of flour. A few small lumps are totally fine. Over-mixing will make your cupcakes tough.
- Fill the Liners: Use your cookie scoop to divide the batter evenly among the 12 liners. Fill each about ⅔ full. This ensures they rise into perfect domes without spilling over.
- Bake: Bake for 18-22 minutes, or until a toothpick inserted into the center of a cupcake comes out clean or with a few moist crumbs. The tops should spring back when lightly touched. My oven runs hot, so I always check at 18 minutes.
- Cool Completely: Let the cupcakes cool in the pan for 5 minutes, then transfer them to a wire rack to cool completely. This is crucial! Warm cupcakes will melt your frosting into a sad puddle.
- Make the Frosting: While the cupcakes cool, make the frosting. In a large bowl, beat the softened cream cheese and butter together with an electric mixer on medium speed until smooth and creamy, about 2 minutes. Scrape down the sides of the bowl.
- Add Sugar and Vanilla: With the mixer on low, gradually add the powdered sugar, about ½ cup at a time. Once it’s all in, add the vanilla and a pinch of salt. Increase the speed to medium-high and beat for another 2 minutes, until the frosting is light, fluffy, and spreadable.
- Create the Vampire Bite: Once the cupcakes are completely cool, use a small knife or apple corer to cut a small, cone-shaped hole in the top of each cupcake. Don’t go too deep—about ¾ of the way down is perfect. Save the little “lid” of cake you removed.
- Fill with Jam: Spoon about 1 teaspoon of raspberry jam into each hole. Don’t overfill, or it will squish out when you add the frosting.
- Replace the Lid: Take the little piece of cake you removed, cut off the pointy tip, and place the flat piece back on top of the jam. This seals the filling inside and gives the frosting a flat surface to sit on.
- Frost and Mark: Pipe a generous swirl of cream cheese frosting onto each cupcake. Now for the fun part! Take a small spoon or the back of a clean knife and gently press a small indent into the side of the frosting, as if a vampire took a bite. You can even use a clean finger to create a more organic-looking mark.
- Add a Jam “Drip”: For the full effect, take a tiny bit of the leftover raspberry jam and dab it just inside the “bite” mark, letting a little bit drip down the side of the frosting. It looks like a bloody bite mark!
Cooking Tips & Techniques
I’ve made a lot of mistakes in the kitchen, and I’m here to save you from them. Here are the things I wish I’d known the first time I made these.
Don’t Overmix the Batter. This is the number one rule for tender cupcakes. Once you add the wet to the dry, use a light hand. Mix until it’s just combined. A few streaks of flour are better than a tough, dense cupcake. I once mixed it for a full minute because I was distracted, and the result was a batch of hockey pucks. Learn from my failure.
Room Temperature Ingredients are Key. This is especially true for the cream cheese and butter in the frosting. If they’re cold, you’ll get a lumpy, grainy frosting. Set them out on the counter at least 30 minutes before you start. For the buttermilk and egg, a quick 15-minute soak in a bowl of warm water will do the trick.
Gel vs. Liquid Food Coloring. Trust me on this one. Liquid food coloring will give you a pinkish-red at best. Gel coloring gives you that deep, dramatic, “blood red” color. It’s more concentrated, so you use less, and it won’t mess with the batter’s consistency. You can find it at any craft store or in the baking aisle of most grocery stores.
Timing is Everything. Start checking your cupcakes at the 18-minute mark. Every oven is different. A toothpick test is your best friend. If the toothpick comes out with wet batter, give it another 2 minutes. If it comes out clean, you’re done. Overbaking is the fastest way to dry out a red velvet cupcake.
Multitasking Like a Pro. While the cupcakes are baking, make your frosting. While the cupcakes are cooling, clean up your mixing bowls. This way, when the cupcakes are cool, all you have to do is assemble. It makes the whole process feel faster and less chaotic.
Variations & Adaptations
This recipe is a great base, and it’s fun to play around with. Here are a few ways to make it your own.
- Spooky Chocolate Filling: Instead of raspberry jam, use a dark chocolate ganache. Just heat ¼ cup of heavy cream and pour it over ½ cup of dark chocolate chips. Stir until smooth, let it cool slightly, and use it to fill the “bite.” It gives a more decadent, less fruity flavor.
- Vegan Vampire Bites: This is easier than you think. Substitute the buttermilk with ¾ cup of almond milk mixed with 1 tablespoon of apple cider vinegar. Use a flax egg (1 tablespoon ground flaxseed mixed with 3 tablespoons water) instead of the regular egg. For the frosting, use a vegan cream cheese and vegan butter. The texture is slightly different, but the flavor is still incredible.
- Gluten-Free Version: Swap the all-purpose flour for a 1:1 gluten-free baking flour blend (I like Bob’s Red Mill). Add ¼ teaspoon of xanthan gum if your blend doesn’t already include it. The crumb will be a little more delicate, so be gentle when coring the cupcakes.
- Lemon-Vampire Twist: Add the zest of one lemon to the cupcake batter and replace the raspberry jam with a lemon curd. The bright, citrusy tang pairs beautifully with the cream cheese frosting. It’s a less spooky, more elegant version.
- Peppermint Patty Bite: For a holiday twist, add ½ teaspoon of peppermint extract to the cupcake batter. Fill the center with a small, soft peppermint patty (like a York) instead of jam. The combination of chocolate, mint, and cream cheese is a winter wonderland.
Serving & Storage Suggestions
These cupcakes are best served at room temperature, which lets the frosting soften and the flavors meld together perfectly. I like to arrange them on a dark cake stand for a dramatic Halloween display. A few plastic spiders or a dusting of edible glitter (for a “vampire sparkle”) can really set the mood.
Store any leftover cupcakes in an airtight container in the refrigerator. They will keep well for up to 4 days. The cold will firm up the frosting, so let them sit on the counter for about 15 minutes before serving to soften up again.
You can also freeze the unfrosted cupcakes for up to 3 months. Wrap each one tightly in plastic wrap, then place them in a freezer-safe bag. When you’re ready to use them, let them thaw at room temperature, then fill and frost as directed. The frosting itself can also be frozen for up to a month. Just thaw it in the fridge overnight and give it a quick whip with a mixer to bring it back to life.
One thing I’ve noticed is that the flavors actually get better after a day in the fridge. The jam soaks into the cake a little, and the tang from the buttermilk becomes more pronounced. So if you can, make them a day ahead. They’re a total crowd-pleaser that way.
Nutritional Information & Benefits
Let’s be real: these are a treat. But knowing what’s in them can help you enjoy them mindfully. Here’s a rough estimate per cupcake (based on 12 servings).
- Calories: ~380
- Fat: 22g
- Carbohydrates: 45g
- Protein: 4g
- Sugar: 34g
The cream cheese and butter provide a good amount of Vitamin A and healthy fats (in moderation, of course). The buttermilk offers a bit of calcium and probiotics. And the cocoa powder? It’s packed with antioxidants. So while this isn’t a health food, it’s not a total nutritional void either.
For those with dietary restrictions, this recipe is not gluten-free or vegan as written, but as I mentioned in the variations, it’s very adaptable. It does contain dairy and gluten. If you’re watching your sugar intake, you could try a sugar substitute in the frosting, but I find the full-sugar version is worth the indulgence for a special occasion.
Conclusion
These Quick Vampire Bite Red Velvet Cupcakes are more than just a pretty face. They’re a testament to the fact that you don’t need a ton of time or fancy skills to create something truly memorable. The recipe is forgiving, the “vampire bite” trick is a showstopper, and the flavor is absolutely classic. Whether you’re making them for a Halloween bash, a birthday party, or just because you want a little bit of fun on a Tuesday night, they deliver.
I love this recipe because it’s a conversation starter. It’s the kind of thing that makes people smile and ask questions. And honestly, in a world that can feel a little heavy sometimes, that’s a beautiful thing. So go ahead, give them a try. Feel free to swap the jam for your favorite filling, or experiment with different frosting colors. The best recipes are the ones you make your own.
I’d love to hear how yours turn out! Leave a comment below and let me know what filling you used, or tag me on social media with your spooky creations. Happy baking, and remember—always save room for dessert.
Frequently Asked Questions
Can I use a different type of jam for the filling?
Absolutely! Raspberry is classic because of its tartness, but strawberry, cherry, or even blackberry jam work wonderfully. For a less sweet option, try a sour cherry preserves. The key is to use a jam that’s thick enough to stay put inside the cupcake.
Why did my cupcakes turn out dry?
The most common reason is overbaking. Start checking at 18 minutes. Another culprit is overmixing the batter, which develops the gluten and makes the cupcakes tough. Finally, make sure your buttermilk and egg are at room temperature—cold ingredients can lead to a denser, drier crumb.
Can I make these cupcakes without red food coloring?
Yes, but they won’t be red! The classic red velvet color comes from the food coloring. You can skip it, and you’ll have a lovely brownish-red velvet cupcake with a cocoa flavor. The taste will be the same, but the visual “wow” factor will be different. Some people use beet powder as a natural alternative, but it gives a more muted, earthy red.
How do I get my cream cheese frosting to be stiff enough for piping?
The key is to not overbeat it. Overbeating can make the frosting too soft and runny. Make sure your cream cheese and butter are softened but still cool to the touch. If the frosting seems too soft, pop it in the fridge for 15 minutes before piping. Also, make sure you’re using full-fat cream cheese, as the low-fat versions have a higher water content.
Can I make these cupcakes ahead of time for a party?
Yes! You can bake the cupcakes up to 2 days in advance and store them in an airtight container at room temperature. You can also make the frosting up to 3 days ahead and keep it in the fridge. Assemble the cupcakes the day of your party for the best presentation. The “vampire bite” mark is best done right before serving so it doesn’t dry out.
Pin This Recipe!
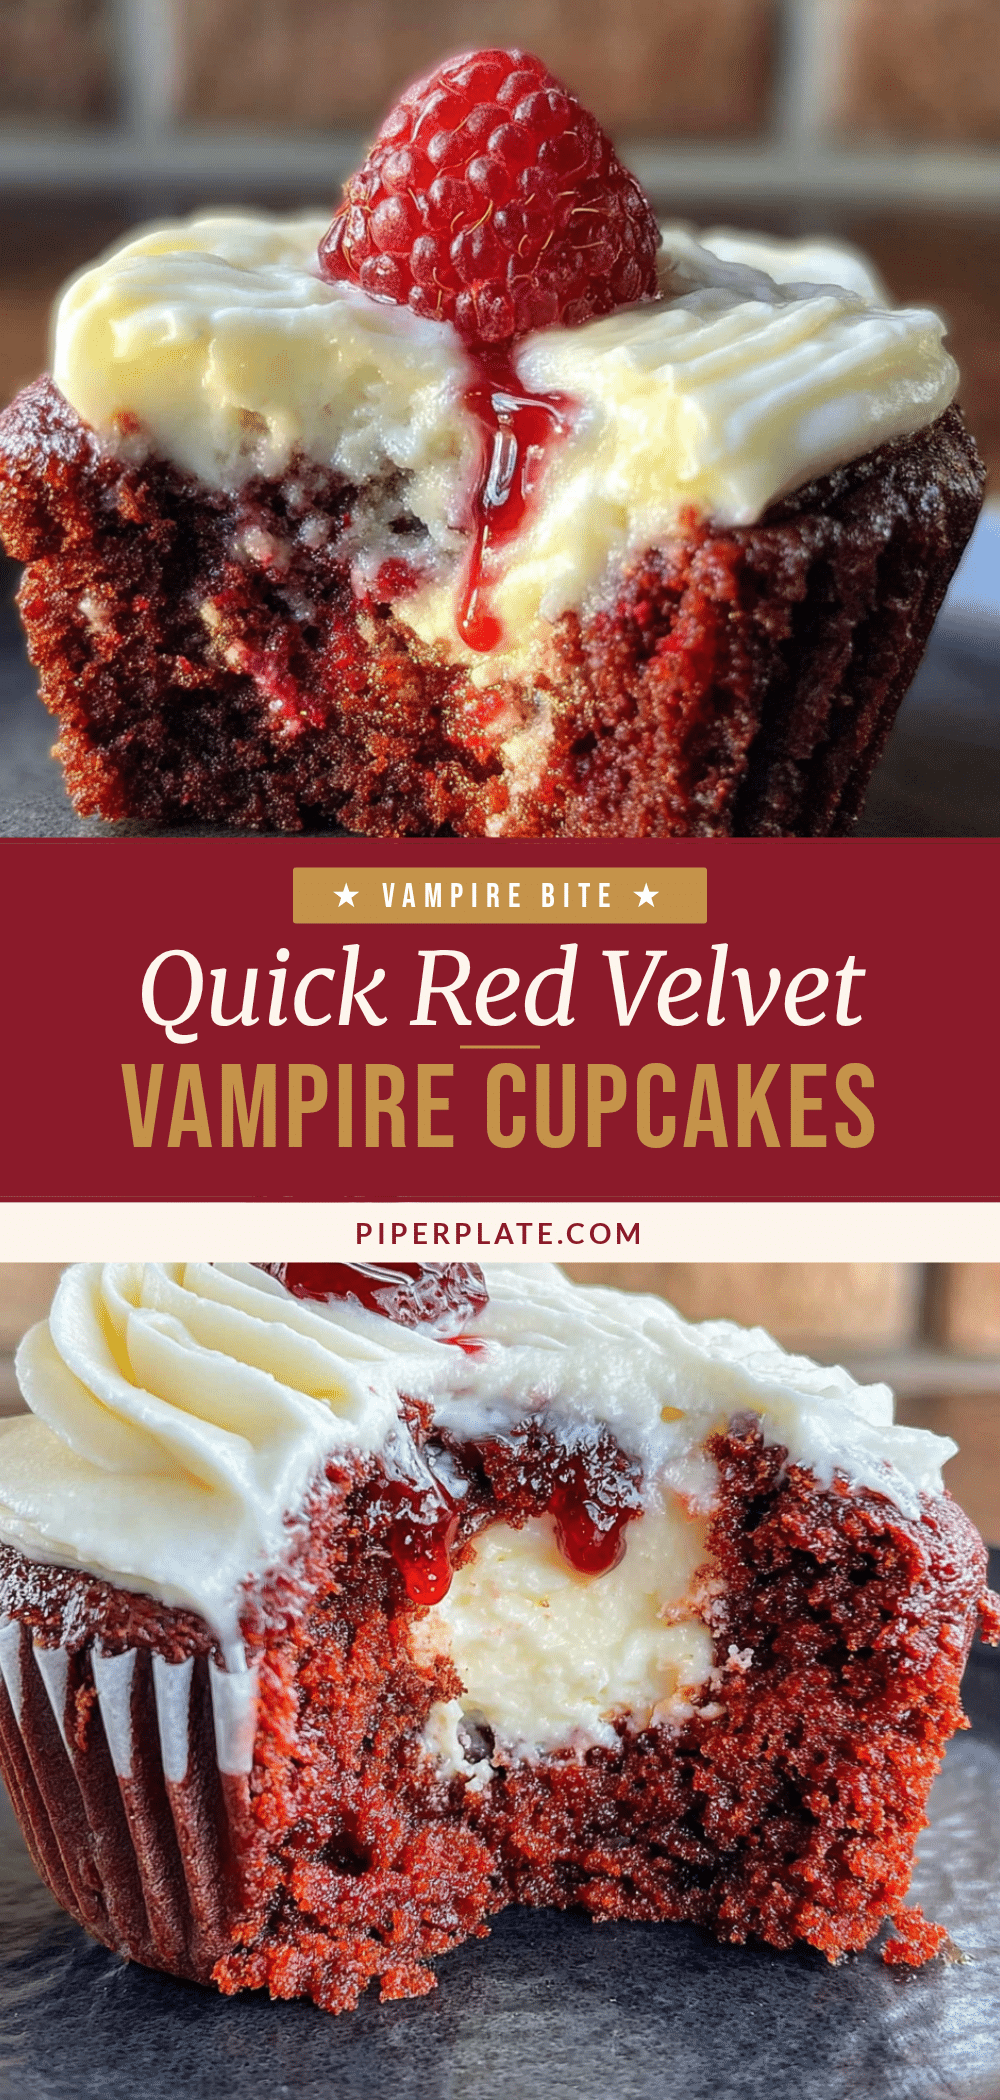
Quick Vampire Bite Red Velvet Cupcakes: Easy Best Recipe
These Quick Vampire Bite Red Velvet Cupcakes are a showstopper with a hidden raspberry jam center and a clever ‘vampire bite’ frosting trick. They come together in about 45 minutes using simple ingredients, making them perfect for Halloween or any fun gathering.
- Prep Time: 15 minutes
- Cook Time: 20 minutes
- Total Time: 45 minutes
- Yield: 12 servings 1x
- Category: Dessert
- Cuisine: American
Ingredients
- 1 ½ cups (190g) all-purpose flour
- 1 cup (200g) granulated sugar
- 1 tablespoon (8g) unsweetened cocoa powder
- 1 teaspoon baking soda
- ½ teaspoon salt
- ¾ cup (180ml) buttermilk, room temperature
- ½ cup (120ml) vegetable oil
- 1 large egg, room temperature
- 1 teaspoon vanilla extract
- 1 tablespoon (15ml) white vinegar
- 1 tablespoon (15ml) red gel food coloring
- ½ cup (160g) raspberry jam or preserves
- 8 oz (226g) cream cheese, softened
- ½ cup (113g) unsalted butter, softened
- 3 cups (360g) powdered sugar
- 1 teaspoon vanilla extract
- Pinch of salt
Instructions
- Preheat oven to 350°F (175°C). Line a 12-cup muffin tin with paper liners.
- In a large bowl, whisk together flour, sugar, cocoa powder, baking soda, and salt.
- In a separate bowl, whisk together buttermilk, oil, egg, vanilla extract, and white vinegar.
- Add red gel food coloring to the wet mixture and stir until fully incorporated.
- Pour wet ingredients into dry ingredients and fold gently with a rubber spatula until just combined (a few lumps are fine).
- Divide batter evenly among the 12 liners, filling each about ⅔ full.
- Bake for 18-22 minutes, or until a toothpick inserted into the center comes out clean or with a few moist crumbs.
- Let cupcakes cool in the pan for 5 minutes, then transfer to a wire rack to cool completely.
- For the frosting: In a large bowl, beat softened cream cheese and butter together with an electric mixer on medium speed until smooth and creamy, about 2 minutes.
- Gradually add powdered sugar, then add vanilla and a pinch of salt. Beat on medium-high for 2 minutes until light and fluffy.
- Once cupcakes are cool, use a small knife or apple corer to cut a cone-shaped hole in the top of each cupcake (about ¾ of the way down). Save the removed cake ‘lid’.
- Spoon about 1 teaspoon of raspberry jam into each hole.
- Cut the pointy tip off the saved cake lid and place the flat piece back on top of the jam to seal.
- Pipe a generous swirl of cream cheese frosting onto each cupcake.
- Use a small spoon or the back of a knife to gently press a small indent into the side of the frosting (the ‘vampire bite’).
- Dab a tiny bit of leftover raspberry jam inside the bite mark, letting a little drip down the side of the frosting.
Notes
For best results, use room temperature ingredients. Gel food coloring gives a deeper red than liquid. Do not overmix the batter. Start checking cupcakes at 18 minutes to avoid overbaking. The ‘vampire bite’ mark is best done right before serving.
Nutrition
- Serving Size: 1 cupcake
- Calories: 380
- Sugar: 34
- Sodium: 280
- Fat: 22
- Saturated Fat: 10
- Carbohydrates: 45
- Fiber: 1
- Protein: 4
Keywords: red velvet cupcakes, vampire bite, Halloween cupcakes, cream cheese frosting, raspberry jam, easy dessert


