Love this? Save it for later!
Share the inspiration with your friends
Last Saturday afternoon, I was wandering through the local farmers market when the unmistakable aroma of roasting green chiles hit me — and suddenly I was eight years old again, standing beside Mr. Ortega at his roadside chile stand just outside Santa Fe. The smoky, slightly charred scent wrapped around me like a cozy blanket, pulling me back to that cracked enamel pot where he slow-simmered Hatch chiles for hours. You know that moment when a smell transports you somewhere else entirely? That afternoon, I could almost taste the spicy green chile chicken enchiladas he’d whip up with that homemade hatch sauce—bright, fiery, and comforting all at once.
I honestly didn’t plan to recreate this dish that day, but the memory stuck with me like a gentle itch. I’d forgotten how much I loved the punch of fresh chiles balanced with tender chicken and melty cheese, all enveloped in a soft corn tortilla. Somehow, making these enchiladas feels like chasing that exact feeling from my childhood kitchen — where the sauce bubbles with smoky depth and the heat sneaks up on you just right. Maybe you’ve been there, trying to capture a dish that’s more than just food — it’s a sensory snapshot of a moment and place.
So, I rolled up my sleeves, pulled out my trusty cast iron skillet, and started slow-roasting Hatch chiles myself. The kitchen got messy — I forgot to wear gloves and ended up with a fiery tingle on my fingers — but that’s part of the charm. This recipe for Spicy Green Chile Chicken Enchiladas with Easy Homemade Hatch Sauce isn’t just about the spice; it’s about that smoky, comforting, slightly wild flavor that stayed with me all these years. Let me tell you, it’s worth every second you spend making it.
Why You’ll Love This Recipe
After testing countless versions of green chile chicken enchiladas, I can honestly say this recipe hits the sweet spot between bold flavor and approachable cooking. It’s been family-approved, friend-tested, and even won a few nods from the picky eaters at potlucks. Here’s why this dish comes through every time:
- Quick & Easy: From roast to plate in under an hour — perfect when you want something cozy but don’t want to wait all day.
- Simple Ingredients: No need for specialty stores; Hatch chiles can be fresh, canned, or frozen, and the rest are pantry staples you probably already have.
- Perfect for Entertaining: Whether it’s a casual weekend dinner or a festive gathering, these enchiladas always impress without fuss.
- Crowd-Pleaser: The balance of smoky heat and creamy cheese wins over even those who aren’t usually into spicy food.
- Unbelievably Delicious: The homemade Hatch sauce is the secret — it’s tangy, smoky, with just enough kick to keep you reaching for more.
This isn’t just another take on green chile enchiladas; the homemade hatch sauce makes all the difference. Roasting your own chiles and blending them into a vibrant sauce brings a depth and freshness that canned sauces just can’t touch. Honestly, the first bite will make you close your eyes and savor that perfect mix of heat and comfort. If you’ve loved recipes like my crispy garlic chicken, you’ll appreciate how this enchilada recipe combines boldness with homey warmth.
What Ingredients You Will Need
This recipe uses simple, wholesome ingredients to deliver bold flavor and satisfying texture without the fuss. Most of these are pantry staples, and the Hatch chiles are the star, bringing that authentic Southwestern flare. If Hatch chiles aren’t available, you can substitute with Anaheim or poblano peppers.
- For the Enchiladas:
- 2 cups cooked chicken, shredded (rotisserie works great here)
- 8-10 corn tortillas (fresh if possible; I prefer El Milagro brand for texture)
- 2 cups shredded Monterey Jack cheese (melts beautifully)
- 1/2 cup chopped white onion (adds a mild crunch)
- 1 tablespoon olive oil (for softening tortillas)
- For the Homemade Hatch Sauce:
- 4-5 fresh Hatch green chiles, roasted, peeled, and seeded (about 1 cup chopped)
- 2 cloves garlic, minced
- 1 cup chicken broth (low sodium preferred)
- 1/2 cup sour cream or Greek yogurt (for creaminess)
- 1 tablespoon all-purpose flour (to thicken)
- 1 tablespoon butter (unsalted)
- 1 teaspoon ground cumin
- Salt and pepper, to taste
- Optional Garnishes: chopped fresh cilantro, sliced avocado, lime wedges, and diced tomatoes
Tip: If you want to keep it dairy-free, swap sour cream with coconut yogurt and use a dairy-free butter substitute. For a gluten-free version, substitute flour with cornstarch or arrowroot powder.
Equipment Needed
- Cast iron skillet or oven-safe sauté pan (great for roasting and finishing the enchiladas)
- Baking dish (around 9×13 inches)
- Mixing bowls (various sizes for sauce and filling)
- Blender or food processor (to puree the Hatch sauce smoothly)
- Roasting pan or grill (for chiles)
- Measuring cups and spoons
- Wooden spoon or silicone spatula
- Knife and cutting board
If you don’t have a food processor, a sturdy blender works just fine for the sauce. When roasting chiles, a grill pan or broiler can substitute for an outdoor grill. I’ve found that cast iron heats evenly, which is perfect for toasting tortillas without drying them out. For budget-friendly options, a basic nonstick pan and a handheld blender will also get the job done well.
Preparation Method
- Roast the Hatch Chiles: Preheat your oven broiler or grill. Place 4-5 fresh Hatch green chiles on a baking sheet or directly on the grill grates. Turn every few minutes until the skin is blackened and blistered all over (about 8-10 minutes). Transfer chiles to a bowl and cover tightly with plastic wrap for 10 minutes to steam (this loosens the skin).
- Peel and Chop: Once cooled, peel off the charred skin carefully (wear gloves if you’re sensitive). Remove stems and seeds, then chop the chiles finely. Set aside about 1 cup for the sauce and save the rest for mixing with the chicken filling.
- Make the Hatch Sauce: In a medium saucepan, melt 1 tablespoon butter over medium heat. Add minced garlic and sauté until fragrant (about 30 seconds). Stir in 1 tablespoon flour and cook, stirring constantly for 1-2 minutes to form a roux.
- Add Liquids and Spices: Slowly whisk in 1 cup chicken broth until smooth. Add the chopped Hatch chiles and 1 teaspoon ground cumin. Simmer gently for 5 minutes, stirring occasionally.
- Blend the Sauce: Transfer the sauce to a blender or use an immersion blender to puree until smooth. Return to saucepan, stir in 1/2 cup sour cream or Greek yogurt, and season with salt and pepper to taste. Keep warm on low heat.
- Prepare the Chicken Filling: In a bowl, combine shredded chicken, remaining chopped roasted Hatch chiles, chopped onion, and 1 cup shredded Monterey Jack cheese. Mix well.
- Soften the Tortillas: Heat 1 tablespoon olive oil in a skillet over medium heat. Quickly warm each tortilla for about 10 seconds per side, just until pliable (don’t let them crisp). This helps prevent tearing when rolling.
- Assemble the Enchiladas: Preheat oven to 375°F (190°C). Spread a thin layer of Hatch sauce in the bottom of a 9×13 inch baking dish. Working one at a time, fill each softened tortilla with about 1/3 cup of the chicken mixture, roll tightly, and place seam-side down in the dish.
- Top and Bake: Pour remaining Hatch sauce evenly over the rolled enchiladas. Sprinkle the remaining 1 cup shredded cheese on top. Bake uncovered for 20-25 minutes, until cheese is melted and bubbly.
- Garnish and Serve: Let the enchiladas rest for 5 minutes before serving. Garnish with fresh cilantro, sliced avocado, lime wedges, or diced tomatoes as you like.
Note: If the sauce is too thick, add a splash more chicken broth to loosen it. When rolling tortillas, don’t overfill to avoid breakage. This method creates enchiladas bursting with flavor and that perfect spicy green chile kick.
Cooking Tips & Techniques
Honestly, the key to making these enchiladas sing is handling the Hatch chiles just right. Roasting them properly brings out that smoky, deep flavor that canned chiles simply can’t replicate. I learned the hard way that skipping the steaming step makes peeling a nightmare — plus, you lose some of the chile’s natural moisture.
Another tip: warming your tortillas briefly in oil keeps them pliable and prevents cracking when rolling. I sometimes lightly toast mine on a dry skillet, which adds a subtle texture contrast that’s pretty delightful.
Don’t rush the sauce! Taking a few minutes to make a proper roux with butter and flour gives it a silky texture that coats the enchiladas perfectly. Adding sour cream at the end softens the heat just enough and adds a little tang.
Common mistakes I’ve seen (and made) include overfilling tortillas, leading to splits, and using too much sauce, which can make the dish soggy. Also, watch the baking time; overbaking dries out the edges. Timing your prep so you can bake immediately after assembly keeps everything fresh and melty.
Multitasking tip: Roast chiles while shredding chicken and prepping onions. This way, you’re efficiently layering flavors without extra wait. If you want to save time, use pre-cooked chicken, but fresh-roasted chiles are worth every extra minute.
Variations & Adaptations
- Dairy-Free Version: Swap sour cream for coconut yogurt and use dairy-free cheese alternatives. The sauce still comes out creamy and rich.
- Vegetarian Option: Replace chicken with roasted sweet potatoes or black beans. Add corn and zucchini for extra texture and color.
- Spice Level: Adjust the heat by adding jalapeños to the sauce or using mild Anaheim chiles if you prefer less kick.
- Cooking Method: Instead of baking, you can cook enchiladas in a covered skillet over low heat for 15 minutes, which keeps things moist and speeds up dinner.
- Seasonal Twist: In fall, swap Hatch chiles with roasted poblano peppers and add pumpkin puree to the sauce for a subtle sweetness.
I once tried adding a splash of tequila to the sauce (because, why not?), and it added a surprising depth. Feel free to experiment with your own flavor twists!
Serving & Storage Suggestions
These enchiladas are best served hot and fresh, right out of the oven, with a squeeze of lime and a sprinkle of fresh cilantro. Pair them with a simple black bean salad or Mexican rice to round out the meal. A cold cerveza or a tangy margarita complements the spicy green chile chicken enchiladas beautifully.
Leftovers keep well in an airtight container in the refrigerator for up to 3 days. When reheating, cover with foil and warm in the oven at 350°F (175°C) to keep the cheese melty and the tortillas soft. Avoid the microwave if possible — it tends to dry them out.
The flavors actually deepen after a day or two, so I often make a double batch and enjoy the next-day magic. Just reheat gently, and you’ll get that same cozy, spicy satisfaction all over again.
Nutritional Information & Benefits
Each serving of these Spicy Green Chile Chicken Enchiladas provides approximately 350-400 calories, with a balanced mix of protein, carbs, and fats. Hatch chiles are rich in vitamins A and C and contain capsaicin, known for boosting metabolism and providing anti-inflammatory benefits.
Using lean chicken keeps the protein content high while keeping calories moderate. The homemade sauce avoids the preservatives and excess sodium found in many store-bought enchilada sauces, making it a healthier choice. For gluten-free diets, simply substitute the flour with cornstarch or a gluten-free blend.
This recipe fits well into balanced eating habits, offering warmth and spice without heaviness. I love that it satisfies my cravings while still feeling nourishing — a true win-win.
Conclusion
Spicy Green Chile Chicken Enchiladas with Easy Homemade Hatch Sauce are one of those dishes that feel like a warm hug from the Southwest. The smoky, spicy sauce paired with tender chicken and melty cheese keeps me coming back, especially when I want something that hits both comfort and flavor notes perfectly. You can tweak the heat, swap ingredients, or make it dairy-free — it’s super adaptable to what you like or have on hand.
I keep making this recipe because it brings that vivid memory of roasting chiles with Mr. Ortega back to my kitchen — and that’s a feeling that’s hard to beat. I’d love to hear how your version turns out, so don’t hesitate to share your tweaks or stories below. Let’s keep the spirit of Hatch chiles alive, one spicy enchilada at a time!
FAQs
Can I use canned green chiles instead of fresh Hatch chiles?
Yes, canned green chiles can be used if fresh Hatch chiles aren’t available, though the flavor is a bit milder and less smoky. Choose fire-roasted canned chiles for the best substitute.
How do I make the enchiladas less spicy?
Use mild Anaheim peppers instead of Hatch chiles or reduce the amount of chiles in the sauce. Adding extra sour cream or cheese also helps mellow the heat.
Can I prepare the sauce ahead of time?
Absolutely! The Hatch sauce can be made a day in advance and stored in the fridge. Reheat gently before assembling the enchiladas.
What’s the best way to shred chicken for this recipe?
Using two forks to pull apart warm cooked chicken works well. Alternatively, you can pulse cooked chicken briefly in a food processor for a finer texture.
Can I freeze these enchiladas?
Yes, you can freeze the assembled enchiladas before baking. Wrap tightly with foil and freeze up to 2 months. Bake from frozen, adding extra cooking time until heated through.
Pin This Recipe!

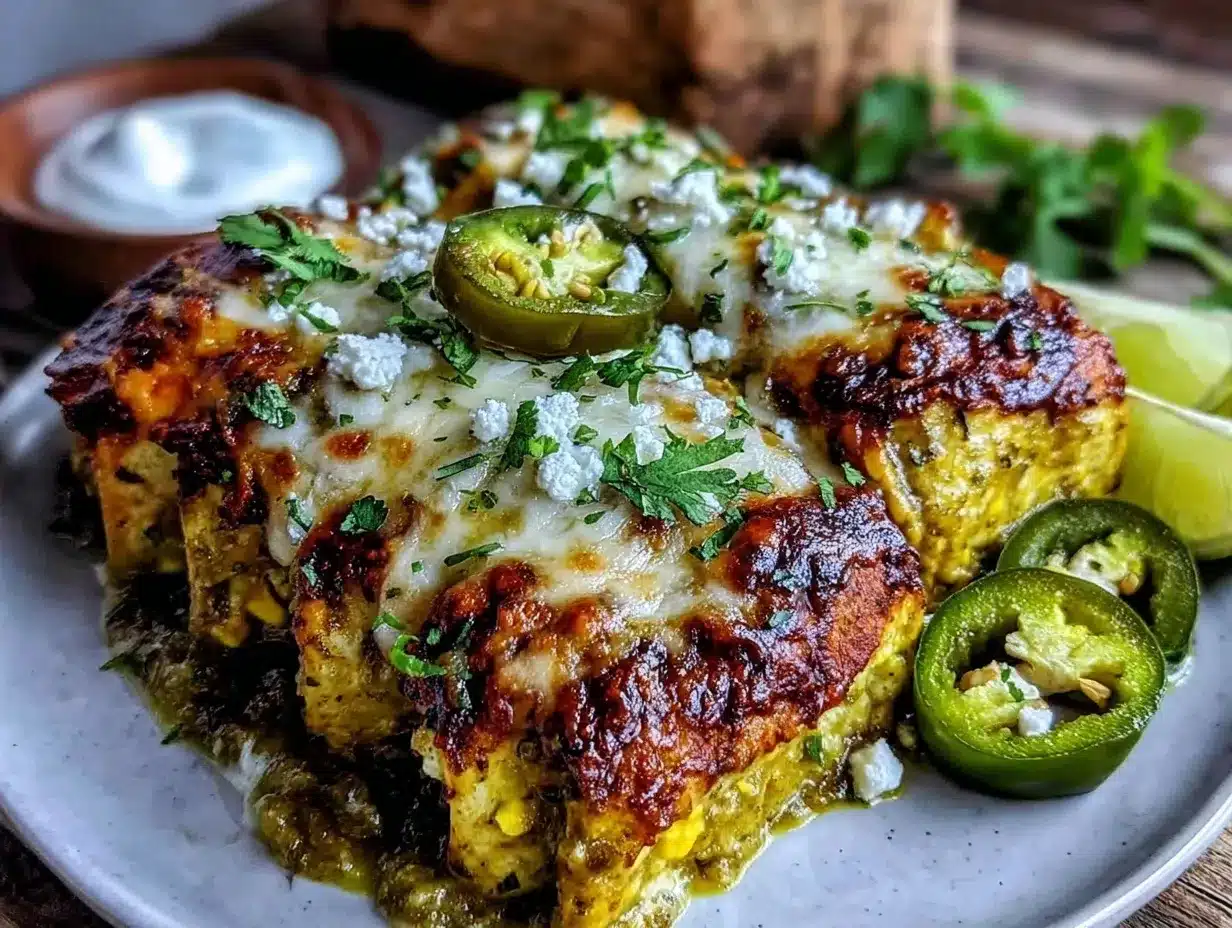
Spicy Green Chile Chicken Enchiladas with Easy Homemade Hatch Sauce

These enchiladas feature tender shredded chicken, melty Monterey Jack cheese, and a smoky, spicy homemade Hatch green chile sauce. Perfectly balanced with bold Southwestern flavors, they are quick to prepare and crowd-pleasing.
- Prep Time: 20 minutes
- Cook Time: 30 minutes
- Total Time: 50 minutes
- Yield: 4-6 servings 1x
- Category: Main Course
- Cuisine: Southwestern / Mexican
Ingredients
- 2 cups cooked chicken, shredded (rotisserie works great)
- 8–10 corn tortillas (fresh if possible; El Milagro brand preferred)
- 2 cups shredded Monterey Jack cheese
- 1/2 cup chopped white onion
- 1 tablespoon olive oil
- 4–5 fresh Hatch green chiles, roasted, peeled, and seeded (about 1 cup chopped)
- 2 cloves garlic, minced
- 1 cup chicken broth (low sodium preferred)
- 1/2 cup sour cream or Greek yogurt
- 1 tablespoon all-purpose flour
- 1 tablespoon unsalted butter
- 1 teaspoon ground cumin
- Salt and pepper, to taste
- Optional garnishes: chopped fresh cilantro, sliced avocado, lime wedges, diced tomatoes
Instructions
- Preheat oven broiler or grill. Roast 4-5 fresh Hatch green chiles on a baking sheet or grill grates, turning every few minutes until skin is blackened and blistered (about 8-10 minutes). Transfer chiles to a bowl and cover tightly with plastic wrap for 10 minutes to steam.
- Peel off charred skin carefully, remove stems and seeds, then chop chiles finely. Set aside about 1 cup for the sauce and save the rest for mixing with the chicken filling.
- In a medium saucepan, melt 1 tablespoon butter over medium heat. Add minced garlic and sauté until fragrant (about 30 seconds). Stir in 1 tablespoon flour and cook, stirring constantly for 1-2 minutes to form a roux.
- Slowly whisk in 1 cup chicken broth until smooth. Add chopped Hatch chiles and 1 teaspoon ground cumin. Simmer gently for 5 minutes, stirring occasionally.
- Transfer sauce to a blender or use an immersion blender to puree until smooth. Return to saucepan, stir in 1/2 cup sour cream or Greek yogurt, and season with salt and pepper to taste. Keep warm on low heat.
- In a bowl, combine shredded chicken, remaining chopped roasted Hatch chiles, chopped onion, and 1 cup shredded Monterey Jack cheese. Mix well.
- Heat 1 tablespoon olive oil in a skillet over medium heat. Quickly warm each tortilla for about 10 seconds per side until pliable.
- Preheat oven to 375°F (190°C). Spread a thin layer of Hatch sauce in the bottom of a 9×13 inch baking dish. Fill each softened tortilla with about 1/3 cup of the chicken mixture, roll tightly, and place seam-side down in the dish.
- Pour remaining Hatch sauce evenly over the rolled enchiladas. Sprinkle remaining 1 cup shredded cheese on top. Bake uncovered for 20-25 minutes until cheese is melted and bubbly.
- Let enchiladas rest for 5 minutes before serving. Garnish with fresh cilantro, sliced avocado, lime wedges, or diced tomatoes as desired.
Notes
If sauce is too thick, add more chicken broth to loosen. Wear gloves when handling chiles if sensitive. Warm tortillas briefly in oil to prevent tearing. Avoid overfilling tortillas to prevent breakage. Sauce can be made ahead and reheated gently. For dairy-free, substitute sour cream with coconut yogurt and butter with dairy-free alternatives. For gluten-free, substitute flour with cornstarch or arrowroot powder.
Nutrition
- Serving Size: 1 enchilada (approxi
- Calories: 375
- Sugar: 3
- Sodium: 450
- Fat: 18
- Saturated Fat: 7
- Carbohydrates: 25
- Fiber: 4
- Protein: 28
Keywords: green chile enchiladas, Hatch chiles, chicken enchiladas, homemade enchilada sauce, spicy enchiladas, Southwestern cuisine