Love this? Save it for later!
Share the inspiration with your friends
My friend Jenna watched me fumbling with a piping bag of melted chocolate one October afternoon, my kitchen counter looking like a crime scene of cocoa and crushed almonds. She didn’t say anything at first. Then she reached into her apron pocket and pulled out a bag of pretzel rods, a jar of green candy melts, and a sly grin. “You’re overthinking it,” she said, setting them on the counter. “Halloween treats don’t need to be perfect. They need to be creepy.” That afternoon, standing in her slightly chaotic kitchen with her toddler stealing almonds off the tray, we made our first batch of witch finger pretzels. I mean, honestly, I was skeptical at first. Pretzels as witch fingers? But then I saw how the salty crunch played off the sweet candy coating, and the way a single slivered almond nail made the whole thing look disturbingly real. Let me tell you, these spooky witch finger pretzel Halloween treats are the kind of recipe that makes you feel like a kitchen wizard with almost zero effort. Maybe you’ve been there, scrolling through Pinterest for hours looking for that perfect Halloween snack that isn’t a total disaster to make. These are it. They’ve become my go-to for every Halloween party, and I keep making them because they’re genuinely fun to create and even more fun to watch people’s faces when they bite into what looks like a witch’s finger.
Why You’ll Love This Recipe
These spooky witch finger pretzel Halloween treats are honestly the best thing to happen to my Halloween menu, and I’ve tested about fifteen different versions over the years. Here’s why they win every single time:
- Quick & Easy: Comes together in under 30 minutes, perfect for last-minute Halloween cravings or when the kids suddenly announce they need treats for school tomorrow.
- Simple Ingredients: No fancy grocery trips needed. You likely already have pretzel rods in your pantry, and the rest is just candy melts and almonds.
- Perfect for Halloween Parties: Great for classroom treats, office parties, or that spooky movie night you’ve been planning.
- Crowd-Pleaser: Always gets screams and laughs from kids and adults alike. I’ve seen grown adults do a double-take before taking a bite.
- Unbelievably Delicious: The salty-sweet combo with that satisfying crunch is next-level comfort food.
What makes this recipe different from the rest is the technique I learned from Jenna that day. Instead of just dipping the pretzels, we paint on the candy coating in thin layers to create that realistic knobby finger texture. The secret is letting each layer set just slightly before adding the next wrinkle. It’s not just another version of a dipped pretzel—it’s your best version of a creepy Halloween snack that actually looks like it belongs in a witch’s kitchen.
This recipe isn’t just good—it is the kind that makes you close your eyes after the first bite. It’s comfort food reimagined for Halloween, with the same soul-soothing satisfaction of a sweet and salty snack but with a spooky twist that makes everyone smile.
What Ingredients You Will Need
This recipe uses simple, wholesome ingredients to deliver that perfect balance of salty and sweet with a creepy visual payoff. Most of these are pantry staples or easy to find at any grocery store during the Halloween season.
For the Witch Fingers
- Pretzel rods: 24 standard-sized rods (look for thick, straight ones for the best finger shape). I recommend Snyder’s of Hanover for their sturdy texture.
- Green candy melts: 12 ounces (340g) – (adds that classic witchy skin tone). Wilton brand works great and melts smoothly.
- Slivered almonds: 24 pieces, whole and unbroken – (these become the fingernails, so be gentle with them).
- Coconut oil: 1 teaspoon (5ml) – (helps thin the candy coating for smoother dipping).
For the Details (Optional but Recommended)
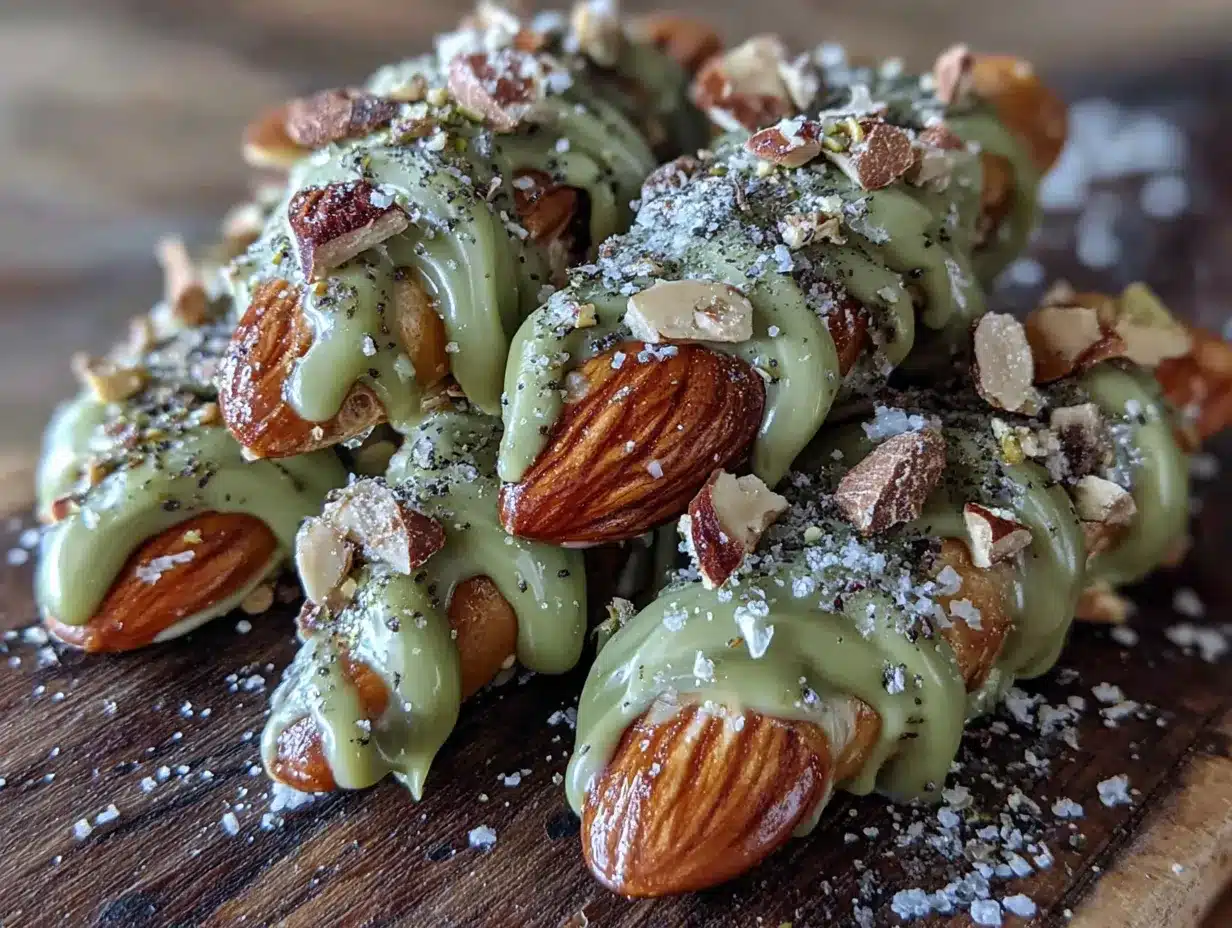
- Red gel food coloring: A tiny drop – (for bloody cuticle effects, if you’re going for extra creepy).
- Pretzel crumbs: 2 tablespoons – (for adding texture and dirt-like appearance).
- Purple or black candy melts: 2 ounces (57g) – (for witchy nail polish accents, totally optional but fun).
For the best results, look for fresh candy melts that haven’t been sitting in your pantry for two years. Trust me on this one. Old candy melts get clumpy and don’t set properly. Also, make sure your slivered almonds are whole and not broken into tiny pieces. I learned this the hard way when I tried to use almond slivers from the bottom of the bag and ended up with witch fingers that looked like they had a bad nail day.
If you need substitutions, white chocolate chips with green food coloring work in a pinch, though the color won’t be as vibrant. For a nut-free version, use small candy corn pieces for the nails instead of almonds. Just press them on while the coating is still wet.
Equipment Needed
You don’t need a fancy kitchen to make these spooky witch finger pretzel Halloween treats. Here’s what I use:
- Microwave-safe bowls: Two medium-sized bowls for melting your candy coatings.
- Parchment paper or silicone baking mat: For placing your finished pretzels to set. Wax paper works too, but parchment is less likely to stick.
- Baking sheet: To hold your parchment paper and keep everything organized.
- Small piping bag or zip-top bag: For adding those creepy knuckle details. A zip-top bag with a tiny corner snipped off works perfectly.
- Toothpicks: For fixing any mistakes and adding fine details.
- Tweezers: Sounds fancy, but they’re amazing for placing those almond nails precisely. Clean craft tweezers work great.
If you don’t have a piping bag, don’t stress. I’ve used a clean ketchup bottle in a pinch. Just wash it really well first. For a budget-friendly option, dollar store baking sheets work just fine for this project.
Preparation Method
Let’s get creepy! Follow these steps carefully, and you’ll have the most realistic witch finger pretzels at any Halloween gathering.
- Prep your workspace: Line a large baking sheet with parchment paper. Arrange your pretzel rods in a single layer nearby. Count out 24 whole slivered almonds and set them in a small bowl. This organization step saves so much stress later, trust me.
- Melt the green candy coating: Place 12 ounces (340g) of green candy melts in a microwave-safe bowl. Add 1 teaspoon (5ml) of coconut oil. Microwave in 30-second intervals at 50% power, stirring thoroughly after each interval. It usually takes about 2 minutes total. Stir until completely smooth with no lumps. The coconut oil helps create a thinner, more workable consistency. If your mixture seems too thick, add another ½ teaspoon of coconut oil.
- Dip the pretzels: Working with one pretzel rod at a time, hold it by one end and dip it into the melted green coating. Tilt the bowl slightly to get deeper coverage. Use a spoon to help coat the pretzel evenly if needed. Let the excess drip back into the bowl for about 5 seconds. You want a thin, even layer—not a thick, gloppy mess. Place the coated pretzel on your parchment-lined baking sheet.
- Attach the fingernails: While the coating is still wet, gently press one whole slivered almond onto the tip of each pretzel. The pointed end should face outward, away from the pretzel, like a fingernail extending past the fingertip. Press lightly but firmly so it sticks. Use your tweezers for precision if you have them. Work quickly here because the coating sets fast.
- Create the knuckle wrinkles: Let the dipped pretzels set for about 5 minutes until the coating is firm to the touch but not completely hard. This is the sweet spot. Using your small piping bag or zip-top bag with a tiny snipped corner, pipe thin lines of green coating across the pretzel at the knuckle points. You want about three or four horizontal lines per finger, spaced like real knuckles. Don’t overthink this—imperfect lines actually look more realistic, like real wrinkled witch fingers.
- Add the cuticle details: For extra realism, dip a toothpick into red gel food coloring and gently swipe a tiny line at the base of each almond nail. This creates that creepy “bloody cuticle” effect that makes people do a double-take. Use a very light hand here. You want it to look like a suggestion of blood, not a horror movie massacre.
- Optional nail polish: If you’re feeling extra creative, melt a small amount of purple or black candy melts. Using a toothpick, paint a tiny stripe across the top of each almond nail. This gives your witch fingers a glamorous touch. I did this for a Halloween party once and someone asked if the witch had a manicure appointment before her shift.
- Set completely: Let your witch finger pretzels set at room temperature for about 20 minutes, or pop them in the refrigerator for 10 minutes if you’re impatient like me. The coating should be completely hard and shiny before you try to move them.
- Add the finishing touch: For a truly spooky presentation, sprinkle a few pretzel crumbs over the finished fingers before the coating sets completely. It looks like dirt from the witch’s garden. My niece asked if the witch washed her hands before making these, and honestly, that’s exactly the reaction you want.
Cooking Tips & Techniques
After making about a million batches of these spooky witch finger pretzel Halloween treats, I’ve picked up some tricks that make the process smoother and the results creepier.
The temperature game matters. Candy melts are finicky about heat. If you overheat them, they’ll seize up into a thick, unusable mess. Always microwave at 50% power and stir frequently. If your coating starts to thicken while you’re working, pop it back in the microwave for 10 seconds and stir. I once ruined a whole bag of candy melts by blasting them on high for a minute. Let’s just say that batch became a science experiment, not a Halloween treat.
Work in small batches. Don’t try to dip all 24 pretzels at once. Work with about 6 to 8 at a time, especially when you’re adding the almond nails. The coating sets quickly, and you want those nails to stick properly. I learned this when I tried to dip all 24 at once and ended up with a tray of bald witch fingers.
The knuckle trick. For the most realistic wrinkles, let the first layer of coating set until it’s just barely firm, then pipe on the knuckle lines. If you pipe them while the coating is still wet, they’ll melt into the surface and disappear. If you wait too long, they won’t stick. That tacky stage is your window of opportunity.
Fix mistakes quickly. If an almond nail falls off or a knuckle line smudges, just dab a tiny bit of melted coating on the spot and reapply. Keep a toothpick handy for precise fixes. Don’t let perfectionism slow you down. Remember, real witches probably have crooked fingers anyway.
Timing strategy. Make these the day before your Halloween event. They keep perfectly at room temperature in an airtight container, and it’s one less thing to stress about on party day. I always make a double batch because they disappear fast.
Variations & Adaptations
These spooky witch finger pretzel Halloween treats are endlessly customizable. Here are some variations I’ve tried and loved:
Color variations: Use purple candy melts for a more magical witch look, or orange for a pumpkin spice witch. I made a batch with purple coating and silver sprinkles for a galaxy witch theme, and they looked incredible. For a zombie version, use gray candy melts and add a tiny dot of red at the tip of each finger.
Dietary adaptations: For a gluten-free version, use gluten-free pretzel rods. They’re available at most health food stores. For a nut-free version, skip the almond nails and use small candy corn pieces instead. The texture is different but still delicious. For a vegan version, use vegan candy melts and dairy-free pretzels. Most candy melts are accidentally vegan anyway, but always check the label.
Flavor twists: Add a drop of peppermint extract to the green coating for a minty witch finger. Or try adding a pinch of cinnamon and cayenne for a spicy witch vibe. My personal favorite variation uses white chocolate coating with matcha powder for a natural green color and a subtle earthy flavor. It’s less sweet and feels slightly more sophisticated.
Different nail styles: Instead of almonds, try using small pumpkin seeds for a shorter, rounder nail shape. Or use black sesame seeds for tiny, creepy nails that look like they belong on a spider witch. I tried using candy corn for the nails once, and they looked like witch fingers with fancy acrylics. Honestly, it was hilarious.
Bloody version: For an extra gruesome take, drizzle melted red candy melts over the finished fingers to look like blood. Just be careful not to overdo it. You want creepy, not messy. I made these for a horror movie marathon and they were a hit, though my friend refused to eat them until she saw me take a bite first.
Serving & Storage Suggestions
These spooky witch finger pretzel Halloween treats are best served at room temperature, which keeps the coating firm and the pretzel crunchy. Arrange them on a platter with the almond nails pointing outward for maximum creep factor. I like to serve them on a black platter with some fake spider webs draped around the edges for a full Halloween vibe.
For presentation, try standing them upright in a mason jar filled with black beans or coffee grounds. They look like a bouquet of witch fingers reaching out to grab unsuspecting guests. My kids love this presentation because they can grab one like a bouquet flower. Just make sure the beans or coffee grounds are food-safe and not touching the coated parts directly if you’re worried about transfer.
These pair beautifully with a warm apple cider or a pumpkin spice latte for the adults. For kids, serve them with a glass of milk or some orange soda. They also work great alongside a cheese board for a savory-sweet Halloween spread. The salty pretzel balances beautifully with sharp cheddar or creamy brie.
For storage, keep your witch finger pretzels in an airtight container at room temperature for up to one week. Do not refrigerate them, as the moisture will make the pretzels soggy and the coating may develop condensation. If you need to store them longer, freeze them in a single layer on a baking sheet, then transfer to a freezer bag. They’ll keep for up to three months. Thaw at room temperature for about 15 minutes before serving.
The flavors actually develop nicely over the first day or two. The salt from the pretzel melds with the sweet coating, and the almond nails get slightly softer, which makes them easier to bite through. I actually prefer them on day two, when everything has settled into perfect harmony.
Nutritional Information & Benefits
Each spooky witch finger pretzel Halloween treat (one pretzel rod with coating and almond) contains approximately:
- Calories: 140
- Total Fat: 7g
- Saturated Fat: 5g
- Carbohydrates: 18g
- Sugar: 12g
- Protein: 2g
- Sodium: 180mg
These treats are a fun indulgence for Halloween, but they do offer a few bright spots. Almonds provide healthy fats, vitamin E, and magnesium. Pretzels offer a quick energy boost from carbohydrates, though they’re higher in sodium. The candy coating is mostly sugar, so these are definitely a treat, not an everyday snack.
For dietary considerations, these are egg-free and can be made vegan with the right ingredients. They are not gluten-free unless you use gluten-free pretzels. Potential allergens include dairy (in the candy melts), tree nuts (almonds), and wheat (pretzels). Always check your ingredient labels if you’re serving guests with allergies.
From a wellness perspective, I believe in enjoying treats in moderation, especially around holidays. These witch finger pretzels are about fun and celebration, not nutrition. One or two are perfectly fine for a Halloween treat, and the portion control is built right in with the individual pretzel rods.
Conclusion
These spooky witch finger pretzel Halloween treats are honestly the easiest way to make a big impression with minimal effort. They look like you spent hours in the kitchen, but the whole process takes about 30 minutes from start to finish. The salty-sweet combination with that satisfying crunch is absolutely addictive, and the creepy visual effect never fails to get a reaction.
I love this recipe because it’s flexible enough for anyone to customize. Make them as simple or as detailed as you want. Add bloody cuticles or skip them. Use different colors or different nail shapes. The base recipe is forgiving and always turns out delicious. Plus, it’s a fantastic activity to do with kids or friends on a cozy October afternoon.
I’d love to hear how your witch fingers turn out! Drop a comment below and tell me what color coating you used or if you came up with any creative variations. Share your photos on Pinterest and tag me so I can see your spooky creations. And if you make these for a party, let me know how many people screamed before taking a bite. Happy Halloween, and happy snacking!
Frequently Asked Questions
Can I use white chocolate instead of candy melts?
Yes, absolutely! Use 12 ounces of white chocolate chips or melting wafers. Add green gel food coloring until you reach your desired witchy shade. White chocolate is creamier than candy melts, so the texture will be slightly different but still delicious. Just be careful not to overheat white chocolate, as it can seize up easily.
How far in advance can I make these witch finger pretzels?
You can make these up to one week ahead of time. Store them in an airtight container at room temperature, away from heat and sunlight. The coating stays firm and shiny, and the pretzels stay crunchy. If you’re making them for a party, I recommend making them two to three days in advance for the best texture and flavor.
My candy melts are too thick. What should I do?
Add a teaspoon of coconut oil or vegetable shortening to your melted candy melts and stir well. This will thin out the coating without affecting the taste or setting properties. Do not add water, milk, or butter, as these will cause the candy melts to seize up into a grainy, unusable mess. I keep a small jar of coconut oil specifically for this purpose.
Can I freeze these Halloween treats?
Yes, you can freeze them for up to three months. Place them in a single layer on a baking sheet and freeze until solid, about one hour. Then transfer them to a freezer-safe bag or container with parchment paper between layers. Thaw at room temperature for about 15 minutes before serving. The coating may develop a slight bloom (white streaks) from condensation, but they’ll still taste great.
How do I get the almond nails to stick properly?
The key is pressing the almond into the coating while it’s still wet, right after dipping. If the coating has started to set, dip the back of the almond into the melted coating before pressing it onto the pretzel. This creates a glue-like bond. Also, make sure your almonds are whole and not broken, as broken pieces don’t stick as well. Tweezers help with precise placement.
Pin This Recipe!

Spooky Witch Finger Pretzels: Easy Halloween Treats

These spooky witch finger pretzel Halloween treats are the easiest way to make a big impression with minimal effort. They look like you spent hours in the kitchen, but the whole process takes about 30 minutes from start to finish.
- Prep Time: 10 minutes
- Cook Time: 20 minutes
- Total Time: 30 minutes
- Yield: 24 servings 1x
- Category: Dessert
- Cuisine: American
Ingredients
- 24 standard-sized pretzel rods (e.g., Snyder’s of Hanover)
- 12 ounces (340g) green candy melts (e.g., Wilton)
- 24 whole slivered almonds
- 1 teaspoon (5ml) coconut oil
- Red gel food coloring (optional, for cuticle effect)
- 2 tablespoons pretzel crumbs (optional, for texture)
- 2 ounces (57g) purple or black candy melts (optional, for nail polish)
Instructions
- Prep your workspace: Line a large baking sheet with parchment paper. Arrange your pretzel rods in a single layer nearby. Count out 24 whole slivered almonds and set them in a small bowl.
- Melt the green candy coating: Place 12 ounces (340g) of green candy melts in a microwave-safe bowl. Add 1 teaspoon (5ml) of coconut oil. Microwave in 30-second intervals at 50% power, stirring thoroughly after each interval. It usually takes about 2 minutes total. Stir until completely smooth with no lumps.
- Dip the pretzels: Working with one pretzel rod at a time, hold it by one end and dip it into the melted green coating. Tilt the bowl slightly to get deeper coverage. Use a spoon to help coat the pretzel evenly if needed. Let the excess drip back into the bowl for about 5 seconds. Place the coated pretzel on your parchment-lined baking sheet.
- Attach the fingernails: While the coating is still wet, gently press one whole slivered almond onto the tip of each pretzel. The pointed end should face outward, away from the pretzel, like a fingernail extending past the fingertip. Press lightly but firmly so it sticks. Use tweezers for precision if you have them.
- Create the knuckle wrinkles: Let the dipped pretzels set for about 5 minutes until the coating is firm to the touch but not completely hard. Using a small piping bag or zip-top bag with a tiny snipped corner, pipe thin lines of green coating across the pretzel at the knuckle points. You want about three or four horizontal lines per finger.
- Add the cuticle details: For extra realism, dip a toothpick into red gel food coloring and gently swipe a tiny line at the base of each almond nail.
- Optional nail polish: If desired, melt a small amount of purple or black candy melts. Using a toothpick, paint a tiny stripe across the top of each almond nail.
- Set completely: Let your witch finger pretzels set at room temperature for about 20 minutes, or refrigerate for 10 minutes. The coating should be completely hard and shiny before moving them.
- Add the finishing touch: For a truly spooky presentation, sprinkle a few pretzel crumbs over the finished fingers before the coating sets completely.
Notes
Work in small batches (6-8 pretzels at a time) to ensure the coating stays workable. For the most realistic wrinkles, pipe knuckle lines when the coating is just barely firm. If an almond nail falls off, dab a bit of melted coating on the spot and reapply. These keep perfectly at room temperature in an airtight container for up to one week.
Nutrition
- Serving Size: 1 pretzel rod
- Calories: 140
- Sugar: 12
- Sodium: 180
- Fat: 7
- Saturated Fat: 5
- Carbohydrates: 18
- Protein: 2
Keywords: Halloween treats, witch finger pretzels, spooky snacks, easy Halloween recipe, pretzel rods, candy melts, Halloween party food


