Love this? Save it for later!
Share the inspiration with your friends
My college roommate asked why I couldn’t just throw candy corn into a basic blondie recipe instead of making some complicated layered bar situation. I started to explain why that wouldn’t work — candy corn melts weird, it’s too sugary, it would burn. Then I stopped. I honestly had no good reason, I just assumed it would be a disaster. So I grabbed a box of candy corn, made my standard blondie batter, and folded in a handful of those little orange triangles like I was daring them to prove me right. They did the exact opposite.
That first batch came out of the oven looking suspiciously perfect. The edges were golden, the center was soft, and the candy corn had mostly melted into these gorgeous little pockets of buttery sweetness. I let them cool for maybe ten minutes before cutting into one — impatient, as always — and that first bite made me laugh out loud. I mean, honestly, I was so sure this was going to be a sticky, sugary mess. Instead, it was this incredible chewy bar with caramel-like pockets where the candy corn had dissolved. My roommate just smiled and said, “Told you.”
I’ve made these Ultimate Chewy Candy Corn Blondie Bars every fall since then. They’ve become my go-to for Halloween parties, tailgates, and those random Tuesday nights when you want something sweet but don’t want to deal with a whole production. The recipe is almost embarrassingly simple — one bowl, no mixer, ten minutes of prep. But the result? It’s the kind of bar that disappears before you’ve even finished cutting them. You know that feeling when you find a recipe that just works, no fuss, no stress? That’s this one. These candy corn blondie bars are exactly that.
Why You’ll Love This Recipe
After years of testing and tweaking, I can confidently say these are the best candy corn blondie bars you’ll make. Here’s why they’ve earned a permanent spot in my fall baking rotation:
- One-Bowl Wonder: No mixer, no separate bowls, no complicated steps. Everything comes together in one bowl with a spatula. Less dishes, more time for eating.
- Perfectly Chewy Texture: These blondies have that ideal balance — crispy edges, soft centers, and a chew that lasts for days. The candy corn melts into caramel-like pockets that add the most incredible texture.
- Simple Pantry Ingredients: Butter, sugar, eggs, flour, vanilla, and candy corn. That’s it. You probably have everything except the candy corn already in your kitchen.
- Halloween Party Hero: These bars are the first thing to disappear at every gathering. Kids love the candy corn, adults love the butterscotch-like flavor, and everyone loves how easy they are to grab and go.
- No Fancy Techniques: If you can stir, you can make these. There’s no creaming, no folding, no tempering. Just mix, pour, bake, and enjoy.
- Make-Ahead Friendly: These bars actually taste better the next day. The flavors meld together, and the texture gets even more fudgy and delicious.
What makes these candy corn blondie bars different from every other recipe out there? It’s the technique. Most recipes tell you to sprinkle candy corn on top, which leads to burnt, hard pieces. I fold them into the batter, where they melt gently into buttery pockets of sweetness. The result is a blondie that tastes like a cross between a classic butterscotch bar and a caramel cookie, with just a hint of that signature candy corn flavor. It’s subtle, it’s delicious, and it’s completely addictive.
What Ingredients You Will Need
This recipe uses simple, everyday ingredients to create something truly special. The magic happens when the candy corn melts into the batter, creating those irresistible caramel-like pockets.
- Unsalted Butter, melted and slightly cooled — ½ cup (1 stick or 113g). I always use unsalted to control the salt level. Let it cool for a few minutes after melting so it doesn’t cook the eggs.
- Light Brown Sugar, packed — 1 cup (200g). This is the secret to that chewy texture and deep, molasses-like flavor. Don’t substitute white sugar here, the blondies won’t be the same.
- Granulated Sugar — ¼ cup (50g). Just a little bit helps balance the sweetness and gives the edges that slight crispiness.
- Large Egg — 1, at room temperature. A room-temperature egg incorporates more easily into the batter, giving you a smoother, more consistent texture.
- Egg Yolk — 1, also at room temperature. The extra yolk adds richness and makes the blondies extra chewy. Save the white for scrambled eggs tomorrow.
- Pure Vanilla Extract — 2 teaspoons. I use pure vanilla, not imitation, for the best flavor. It really shines in a simple recipe like this.
- All-Purpose Flour — 1½ cups (180g). Spoon and level your flour for accurate measuring. Scooping directly from the bag packs in too much flour and makes dry blondies.
- Salt — ½ teaspoon. Don’t skip this! Salt balances the sweetness and enhances all the other flavors.
- Baking Powder — ½ teaspoon. Just enough to give the blondies a little lift without making them cakey.
- Candy Corn — 1½ cups (about 225g). Use fresh candy corn for the best results. Stale candy corn can be hard and won’t melt as nicely. I’ve tested this with Brach’s and store brands, both work great.
Ingredient Tips: If you can’t find candy corn, you can substitute with candy pumpkins (chopped) or even butterscotch chips for a different but equally delicious flavor. For a seasonal twist, try using autumn mix candy corn with the little pumpkins — the colors are gorgeous. I’ve also made these with the chocolate-flavored candy corn, and while they’re good, nothing beats the original.
Equipment Needed
You don’t need fancy equipment for these candy corn blondie bars. Here’s what you’ll need:
- 8×8-inch Baking Pan — This is the perfect size for thick, chewy blondies. A 9×9-inch pan works too, but your bars will be thinner and bake faster, so check them a few minutes early.
- Parchment Paper — Cut two strips to create a sling for easy removal. Trust me, this makes cutting neat squares so much easier than trying to scoop them out of the pan.
- Large Mixing Bowl — Any medium-to-large bowl will work. I use a glass bowl because I can see when the butter and sugar are fully combined.
- Whisk or Spatula — A wooden spoon, silicone spatula, or even a sturdy whisk will do. No electric mixer needed.
- Measuring Cups and Spoons — For accurate measuring. I prefer metal measuring cups for dry ingredients and glass for liquids.
- Kitchen Scale (optional but helpful) — If you have one, weighing your flour ensures perfect results every time. If not, spoon and level carefully.
- Cooling Rack — For cooling the blondies completely before cutting. This prevents them from crumbling.
I’ve made these bars with a cheap baking pan from the dollar store, and they turned out great. The only non-negotiable is the parchment paper sling — it really does make a difference.
Preparation Method
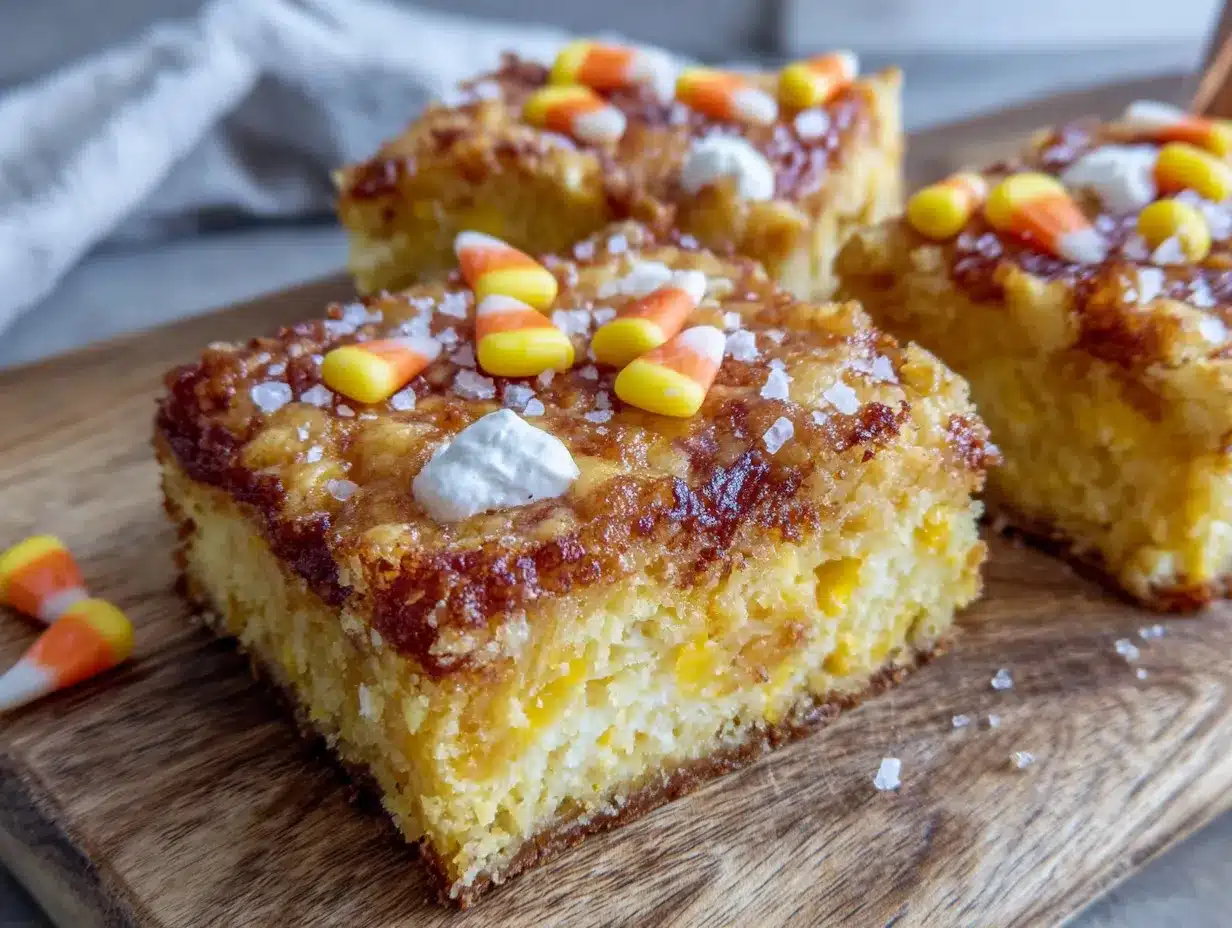
Preheat your oven to 350°F (175°C). Line your 8×8-inch baking pan with parchment paper, leaving overhang on two opposite sides. This creates handles for lifting the blondies out later.
- Melt the butter — Place ½ cup (113g) unsalted butter in a microwave-safe bowl and heat in 30-second intervals until melted. Set aside to cool for 5 minutes. You want it warm, not hot, so it doesn’t scramble the egg.
- Combine sugars and butter — In your large mixing bowl, whisk together the melted butter, 1 cup (200g) packed light brown sugar, and ¼ cup (50g) granulated sugar. Whisk until smooth and no lumps remain. The mixture should look like wet sand.
- Add eggs and vanilla — Whisk in 1 large egg, 1 egg yolk, and 2 teaspoons vanilla extract. Whisk vigorously for about 30 seconds until the mixture is smooth, glossy, and slightly thickened. This step is important — it helps create that crackly top crust.
- Mix dry ingredients — Add 1½ cups (180g) all-purpose flour, ½ teaspoon salt, and ½ teaspoon baking powder directly to the bowl. Fold gently with a spatula until just combined. Stop when you can’t see any more streaks of flour. Overmixing will make your blondies tough.
- Fold in candy corn — Add 1½ cups (about 225g) candy corn to the batter. Fold gently 3-4 times to distribute. Don’t overmix here either — you want some candy corn pieces to remain whole for those pretty pockets of color.
- Transfer to pan — Scrape the batter into your prepared baking pan. It will be thick, so use your spatula to spread it evenly into all corners. Wet your spatula slightly if the batter sticks.
- Bake — Place the pan on the middle rack of your preheated oven. Bake for 25-30 minutes. At 25 minutes, check for doneness: the edges should be golden brown and pulling away from the pan slightly. The center should look set but still soft — a toothpick inserted in the center should come out with a few moist crumbs, not wet batter.
- Cool completely — Transfer the pan to a cooling rack and let the blondies cool completely in the pan, about 2 hours. This is crucial — cutting them while warm will result in a crumbly mess. The bars firm up as they cool, giving you clean, neat squares.
- Lift and cut — Once completely cool, use the parchment sling to lift the entire block of blondies out of the pan. Place on a cutting board and cut into 16 squares with a sharp knife. Wipe the knife clean between cuts for the neatest edges.
Sensory Cues: When the batter is ready, it should be thick and glossy, almost like a soft cookie dough. During baking, your kitchen will smell like butter and vanilla with a hint of caramel from the melting candy corn. The finished blondies should be golden brown on top with a slightly crackly surface and a soft, tender center.
Cooking Tips & Techniques
After making these candy corn blondie bars more times than I can count, I’ve learned a few things the hard way. Here are my best tips for perfect results every time:
Don’t overbake. This is the number one mistake people make with blondies. They look underdone in the center when they’re actually perfect. The residual heat continues to cook them as they cool. Pull them out when the edges are set and the center is still slightly jiggly. You’ll thank me later.
Use fresh candy corn. Stale candy corn is hard, dry, and won’t melt properly. If your candy corn is more than a few months old, it might stay crunchy in the blondies instead of melting into those lovely caramel pockets. Fresh candy corn is soft and pliable — you should be able to bend one slightly without it breaking.
Room temperature eggs matter. Cold eggs can seize the butter, creating a lumpy batter. If you forgot to take your eggs out ahead of time, place them in a bowl of warm water for 5 minutes. Problem solved.
Let them cool completely. I know it’s hard to wait, but I promise it’s worth it. Warm blondies are soft and crumbly. Fully cooled blondies are chewy, firm, and cut into perfect squares. If you absolutely can’t wait, at least give them 30 minutes in the fridge.
Line your pan properly. A parchment sling is your best friend. Cut two strips of parchment paper that are slightly wider than your pan, then lay them perpendicular to each other. The overhang creates handles that make lifting the blondies out effortless.
Measure flour correctly. Spoon the flour into your measuring cup and level it off with a knife. Scooping directly from the bag can add up to 25% more flour, resulting in dry, cakey blondies. A kitchen scale takes the guesswork out completely.
Variations & Adaptations
These candy corn blondie bars are incredibly versatile. Here are some of my favorite variations:
Chocolate Drizzle Blondies — After the blondies cool, melt ½ cup of chocolate chips with 1 teaspoon of coconut oil and drizzle over the top. The combination of sweet candy corn and dark chocolate is absolutely divine. I made these for a Halloween party last year, and they disappeared in minutes.
Peanut Butter Swirl — Drop ¼ cup of creamy peanut butter in small spoonfuls over the batter before baking. Swirl gently with a knife for a marbled effect. The salty peanut butter balances the sweet candy corn perfectly. This is my husband’s favorite version.
Gluten-Free Option — Substitute the all-purpose flour with a 1:1 gluten-free baking flour blend. I’ve tested this with King Arthur Measure for Measure, and the texture is almost identical to the original. Make sure your candy corn is gluten-free too (most brands are).
Fall Spice Blondies — Add 1 teaspoon of pumpkin pie spice or cinnamon to the dry ingredients. The warm spices complement the candy corn flavor beautifully. This version tastes like autumn in every bite.
White Chocolate Chip — Fold in ½ cup of white chocolate chips along with the candy corn. The creamy white chocolate adds another layer of sweetness and texture. I love this version for holiday cookie exchanges.
Vegan Adaptation — Use melted coconut oil instead of butter, a flax egg (1 tablespoon flaxseed meal + 3 tablespoons water) instead of the egg, and an extra flax egg instead of the yolk. The texture will be slightly different but still delicious. I’ve made this for a vegan friend, and she couldn’t stop eating them.
Serving & Storage Suggestions
These candy corn blondie bars are incredibly versatile when it comes to serving. Here’s how to enjoy them at their best:
Serving Temperature: Room temperature is ideal. The texture is perfectly chewy, and the candy corn flavor is most pronounced. If you’re serving them at a party, they’ll be fine sitting out for several hours.
Presentation Ideas: Cut into 16 squares and arrange on a platter. For Halloween, I like to serve them on a black or orange platter with extra candy corn scattered around. A dusting of powdered sugar makes them look fancy for holiday gatherings.
Pairing Suggestions: These blondies are amazing with a cold glass of milk, a warm cup of coffee, or a scoop of vanilla ice cream. For an extra indulgence, warm a blondie in the microwave for 10 seconds and top with ice cream — the warm caramel pockets and cold ice cream are incredible together.
Storage Instructions: Store leftover blondies in an airtight container at room temperature for up to 5 days. Place a piece of bread in the container to keep them soft — the bread absorbs excess moisture and the blondies stay perfectly chewy. Replace the bread every 2 days if needed.
Freezing Instructions: These blondies freeze beautifully. Wrap individual bars tightly in plastic wrap, then place them in a freezer-safe bag. They’ll keep for up to 3 months. To thaw, leave them at room temperature for about 30 minutes, or microwave for 15-20 seconds for that just-baked warmth.
Flavor Development: Here’s a secret — these blondies actually taste better the next day. The candy corn continues to meld with the batter, creating even more of those caramel-like pockets. If you can resist eating them all on day one, you’ll be rewarded on day two.
Nutritional Information & Benefits
While these candy corn blondie bars are definitely a treat, here’s the nutritional breakdown for one bar (based on 16 servings):
| Nutrient | Amount per Serving |
|---|---|
| Calories | 245 |
| Total Fat | 9g |
| Saturated Fat | 5g |
| Cholesterol | 45mg |
| Sodium | 115mg |
| Total Carbohydrates | 39g |
| Dietary Fiber | 0.5g |
| Sugars | 28g |
| Protein | 2g |
Dietary Considerations: These bars are not gluten-free unless you use a gluten-free flour blend. They contain dairy (butter) and eggs. For a dairy-free version, use vegan butter. For an egg-free version, use flax eggs as mentioned in the variations section.
Allergen Note: Candy corn is typically made with sugar, corn syrup, and gelatin, making it gluten-free but not vegan. Always check labels if you’re serving someone with dietary restrictions.
Wellness Perspective: I believe in balance — these blondies are a fun, seasonal treat that brings joy. They’re not everyday food, but they’re perfect for celebrations, holidays, and those moments when you need something sweet and nostalgic. Life is too short to skip dessert.
Conclusion
These Ultimate Chewy Candy Corn Blondie Bars are proof that sometimes the simplest ideas are the best. They’re easy enough for a beginner baker, impressive enough for a party, and delicious enough to become a new tradition. The combination of chewy blondie base and melty candy corn pockets is honestly irresistible.
I love that this recipe started as a skeptical experiment and turned into one of my most-requested fall treats. Every time I make them, I think about that moment in my college kitchen when I almost said no to a good idea. Now I make them every Halloween, and they never last more than a day.
I’d love to hear how these turn out for you! Leave a comment below and let me know if you tried any variations, or share a photo on Pinterest and tag me. Don’t forget to pin this recipe for later — you’ll want it handy when candy corn season rolls around. Happy baking, friends!
Frequently Asked Questions
Can I use salted butter instead of unsalted?
Yes, you can. Just reduce the added salt to ¼ teaspoon instead of ½ teaspoon. The blondies will still turn out delicious, but they might be slightly saltier. I personally prefer unsalted butter so I can control the salt level precisely.
Why did my candy corn sink to the bottom?
This usually happens if the batter is too thin or the candy corn is too heavy. Make sure your butter has cooled slightly before adding the sugars and eggs — hot butter makes the batter too runny. Also, toss the candy corn in a tablespoon of flour before folding it in to help it stay suspended in the batter.
Can I make these ahead of time for a party?
Absolutely! These blondies actually taste better the next day. Bake them up to 2 days ahead, cool completely, and store in an airtight container at room temperature. They’ll stay perfectly chewy and delicious. You can even freeze them for up to 3 months.
My blondies turned out cakey instead of chewy. What went wrong?
Two common culprits: too much flour or overbaking. Make sure you’re spooning and leveling your flour, not scooping directly from the bag. Also, pull the blondies out of the oven when the center is still slightly soft — they continue to cook as they cool. Overbaked blondies lose that signature chewiness.
Can I use candy pumpkins or other seasonal candy instead?
Yes! Candy pumpkins (the little orange and yellow ones) work great — just chop them into smaller pieces first. You can also try candy corn’s cousins like harvest mix or autumn blend. Just avoid any candy with hard shells or chocolate coatings, as they won’t melt the same way.
Pin This Recipe!
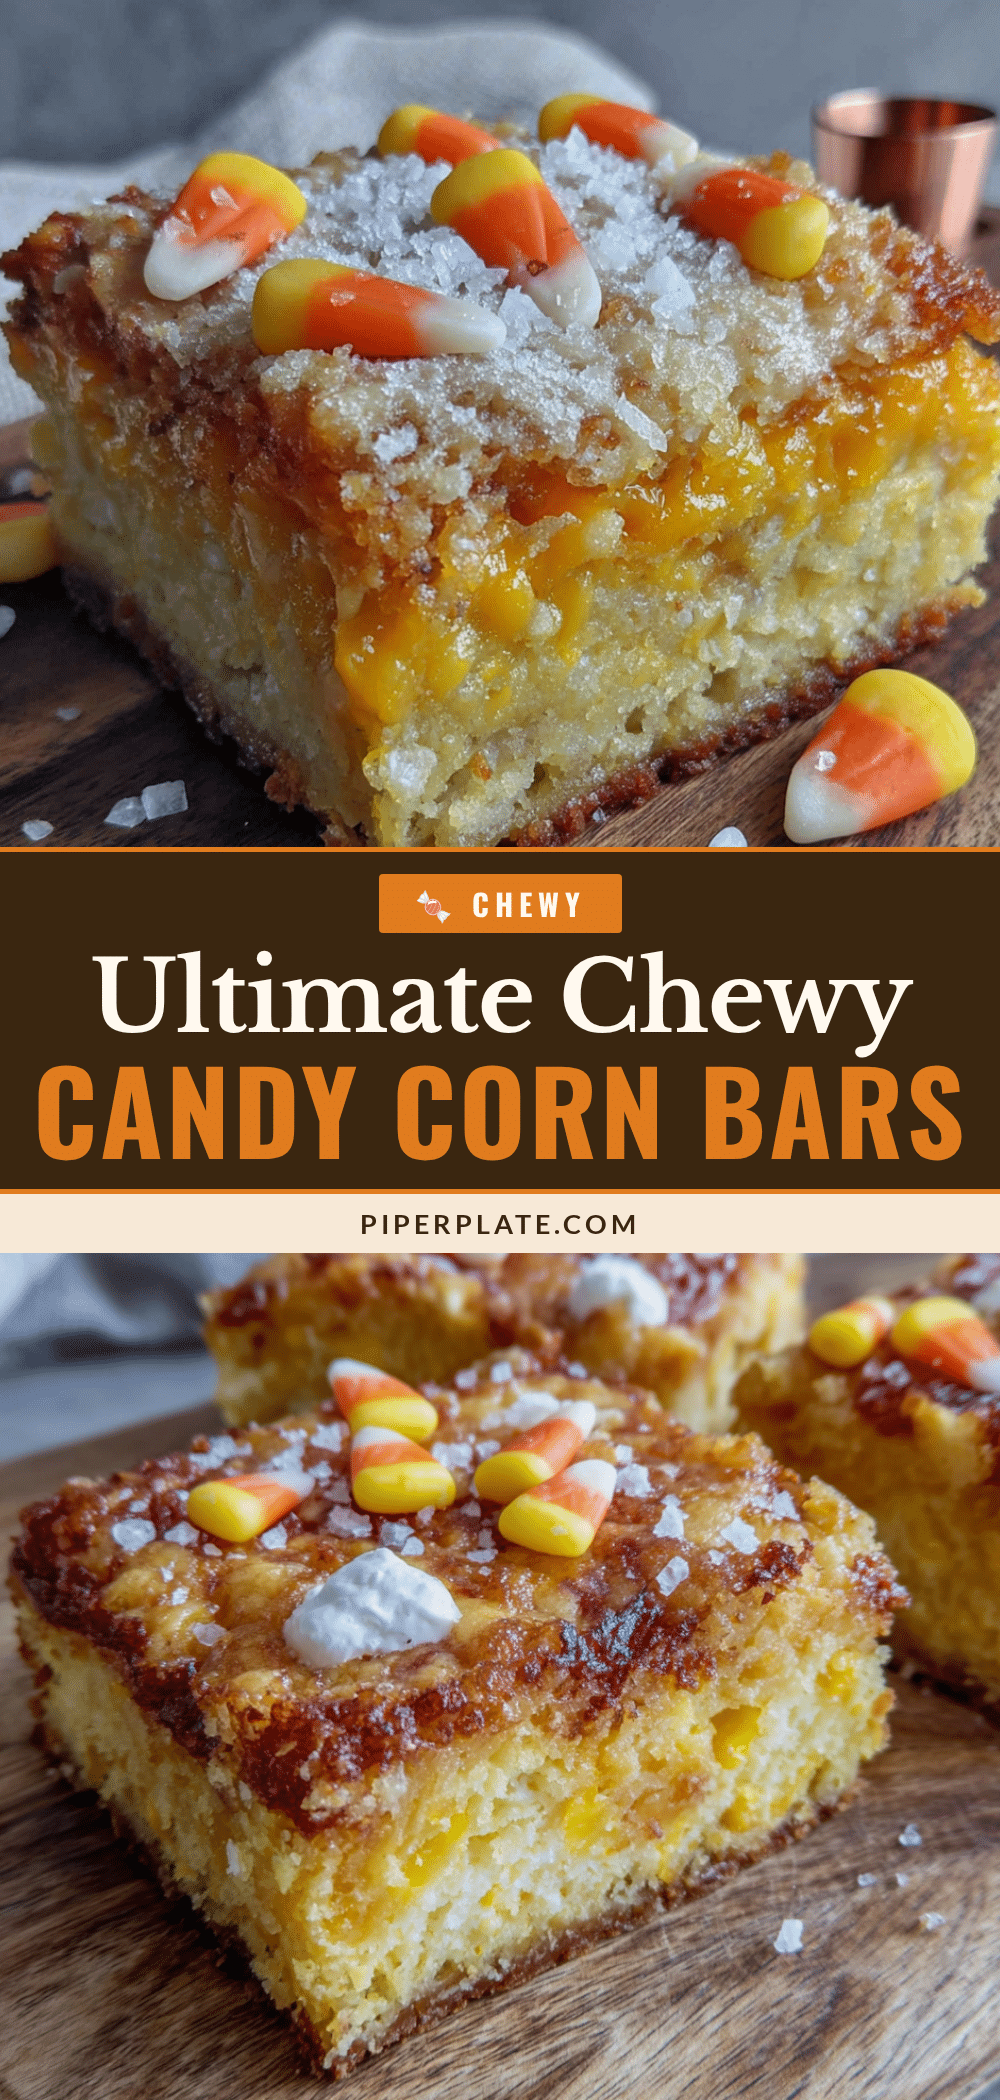
The Best Chewy Candy Corn Blondie Bars Recipe
These Ultimate Chewy Candy Corn Blondie Bars are incredibly easy, one-bowl, no-mixer bars with caramel-like pockets from melted candy corn. Perfectly chewy, they’re a Halloween party hero that disappears fast.
- Prep Time: 10 minutes
- Cook Time: 25-30 minutes
- Total Time: 2 hours 35-40 minutes (including cooling)
- Yield: 16 servings 1x
- Category: Dessert
- Cuisine: American
Ingredients
- ½ cup (1 stick or 113g) unsalted butter, melted and slightly cooled
- 1 cup (200g) packed light brown sugar
- ¼ cup (50g) granulated sugar
- 1 large egg, at room temperature
- 1 egg yolk, at room temperature
- 2 teaspoons pure vanilla extract
- 1½ cups (180g) all-purpose flour
- ½ teaspoon salt
- ½ teaspoon baking powder
- 1½ cups (about 225g) candy corn
Instructions
- Preheat oven to 350°F (175°C). Line an 8×8-inch baking pan with parchment paper, leaving overhang on two opposite sides.
- Melt ½ cup unsalted butter in a microwave-safe bowl in 30-second intervals. Set aside to cool for 5 minutes.
- In a large mixing bowl, whisk together melted butter, 1 cup packed light brown sugar, and ¼ cup granulated sugar until smooth and no lumps remain.
- Whisk in 1 large egg, 1 egg yolk, and 2 teaspoons vanilla extract. Whisk vigorously for about 30 seconds until smooth, glossy, and slightly thickened.
- Add 1½ cups all-purpose flour, ½ teaspoon salt, and ½ teaspoon baking powder. Fold gently with a spatula until just combined.
- Fold in 1½ cups candy corn gently, 3-4 folds, to distribute without overmixing.
- Scrape batter into prepared pan and spread evenly with a spatula.
- Bake on middle rack for 25-30 minutes. Edges should be golden and pulling away from pan; center should be set but soft. A toothpick inserted in center should come out with a few moist crumbs.
- Cool completely in pan on a cooling rack, about 2 hours.
- Use parchment sling to lift blondies out. Cut into 16 squares with a sharp knife, wiping clean between cuts.
Notes
Use fresh candy corn for best melting. Don’t overbake; center should be slightly soft. Cool completely before cutting for clean squares. Blondies taste even better the next day. Store in airtight container at room temperature up to 5 days. Freeze individually wrapped for up to 3 months.
Nutrition
- Serving Size: 1 bar
- Calories: 245
- Sugar: 28
- Sodium: 115
- Fat: 9
- Saturated Fat: 5
- Carbohydrates: 39
- Fiber: 0.5
- Protein: 2
Keywords: candy corn blondies, chewy blondies, Halloween bars, fall dessert, one-bowl blondies, easy blondie recipe


