Love this? Save it for later!
Share the inspiration with your friends
I was standing in the parking lot of our local grocery store last November, fumbling for my keys, when the smell of rotisserie chicken hit me from someone’s car—and suddenly I was twelve years old, crammed into Aunt Carol’s tiny kitchen on the day after Thanksgiving. She was pulling a massive turkey carcass off the bone, and the air was thick with sage and butter and the faint burn of burned rolls she’d tried to save. She’d always make these weird little sandwiches the next day—piled high with leftover meat, slathered in cranberry sauce, and baked until the tops were golden and the cheese was oozing. I never asked her for the recipe. She passed a few years back, and I’ve been chasing that exact feeling ever since. Maybe you’ve been there—trying to recreate a taste you can almost, but not quite, hold onto.
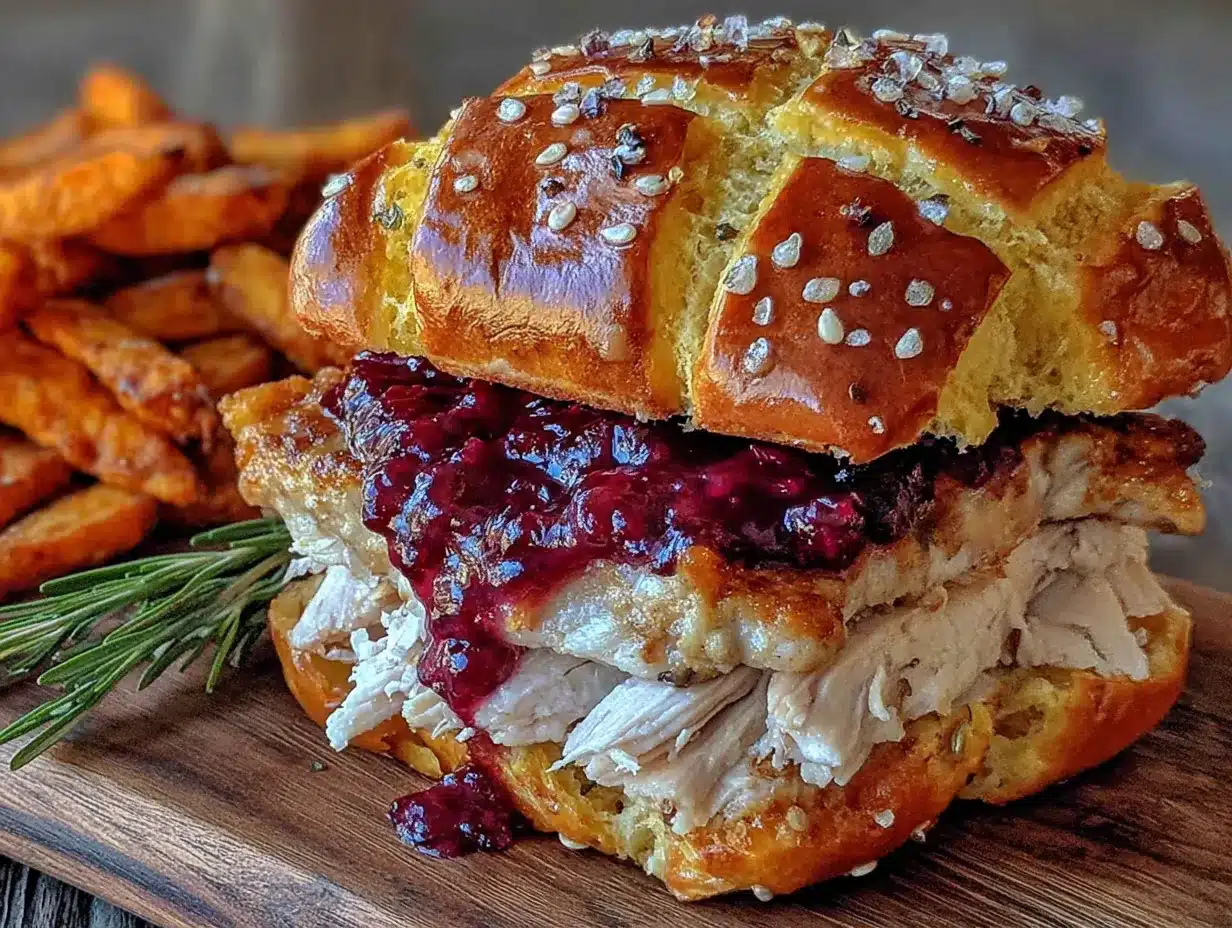
These Best Friendsgiving Turkey Sliders are my attempt to bottle that messy, happy, chaotic energy. They’re not fancy. They’re not fussy. But honest to goodness, they taste like the best part of any holiday meal—without the stress of roasting a whole bird. I’ve made these for Friendsgiving every year since I moved out on my own, and they’ve become the thing people ask for. Not the pie, not the fancy appetizers. These little sliders. And honestly? I’m not mad about it. They’re budget-friendly, they come together in thirty minutes flat, and kids go absolutely wild for them. Let me tell you, there’s something magical about watching a room full of adults and toddlers both reach for the same plate.
Why You’ll Love This Recipe
I’ve tested this recipe more times than I care to count—through burnt edges, soggy bottoms, and one particularly sad attempt where the rolls fell apart like wet cardboard. So trust me when I say this version is the one. Here’s why it works for real families on real budgets:
- Budget-Friendly: This recipe uses deli turkey or leftover turkey, not a whole bird. You’re looking at under $15 for a tray that feeds eight people easily. That’s less than two bucks a person for a meal that feels like a celebration.
- 30 Minutes Flat: From start to finish, you’re in and out of the kitchen in half an hour. No basting, no brining, no carving. Just slice, assemble, bake, and eat.
- Kid-Approved: My niece, who once declared that turkey was “too dry and too boring,” ate three of these in one sitting. The soft rolls, the melty cheese, the sweet pop of cranberry—it’s basically a hug in sandwich form.
- Perfect for Friendsgiving: Whether you’re hosting a big gathering or a small get-together, these sliders travel well, reheat beautifully, and disappear faster than anything else on the table.
- Crowd-Pleaser: I’ve served these to picky toddlers, gluten-free cousins, and my uncle who “doesn’t do leftovers.” Everyone goes back for seconds. Every single time.
What makes this recipe different from every other slider recipe out there? It’s the sauce. I spent three Thanksgivings tweaking the butter glaze until it hit that perfect balance of savory, sweet, and tangy. It’s not too heavy, not too rich—just enough to coat the tops of the rolls and soak into the bread without making it soggy. Plus, the combination of melty Swiss cheese and tangy cranberry sauce is honestly genius. I didn’t invent it, but I perfected it for the home cook who doesn’t have time to mess around.
This isn’t just another turkey sandwich recipe. It’s the kind of food that makes you close your eyes after the first bite—not because it’s fancy, but because it tastes like someone made it just for you. And in a world where we’re all juggling a million things, that feeling is worth holding onto.
What Ingredients You Will Need
This recipe uses simple, pantry-friendly ingredients to deliver big flavor without the big grocery bill. Most of these items you probably already have in your fridge or pantry, which is exactly the point. Let’s break it down:
For the Sliders
- 12-count package of Hawaiian sweet rolls (like King’s Hawaiian)—these are non-negotiable for that soft, slightly sweet base that holds everything together. I’ve tried other brands, and they just don’t give the same texture.
- 1 pound deli-sliced turkey breast—look for oven-roasted or honey-roasted for the best flavor. I usually grab it from the deli counter at my local grocery store. Ask them to slice it thick, about a quarter-inch. It holds up better in the oven.
- 8 slices Swiss cheese—you can use provolone or mozzarella in a pinch, but Swiss gives that nutty, melty quality that pairs perfectly with the cranberry. I like Sargento or Boar’s Head for consistent melting.
- 1/2 cup whole berry cranberry sauce—canned is totally fine here. I actually prefer it. The jellied kind works too, but whole berry gives you those little bursts of tartness that make the sliders interesting. If you have homemade leftover, even better.
- 2 tablespoons salted butter, melted—for the glaze. Don’t skip this step. It’s what makes the tops golden and gorgeous.
For the Butter Glaze
- 1/4 cup salted butter, melted—yes, more butter. Trust me on this.
- 1 tablespoon Dijon mustard—adds a subtle tang that cuts through the richness. You can use yellow mustard if that’s what you have, but Dijon is smoother.
- 1 tablespoon brown sugar, packed—just a touch of sweetness to caramelize the tops. Light or dark both work.
- 1/2 teaspoon garlic powder—not fresh garlic, which can burn. Stick with powder for even distribution.
- 1/2 teaspoon onion powder—adds depth without being overpowering.
- 1/4 teaspoon poppy seeds (optional)—totally optional, but they add a nice little crunch and make the sliders look fancy. I throw them on when I’m feeling extra.
- Pinch of salt—just a tiny one. The cheese and turkey are already salty.
Ingredient Tips: If you’re feeding a crowd, double the recipe and use a 9×13 baking dish. The sliders freeze beautifully, so don’t worry about leftovers. For a gluten-free option, use gluten-free sweet rolls or slider buns—just watch the bake time as they tend to dry out faster. And if you’re dairy-free, swap the Swiss for a good-quality dairy-free cheese and use plant-based butter. I’ve tested it with Miyoko’s, and it works surprisingly well.
Equipment Needed
You don’t need a fancy kitchen to make these sliders. Here’s what you’ll actually use:
- 9×13 baking dish—or a similar-sized casserole dish. I’ve used everything from a ceramic dish to a disposable aluminum pan for potlucks. They all work.
- Sharp knife—for slicing the rolls in half. A serrated bread knife works best to cut through without squishing them.
- Small bowl—for mixing the butter glaze. Any small bowl will do.
- Pastry brush—for brushing the glaze on top. If you don’t have one, use a spoon and spread it gently. A silicone brush is easier to clean than a natural bristle one, but both work.
- Aluminum foil—to cover the dish while baking so the tops don’t burn before the cheese melts.
- Cutting board—for assembling. A large one makes life easier.
Budget-Friendly Tip: Don’t have a pastry brush? No problem. Just use the back of a spoon to drizzle and spread the glaze. It won’t be as even, but it’ll still taste amazing. I’ve done it more times than I’d like to admit.
Preparation Method
Alright, let’s get into the good stuff. Here’s how to make these sliders step by step. I’ve included all the little details I wish someone had told me the first time I made them.
- Preheat your oven to 350°F (175°C). While it’s heating, grab your 9×13 baking dish. You don’t need to grease it unless you’re using a really sticky pan. I usually skip it.
- Slice the entire slab of Hawaiian rolls in half horizontally. This is the trickiest part. Keep the rolls connected—don’t separate them into individual buns. Use a serrated knife and a gentle sawing motion. If you squish them, don’t panic. They’ll puff back up in the oven. Place the bottom half of the rolls in the baking dish, cut side up.
- Spread the cranberry sauce over the bottom layer. Use a spoon or an offset spatula to spread it evenly. Don’t go too thick—you want a thin layer that adds sweetness without making the bread soggy. About 1/4 cup should do it. If your cranberry sauce is jellied, let it soften at room temperature for a few minutes first.
- Layer the turkey slices evenly over the cranberry sauce. Fold the slices to fit, overlapping them slightly. You want every bite to have turkey in it. I usually use about 3/4 of the pound here and save the rest for the top layer.
- Place the Swiss cheese slices over the turkey. Tear them if needed to cover the surface. Don’t leave gaps—cheese is what holds everything together. If you’re using provolone or mozzarella, same deal.
- Add the remaining turkey slices on top of the cheese. This second layer ensures every bite has that meaty, savory goodness. It also helps the cheese stay put instead of sliding off.
- Place the top half of the rolls over the filling. Line them up carefully so they match the bottoms. Gently press down to settle everything.
- Make the butter glaze. In a small bowl, whisk together the 1/4 cup melted butter, Dijon mustard, brown sugar, garlic powder, onion powder, poppy seeds (if using), and a pinch of salt. Whisk until the brown sugar is mostly dissolved. It should look smooth and smell amazing.
- Brush the glaze generously over the tops of the rolls. Use your pastry brush or spoon to get every surface. Don’t be shy—the glaze is what gives these sliders that golden, glossy, irresistible top. Let it soak in for a minute.
- Cover the dish with aluminum foil. This traps steam and prevents the tops from burning before the cheese melts. I’ve skipped this step before and ended up with burnt tops and unmelted cheese. Don’t be like me.
- Bake for 15 minutes covered. Set a timer. Walk away. Do not open the oven to peek—you’ll let the heat out.
- Remove the foil and bake for another 5-8 minutes. This is where the magic happens. The tops will turn golden brown and the glaze will caramelize. Keep an eye on them after 5 minutes—ovens vary. You want them dark golden but not burnt.
- Let them rest for 5 minutes before slicing. I know it’s hard to wait, but this step is crucial. The cheese needs a minute to set so it doesn’t ooze out everywhere when you cut them. Use a sharp knife to slice between the rolls. Serve warm.
Visual Cue: When you pull the foil off, the tops should be a deep golden brown with slightly darker edges. The cheese should be visibly melted and bubbly around the edges. If the tops are pale, pop them back in for another 2-3 minutes uncovered.
Cooking Tips & Techniques
I’ve made these sliders at least two dozen times, and I’ve learned a few things the hard way. Here are my best tips for slider success:
- Don’t over-saturate the rolls. The glaze is delicious, but too much will make the bottoms soggy. Brush it on the tops only—the bottoms will absorb enough moisture from the turkey and cranberry sauce.
- Let the rolls come to room temperature before slicing. Cold rolls are stiff and prone to tearing. Leave them on the counter for 10-15 minutes before you start. It makes a huge difference.
- Use a sharp serrated knife. A dull knife will squish the rolls and make a mess. I learned this after ruining two packages of rolls in one afternoon. A bread knife with a long blade works best.
- Toast the bottom half of the rolls first? Some recipes call for this, but honestly, I’ve tested it both ways and prefer not to. The cranberry sauce keeps the bottom soft, which I think is part of the charm. If you like a crunchier base, toast them under the broiler for 1-2 minutes before assembling.
- Make ahead tip: You can assemble the sliders up to 24 hours in advance. Just cover and refrigerate without the glaze. Add the glaze right before baking. If baking from cold, add 5-7 minutes to the covered bake time.
- Multitasking strategy: While the sliders bake, make a quick side salad or slice some apples. That way everything is ready at the same time. I usually prep the salad while the sliders are in their covered bake phase.
Variations & Adaptations
One of the best things about this recipe is how easy it is to tweak. Here are some of my favorite variations:
- Thanksgiving Leftover Sliders: Use actual leftover turkey instead of deli meat. Shred or slice it thin, and add a layer of leftover stuffing between the turkey and cheese. It’s next-level good.
- Spicy Cranberry Sliders: Add 1/2 teaspoon of red pepper flakes to the butter glaze, or use a spicy cranberry sauce (the kind with jalapeño or chipotle). The heat cuts through the richness beautifully.
- Vegetarian Version: Swap the turkey for roasted portobello mushrooms or a plant-based turkey alternative. I’ve used Trader Joe’s roasted vegetable slices, and they work great. Add a handful of fresh spinach under the cheese for extra nutrition.
- Gluten-Free Adaptation: Use gluten-free Hawaiian rolls or slider buns. Watch the bake time closely—gluten-free breads tend to dry out faster. Check for doneness at 12 minutes covered and 3 minutes uncovered.
- Cheese Swap: Not a fan of Swiss? Try provolone for a milder flavor, sharp cheddar for a bolder bite, or pepper jack for a little kick. I’ve even used leftover brie from a cheese board—it was incredible.
- Breakfast Sliders: Use the same base but swap turkey for crispy bacon or breakfast sausage, and use maple syrup in the glaze instead of brown sugar. Serve with scrambled eggs on the side. Game changer.
Personal Variation: My favorite version is what I call the “Everything But The Kitchen Sink” slider. I add a thin layer of leftover stuffing, a smear of cream cheese, and a drizzle of leftover gravy over the turkey before adding the cheese. It’s ridiculous and indulgent and I only make it once a year, but it’s worth every calorie.
Serving & Storage Suggestions
These sliders are best served warm, straight from the oven. Here’s how to make the most of them:
Serving Temperature: Serve them hot, but not scalding. Let them rest for those 5 minutes—it makes a real difference in how they hold together. If you’re serving them at a party, keep them in a warm oven (200°F) covered with foil for up to 30 minutes. They’ll stay soft and melty.
Presentation: Arrange the sliders on a large platter or cutting board. Sprinkle some fresh parsley or chives over the top for color. I like to serve them with extra cranberry sauce on the side for dipping, plus a simple green salad or coleslaw to balance the richness.
Side Dish Suggestions: These pair beautifully with sweet potato fries, roasted Brussels sprouts, or a crisp apple slaw. For a full Friendsgiving spread, serve them alongside a bowl of butternut squash soup or a simple kale salad. And don’t forget the pickles—a tangy dill spear cuts through the richness perfectly.
Storage Instructions: Store leftover sliders in an airtight container in the refrigerator for up to 4 days. To reheat, wrap them in foil and bake at 350°F for 10-12 minutes, or microwave individual sliders for 30-45 seconds. The microwave is faster but the oven keeps the tops crisp.
Freezer Instructions: These freeze beautifully. Assemble the sliders completely (including the glaze) but don’t bake them. Wrap the entire dish tightly in plastic wrap, then foil. Freeze for up to 3 months. To bake from frozen, remove the plastic wrap, cover with foil, and bake at 350°F for 25 minutes covered, then 10 minutes uncovered. Let rest 5 minutes before serving.
Flavor Development Note: Honestly, these sliders taste even better the next day. The flavors meld together overnight, and the bread absorbs just enough of the sauce to become perfectly soft without being mushy. I sometimes make a double batch just so I can have them for lunch the next day.
Nutritional Information & Benefits
While these sliders are definitely a treat, they’re not as indulgent as you might think. Here’s the estimated nutritional breakdown per slider (based on 12 sliders):
- Calories: 310
- Protein: 18g
- Fat: 14g
- Carbohydrates: 28g
- Fiber: 1g
- Sugar: 10g
- Sodium: 620mg
Health Benefits: Turkey is a lean source of protein that’s rich in B vitamins and selenium, which supports immune function. Swiss cheese provides calcium and phosphorus for bone health. Cranberries are packed with antioxidants and vitamin C. And while the butter and sugar aren’t exactly health foods, a moderate portion fits perfectly into a balanced diet—especially when you pair these sliders with a big green salad or roasted vegetables.
Dietary Considerations: This recipe can be made gluten-free and dairy-free with simple swaps (see Variations section). It’s not suitable for vegan diets as written, but you can experiment with plant-based meat and cheese alternatives. Always check labels for hidden allergens if serving guests with dietary restrictions.
Personal Wellness Perspective: I’m not a nutritionist, but I’ve learned that food is about more than numbers. These sliders are about gathering people around a table, sharing a meal, and making memories. That has its own kind of nutritional value. So enjoy them without guilt—just maybe don’t eat six in one sitting. (Speaking from experience.)
Conclusion
These Best Friendsgiving Turkey Sliders have become a staple in my kitchen for a reason. They’re easy, they’re affordable, and they bring people together in a way that fancy food sometimes can’t. Every time I make them, I think of Aunt Carol’s tiny kitchen and that chaotic, wonderful day after Thanksgiving. And honestly? I think she’d be proud of how they turned out.
I hope you give these sliders a try—whether it’s for Friendsgiving, a family dinner, or just a Tuesday night when you need something comforting and good. Don’t be afraid to make them your own. Swap the cheese, try a different sauce, pile on the leftovers. That’s the beauty of a recipe like this—it’s a starting point, not a rulebook.
If you make these, I’d love to hear about it. Drop a comment below and let me know how they turned out, what variations you tried, or if your kids went back for thirds like mine do. And if you have a favorite Friendsgiving tradition, share that too—I’m always looking for new ideas. Until next time, happy cooking!
Frequently Asked Questions
Can I use leftover turkey instead of deli meat?
Absolutely! Leftover turkey works beautifully in this recipe. Just shred or slice it thin, and layer it the same way you would deli meat. You might need a little more cranberry sauce to keep it moist, since leftover turkey tends to be drier than deli slices.
Can I make these sliders ahead of time?
Yes, you can assemble them up to 24 hours in advance. Just cover and refrigerate without the glaze. Add the glaze right before baking. If baking from cold, add 5-7 minutes to the covered bake time. They’re also freezer-friendly—see the storage section for details.
What’s the best cheese for turkey sliders?
Swiss cheese is my top recommendation because it melts beautifully and has a nutty flavor that pairs perfectly with cranberry sauce. But provolone, mozzarella, sharp cheddar, or even pepper jack all work well. Use whatever you have on hand.
Can I use homemade cranberry sauce?
Definitely! Homemade cranberry sauce works great. Just make sure it’s not too runny—if it’s very liquid, strain out some of the liquid before spreading it on the rolls to prevent soggy bottoms. Whole berry or jellied, both work.
How do I keep the sliders from getting soggy?
The key is not overdoing the cranberry sauce and only brushing the glaze on the tops, not the bottoms. Also, letting the sliders rest for 5 minutes after baking helps the cheese set and prevents excess moisture from soaking into the bread. If you’re making them ahead, assemble without the cranberry sauce and add it just before baking.
Pin This Recipe!
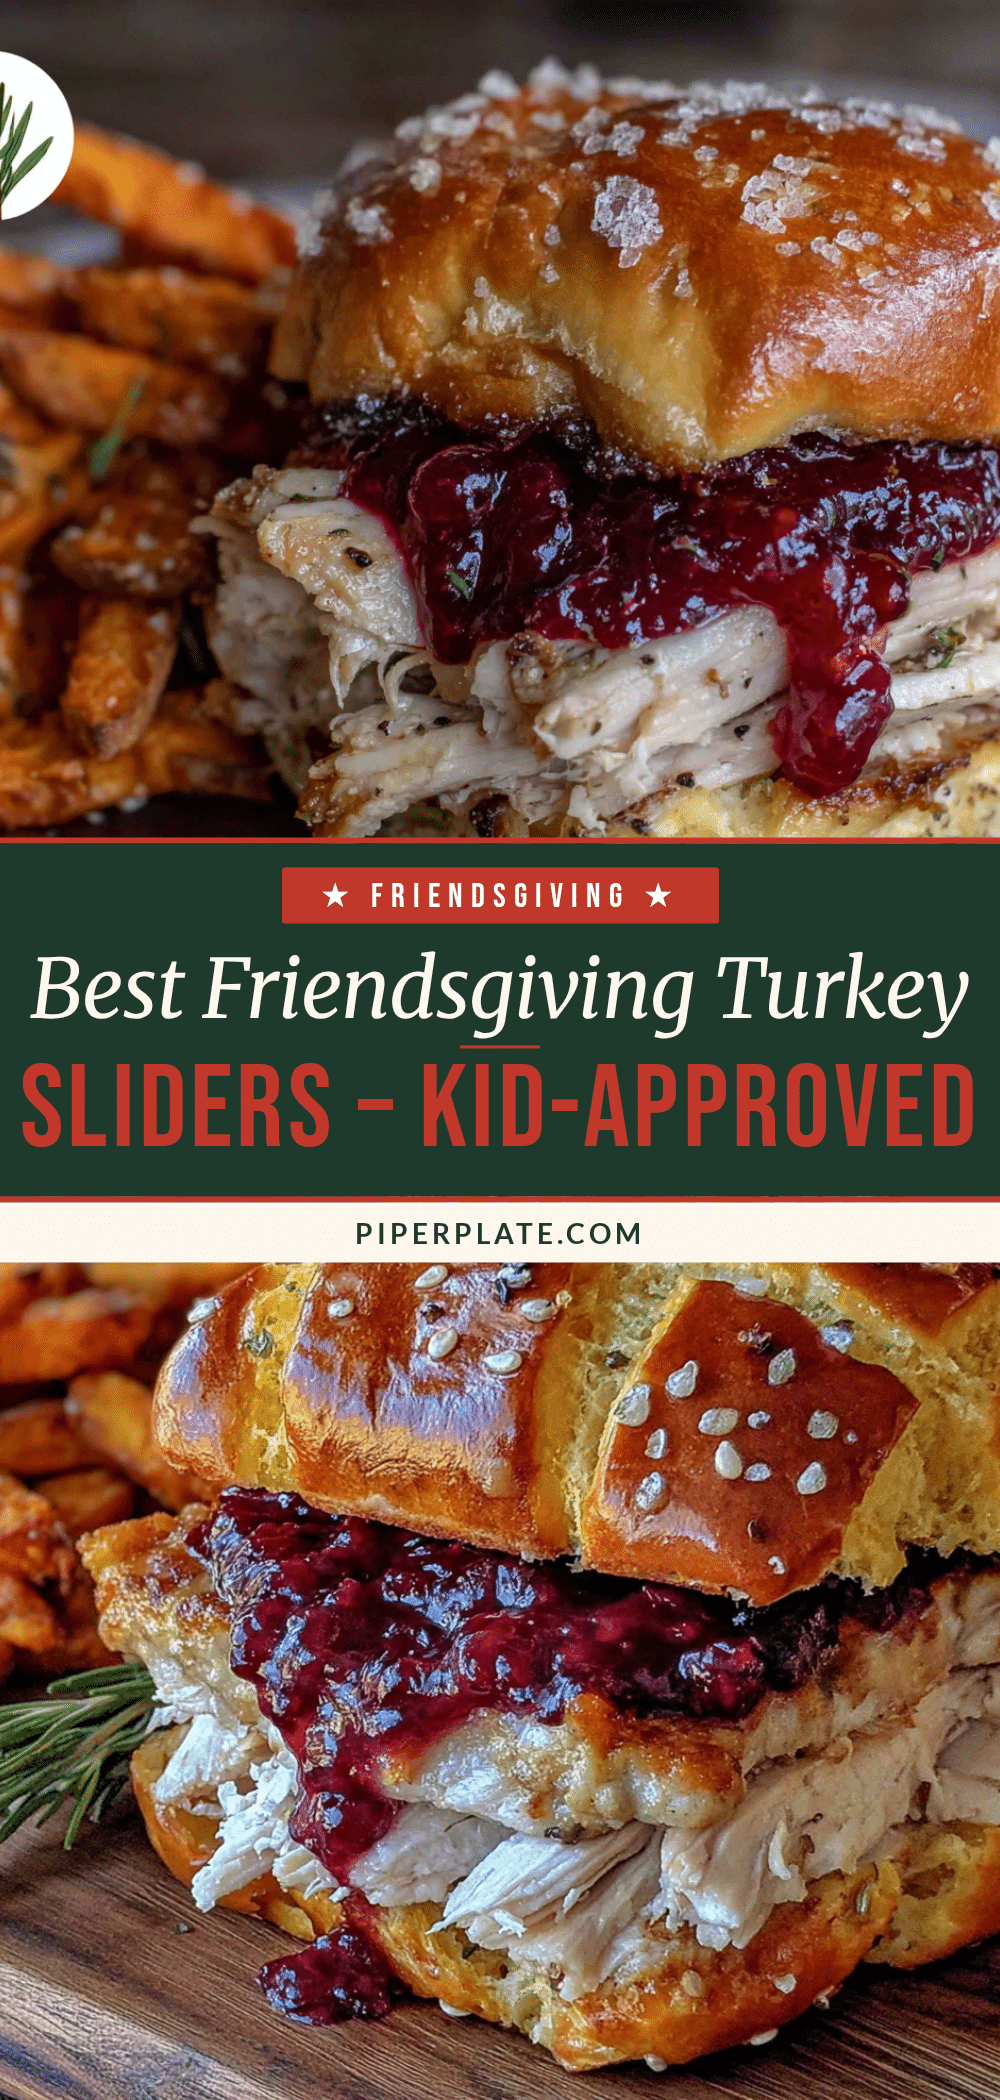
Best 30-Minute Friendsgiving Turkey Sliders Recipe

These Best Friendsgiving Turkey Sliders are my attempt to bottle that messy, happy, chaotic energy. They’re not fancy. They’re not fussy. But honest to goodness, they taste like the best part of any holiday meal—without the stress of roasting a whole bird.
- Prep Time: 10 minutes
- Cook Time: 20 minutes
- Total Time: 30 minutes
- Yield: 12 sliders 1x
- Category: Main Course
- Cuisine: American
Ingredients
- 12-count package of Hawaiian sweet rolls (like King’s Hawaiian)
- 1 pound deli-sliced turkey breast (oven-roasted or honey-roasted, sliced about 1/4 inch thick)
- 8 slices Swiss cheese
- 1/2 cup whole berry cranberry sauce
- 2 tablespoons salted butter, melted (for glaze)
- 1/4 cup salted butter, melted (for glaze)
- 1 tablespoon Dijon mustard
- 1 tablespoon brown sugar, packed
- 1/2 teaspoon garlic powder
- 1/2 teaspoon onion powder
- 1/4 teaspoon poppy seeds (optional)
- Pinch of salt
Instructions
- Preheat your oven to 350°F (175°C).
- Slice the entire slab of Hawaiian rolls in half horizontally, keeping them connected. Place the bottom half in a 9×13 baking dish, cut side up.
- Spread the cranberry sauce over the bottom layer in a thin layer (about 1/4 cup).
- Layer the turkey slices evenly over the cranberry sauce, folding to fit and overlapping slightly.
- Place the Swiss cheese slices over the turkey, tearing to cover the surface without gaps.
- Add the remaining turkey slices on top of the cheese.
- Place the top half of the rolls over the filling, lining them up carefully. Gently press down.
- In a small bowl, whisk together 1/4 cup melted butter, Dijon mustard, brown sugar, garlic powder, onion powder, poppy seeds (if using), and a pinch of salt until smooth.
- Brush the glaze generously over the tops of the rolls. Let it soak in for a minute.
- Cover the dish with aluminum foil.
- Bake for 15 minutes covered.
- Remove the foil and bake for another 5-8 minutes, until tops are golden brown and glaze is caramelized.
- Let them rest for 5 minutes before slicing between the rolls. Serve warm.
Notes
Don’t over-saturate the rolls; brush glaze only on tops. Let rolls come to room temperature before slicing. Use a sharp serrated knife. For make ahead, assemble without glaze up to 24 hours in advance, add glaze before baking. If baking from cold, add 5-7 minutes to covered bake time. For gluten-free, use gluten-free sweet rolls and adjust bake time. For dairy-free, use dairy-free cheese and plant-based butter.
Nutrition
- Serving Size: 1 slider
- Calories: 310
- Sugar: 10
- Sodium: 620
- Fat: 14
- Saturated Fat: 8
- Carbohydrates: 28
- Fiber: 1
- Protein: 18
Keywords: turkey sliders, Friendsgiving, Thanksgiving leftovers, 30-minute recipe, Hawaiian rolls, cranberry sauce, Swiss cheese, easy appetizer, party food, budget-friendly


