Love this? Save it for later!
Share the inspiration with your friends
It was 10:47 PM on a rainy Wednesday in October, and I had completely forgotten about the classroom Halloween party the next morning. My daughter, still awake and buzzing with sugar-fueled excitement, reminded me with that particular brand of panic only a six-year-old can muster. I didn’t have time for a Pinterest-perfect cake with fondant and intricate piping. What I had was a box of cake mix, a tub of frosting, and a bag of candy eyes leftover from a failed attempt at spooky cupcakes the year before. The idea just arrived, fully formed, like a little monster whispering in my ear.
I grabbed a round cake pan, whipped up the batter, and while it baked, I laid out all the candy on the counter like a surgeon preparing for a very silly operation. A tube of black gel icing became the messy hair. Pretzel sticks turned into jagged teeth. And those candy eyes? They became the stars of the show. When I pulled that cake out and started decorating, something clicked. This wasn’t just a last-minute save. It was honestly the most fun I’d ever had decorating a dessert. The monster face was gloriously ugly, and my daughter absolutely lost her mind.
That’s the thing about this Easy Monster Face Halloween Cookie Cake. It doesn’t need to be perfect. In fact, the messier it looks, the better. The whole point is to let your inner child take over and have a little fun. Maybe you’ve been there, staring down a holiday deadline with zero plan and a kitchen full of half-used ingredients. Let me tell you, this recipe is your new best friend. It’s why I keep making it year after year, even when I have more time. The joy it brings is completely unmatched.
Why You’ll Love This Recipe
I’ve tested this recipe more times than I care to admit, tweaking the bake time, the frosting consistency, and the candy placement. What I landed on is the absolute best version, and here’s why it’s a winner for everyone from busy parents to seasoned bakers.
- Quick & Easy: From start to finish, you’re looking at about 45 minutes. That includes baking and decorating. It’s perfect for those last-minute school parties or when the Halloween spirit sneaks up on you.
- Simple Ingredients: No fancy grocery trips needed. You likely already have the cake mix, eggs, oil, and frosting in your pantry. The candy is totally flexible based on what you have leftover from trick-or-treat bags.
- Perfect for Halloween: This is the ultimate centerpiece for any spooky gathering. It works for classroom parties, office potlucks, or just a fun family night in. Kids and adults alike go crazy for it.
- Crowd-Pleaser: I’ve brought this to multiple parties, and it’s always the first thing to disappear. The combination of soft cookie cake and sweet frosting is a guaranteed hit.
- Unbelievably Delicious: The texture is what really sets this apart. It’s denser than a regular cake but softer than a cookie, with that perfect chewy edge and tender center. It’s next-level comfort food.
What makes this recipe different from the rest is the technique. By using a slightly thicker batter and a shorter bake time, you get that ideal cookie cake texture that holds up to all that candy without falling apart. It’s not just another Halloween dessert. It’s your new go-to.
This recipe is the kind that makes you close your eyes after the first bite. It’s comfort food reimagined for the spooky season, and it delivers the same soul-soothing satisfaction with a side of silly monster fun.
What Ingredients You Will Need
This recipe uses simple, wholesome ingredients to deliver bold flavor and satisfying texture without the fuss. Most of these are pantry staples, which makes it incredibly easy to whip up on a whim.
For the Cookie Cake Base
- 1 box (15.25 oz) yellow or vanilla cake mix (I prefer Duncan Hines for its consistent texture, but any brand works)
- 1/2 cup (1 stick) unsalted butter, melted (adds richness and helps create that chewy texture)
- 1 large egg, room temperature (helps bind the dough)
- 1 teaspoon vanilla extract (enhances the flavor)
For the Frosting
- 1 tub (16 oz) vanilla frosting (store-bought is fine, or use homemade buttercream frosting for a richer taste)
- Green or purple gel food coloring (for that monster skin tone)
For the Monster Face Decorations
- Candy eyeballs (the wiggly kind work best for a silly look)
- Black gel icing (for drawing mouths, hair, and eyebrows)
- Pretzel sticks (for jagged teeth or monster horns)
- Assorted candies (M&M’s, gummy worms, candy corn, or anything else you have on hand)
For ingredient selection, look for a good quality cake mix. I’ve tried store brands, and while they work, the texture isn’t quite as soft. If you want to go the from-scratch route, you can use this vanilla cookie cake recipe as the base instead. For the candy, feel free to get creative. Last year, I used leftover Halloween candy, and the monster ended up with a chocolate bar smile and a licorice mustache. It was hilarious.
Substitution guidance is easy here. Use a gluten-free cake mix for a gluten-free option. Dairy-free frosting works perfectly for those with dairy sensitivities. The key is keeping the dough thick enough to hold its shape while baking.
Equipment Needed
You don’t need a fancy kitchen to pull this off. Here’s what you’ll need:
- 9-inch round cake pan (a springform pan works great for easy removal)
- Mixing bowl (any size will do)
- Wooden spoon or spatula (for mixing the dough)
- Parchment paper (to line the pan and prevent sticking)
- Cooling rack (for letting the cookie cake cool completely)
- Offset spatula or butter knife (for spreading the frosting)
- Small bowls (for organizing your candy decorations)
If you don’t have a 9-inch round pan, an 8-inch square pan works just as well, though you’ll need to adjust the bake time by a few minutes. I’ve used a cast iron skillet before, and it gave the cookie cake a wonderfully crispy edge. Just make sure to grease it well. For the frosting, a piping bag with a round tip makes applying the green frosting easier, but honestly, a butter knife works perfectly fine. That’s what I used the first time, and the monster looked even more charmingly deranged.
For budget-friendly options, skip the piping bag and use a zip-top bag with the corner snipped off. It’s a great hack that saves money and cleanup time. Also, don’t stress about having the perfect candy. The whole point is to use what you have.
Preparation Method
Follow these steps carefully, and you’ll have a monster masterpiece in no time. I’ve included all the little details I wish someone had told me the first time.
Step 1: Preheat and Prep the Pan
Preheat your oven to 350°F (175°C). Grease your 9-inch round cake pan generously with butter or non-stick spray. Line the bottom with a circle of parchment paper. This step is non-negotiable if you want the cookie cake to come out cleanly. I learned this the hard way when my first attempt stuck to the pan and I had to serve it in crumbled pieces like some kind of monster graveyard.
Step 2: Make the Cookie Dough
In a large mixing bowl, combine the cake mix, melted butter, egg, and vanilla extract. Stir everything together with a wooden spoon until a thick, cohesive dough forms. It should look like a stiff cookie dough, not a runny batter. If it seems too dry, add a teaspoon of milk. If it’s too sticky, add a tablespoon of flour. The dough should be easy to press into the pan. This takes about 2-3 minutes of mixing.
Step 3: Press the Dough into the Pan
Transfer the dough to your prepared pan. Use your hands or the back of a spoon to press it into an even layer. Make sure it reaches all the way to the edges. The dough will be thick, about 1/2 inch. Don’t worry if it looks a little uneven. That’s character. The cookie cake will spread slightly as it bakes, so leaving a tiny gap at the edges is fine.
Step 4: Bake to Golden Perfection
Bake for 18-22 minutes, or until the edges are golden brown and the center is just set. The key is to not overbake. The center should look slightly underdone and puffy. It will continue to set as it cools. A toothpick inserted into the center should come out with a few moist crumbs, not wet batter. For me, 20 minutes is the sweet spot. Let it cool in the pan for 10 minutes, then transfer to a cooling rack to cool completely. This is crucial. Frosting a warm cookie cake will turn it into a melted mess.
Step 5: Make the Monster Frosting
While the cookie cake cools, prepare your frosting. Scoop the vanilla frosting into a bowl and add a few drops of green or purple gel food coloring. Stir until the color is evenly distributed. I prefer green for that classic monster look, but purple is also fantastic. If you want a two-tone effect, divide the frosting into two bowls and color each separately.
Step 6: Frost the Cookie Cake
Once the cookie cake is completely cool, spread the colored frosting evenly over the top. Use an offset spatula or butter knife to create a smooth surface. Don’t worry about perfection here. The monster face will cover up any imperfections. In fact, a slightly uneven frosting layer adds to the monster’s texture.
Step 7: Create the Monster Face
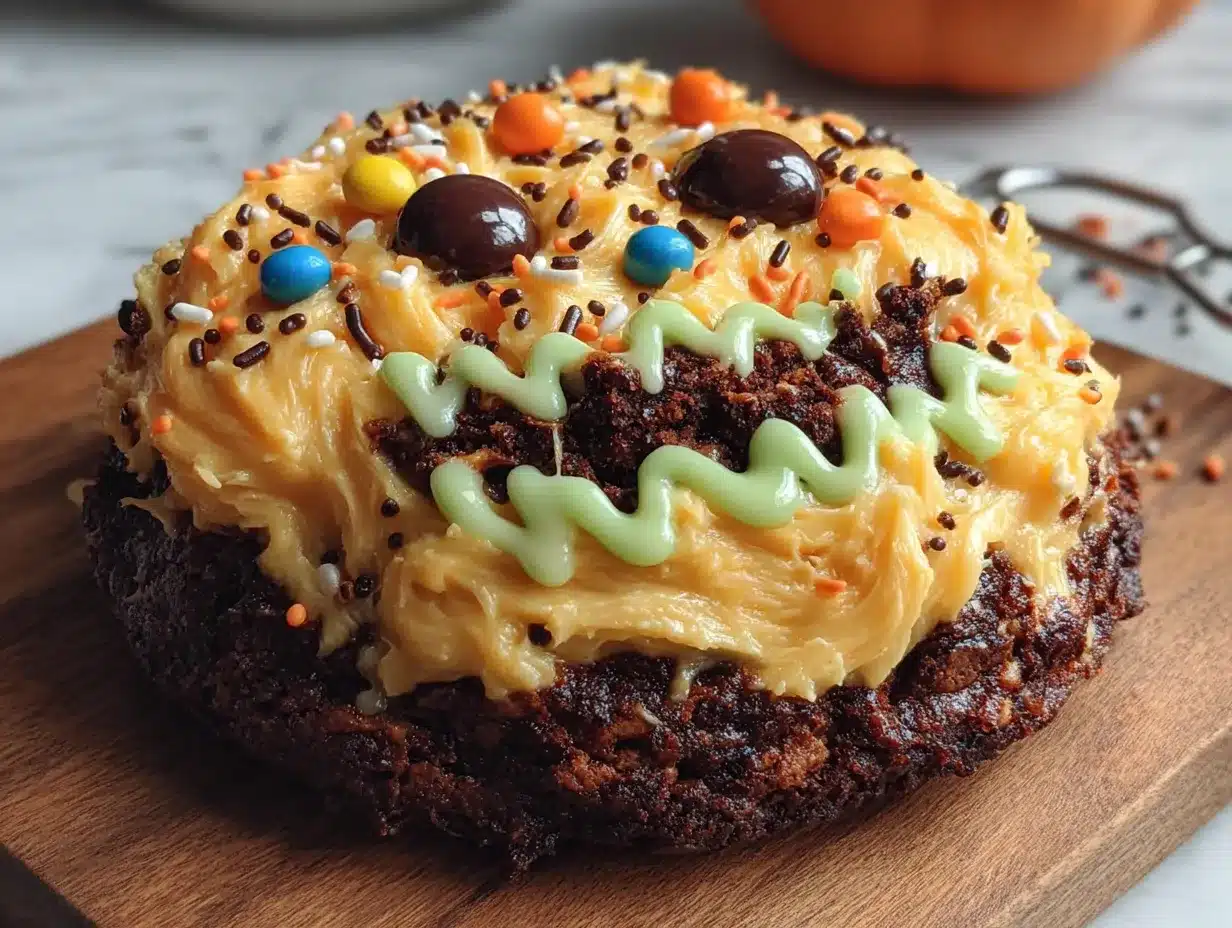
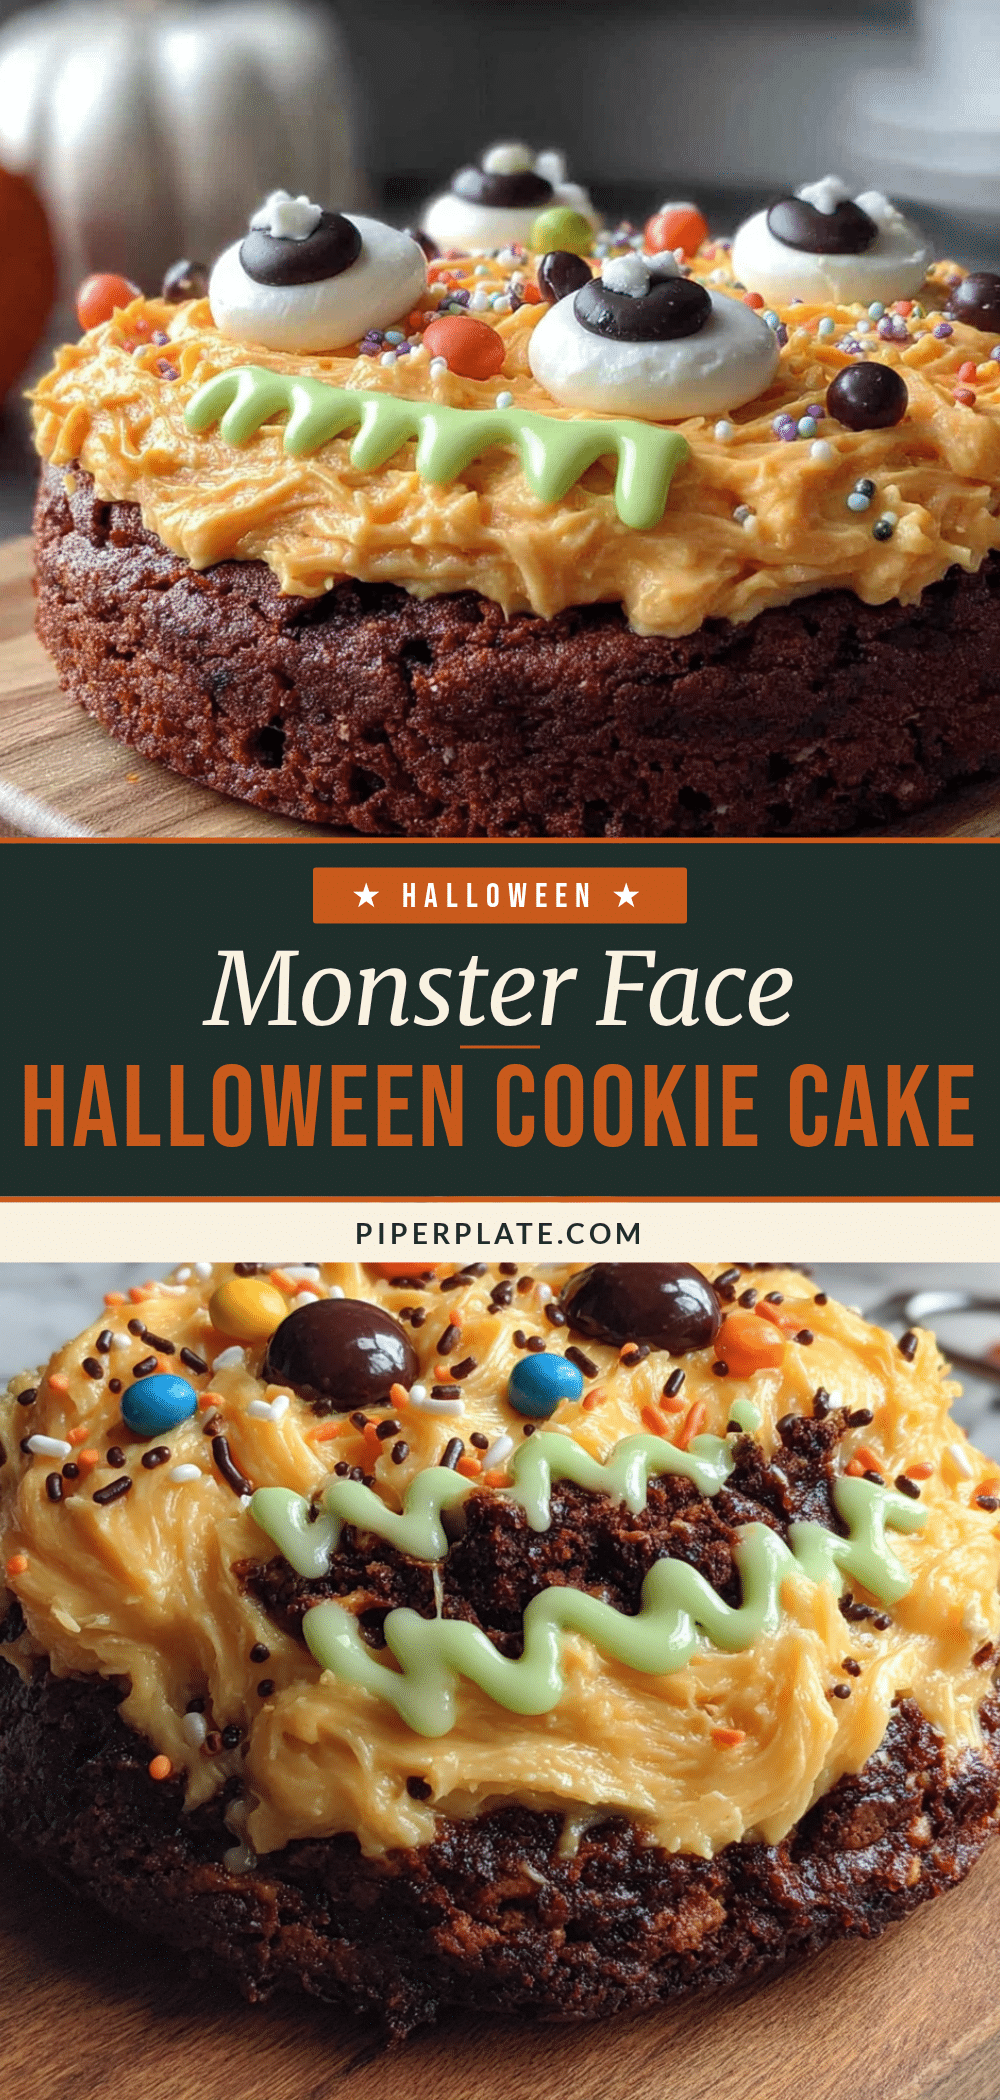
Now for the fun part. Use the black gel icing to draw a mouth, eyebrows, and any other features you want. Press the candy eyeballs into the frosting. Add pretzel sticks for teeth or horns. Use M&M’s for warts or a gummy worm for a tongue. Let your imagination run wild. The messier and more asymmetrical, the better. That’s what makes it a monster.
Step 8: Let It Set
Refrigerate the decorated cookie cake for at least 15 minutes before serving. This helps the frosting firm up and makes slicing cleaner. If you’re serving it at a party, you can leave it out for up to 2 hours. Just keep it away from direct heat.
Cooking Tips & Techniques
Over the years, I’ve made every mistake in the book with this recipe. Here’s what I’ve learned so you don’t have to repeat my failures.
Don’t overmix the dough. I know it’s tempting to keep stirring until it’s perfectly smooth, but overmixing will make the cookie cake tough. Mix just until the ingredients are combined. A few lumps are totally fine.
Use room temperature ingredients. This is a big one. If your egg is cold, it won’t incorporate as well into the melted butter, leading to a denser texture. Let your egg sit on the counter for 15 minutes before starting.
Watch the bake time like a hawk. Ovens vary wildly. My first attempt came out like a hockey puck because I left it in for 25 minutes. Start checking at 18 minutes. The edges should be golden, and the center should still look a little soft. It will firm up as it cools.
Let it cool completely. I cannot stress this enough. I once tried to rush the process and frosted a slightly warm cookie cake. The frosting melted into a green puddle, and my monster looked like it had been through a blender. Patience is key.
Plan your candy layout before decorating. Lay out all your candies on a plate and arrange them in a face pattern before you start sticking them into the frosting. This saves time and prevents you from running out of candy eyes halfway through.
For consistency, use a kitchen scale. If you’re making this recipe often, weighing your ingredients ensures the same results every time. The cake mix box should have the weight listed, so you can double-check you’re using the right amount.
Variations & Adaptations
This recipe is incredibly flexible. Here are some of my favorite ways to change it up.
Gluten-Free Monster Cake
Substitute the regular cake mix with a gluten-free yellow cake mix. The texture will be slightly more crumbly, but it still tastes fantastic. Just make sure to let it cool completely before frosting, as gluten-free cakes tend to be more delicate.
Chocolate Monster Version
Use a chocolate cake mix instead of vanilla. Pair it with chocolate frosting for a double-chocolate monster. I did this for a friend’s birthday, and we used red gel icing for the mouth to make it look like a scary monster. The chocolate flavor is rich and decadent.
Vegan Adaptation
Use a vegan cake mix and replace the egg with a flax egg (1 tablespoon ground flaxseed mixed with 3 tablespoons water). Use vegan butter and vegan frosting. The texture will be a bit denser, but it’s still delicious. I tested this for a vegan friend, and it was a hit at her Halloween party.
Spooky Spider Variation
Instead of a monster face, turn the cookie cake into a giant spider. Use black frosting, add eight pretzel stick legs, and place a large candy eyeball in the center. This is a fun twist that takes the same base recipe in a completely different direction.
Mini Monster Cookies
Instead of one large cookie cake, portion the dough into 12 equal balls and press them into a greased muffin tin. Bake for 12-15 minutes. Once cooled, frost and decorate each mini cookie as its own little monster. These are perfect for party favors or classroom treats.
Serving & Storage Suggestions
This Easy Monster Face Halloween Cookie Cake is best served at room temperature. The texture is soft and chewy, and the frosting is perfectly creamy. If you’ve refrigerated it, let it sit out for about 15 minutes before slicing to take the chill off.
For presentation, place the cookie cake on a festive platter or cake stand. I like to surround it with a few extra candy eyeballs or gummy worms for a spooky effect. If you’re serving it at a party, slice it into wedges like a pizza. Each slice should have a good mix of cookie, frosting, and candy.
Storage is simple. Cover any leftovers with plastic wrap or store in an airtight container at room temperature for up to 3 days. If your kitchen is warm, refrigerate it to keep the frosting from getting too soft. The cookie cake actually tastes even better the next day as the flavors meld together.
For longer storage, you can freeze the unfrosted cookie cake. Wrap it tightly in plastic wrap and then in foil. It will keep for up to 3 months. When you’re ready to serve, thaw it at room temperature, then frost and decorate. This is a great time-saver for busy Halloween weeks.
Reheating is not recommended, as it will melt the frosting. But if you want a warm cookie cake experience, microwave a slice for 10 seconds. The frosting will get slightly melty, and it’s honestly a delicious mess.
The flavors develop beautifully over time. The cookie absorbs a bit of moisture from the frosting, becoming even softer and more tender. That’s why I always recommend making it a day ahead if you can.
Nutritional Information & Benefits
While this is definitely a treat, here’s a rough estimate of the nutritional value per slice (based on 8 servings):
- Calories: 420
- Fat: 18g
- Carbohydrates: 62g
- Protein: 4g
- Sugar: 38g
Let’s be real, this isn’t health food. But there are a few bright spots. The butter provides a small amount of vitamin A, and if you use dark chocolate candies for decoration, you’ll get a tiny dose of antioxidants. The egg adds a bit of protein, which helps balance out the sugar rush.
For dietary considerations, this recipe is nut-free if you use nut-free candies. It’s also vegetarian. It contains gluten, dairy, and eggs, so it’s not suitable for those with allergies to those ingredients without substitutions.
My personal wellness perspective is all about balance. Halloween comes once a year, and this cookie cake is meant to be enjoyed. I serve it alongside a plate of fruit or veggies at parties so there’s something for everyone. The joy it brings is worth every calorie.
Conclusion
This Easy Monster Face Halloween Cookie Cake is more than just a dessert. It’s a memory in the making. It’s the cake you throw together at 11 PM when you’ve forgotten about the school party. It’s the centerpiece that makes kids squeal with delight. And it’s the recipe that proves you don’t need to be a professional baker to create something truly special.
I encourage you to customize it based on your preferences. Use your kid’s favorite candies. Make it as scary or as silly as you want. The whole point is to have fun and let your creativity run wild. I promise you, the results will be delicious no matter what.
Personally, I love this recipe because it reminds me of that rainy October night when I was stressed and overwhelmed, and this little monster cake saved the day. It’s a reminder that the best things in life are often the simplest. So go ahead, make a mess, and enjoy every bite.
I’d love to see your monster creations! Leave a comment below telling me what candies you used or tag me in your photos. Happy Halloween, and happy baking!
Frequently Asked Questions
Can I use a different cake mix flavor?
Absolutely! Chocolate, strawberry, or even spice cake mix work wonderfully. Just keep in mind that the color of the cake will change, which might affect your monster design. A chocolate cake with green frosting makes for a very unique-looking monster.
How far in advance can I make this cookie cake?
You can bake the cookie cake up to 2 days in advance and store it unfrosted at room temperature. Frost and decorate it the day you plan to serve it for the best texture and appearance. The frosting can be made a day ahead and stored in the fridge.
My cookie cake turned out too hard. What went wrong?
The most common culprit is overbaking. Make sure to pull the cookie cake out when the center is still slightly soft. It will continue to cook from residual heat as it cools. Also, check your oven temperature with an oven thermometer, as many ovens run hot.
Can I use homemade frosting instead of store-bought?
Yes, homemade frosting works great. Use your favorite buttercream recipe. I recommend a stiff buttercream so it holds the candy decorations well. If it’s too soft, add a bit more powdered sugar until it reaches a spreadable but firm consistency.
How do I get clean slices?
Use a sharp knife and wipe it clean between each cut. For the cleanest slices, refrigerate the decorated cookie cake for 30 minutes before cutting. This firms up the frosting and prevents it from smearing. A pizza cutter also works surprisingly well for this.
Pin This Recipe!
Best Easy Monster Face Halloween Cookie Cake Recipe
A quick and easy Halloween cookie cake decorated like a silly monster face. Perfect for last-minute school parties or spooky gatherings, this recipe uses simple ingredients and lets your creativity run wild.
- Prep Time: 15 minutes
- Cook Time: 20 minutes
- Total Time: 45 minutes
- Yield: 8 servings 1x
- Category: Dessert
- Cuisine: American
Ingredients
- 1 box (15.25 oz) yellow or vanilla cake mix
- 1/2 cup (1 stick) unsalted butter, melted
- 1 large egg, room temperature
- 1 teaspoon vanilla extract
- 1 tub (16 oz) vanilla frosting
- Green or purple gel food coloring
- Candy eyeballs
- Black gel icing
- Pretzel sticks
- Assorted candies (M&M’s, gummy worms, candy corn, etc.)
Instructions
- Preheat oven to 350°F (175°C). Grease a 9-inch round cake pan and line the bottom with parchment paper.
- In a large mixing bowl, combine cake mix, melted butter, egg, and vanilla extract. Stir until a thick, cohesive dough forms (about 2-3 minutes).
- Press the dough evenly into the prepared pan, reaching all the way to the edges. The dough should be about 1/2 inch thick.
- Bake for 18-22 minutes, until edges are golden brown and center is just set. A toothpick inserted in the center should come out with a few moist crumbs.
- Let cool in the pan for 10 minutes, then transfer to a cooling rack to cool completely.
- While the cookie cake cools, mix the vanilla frosting with a few drops of green or purple gel food coloring until evenly colored.
- Once the cookie cake is completely cool, spread the colored frosting evenly over the top.
- Use black gel icing to draw a mouth, eyebrows, and other features. Press candy eyeballs, pretzel sticks, and assorted candies into the frosting to create a monster face.
- Refrigerate the decorated cookie cake for at least 15 minutes before serving to firm up the frosting.
Notes
Don’t overmix the dough to avoid a tough texture. Use room temperature ingredients for best results. Watch the bake time closely; start checking at 18 minutes. Let the cookie cake cool completely before frosting to prevent melting. Plan your candy layout before decorating. For clean slices, refrigerate for 30 minutes before cutting.
Nutrition
- Serving Size: 1 slice
- Calories: 420
- Sugar: 38
- Fat: 18
- Carbohydrates: 62
- Protein: 4
Keywords: Halloween cookie cake, monster face cake, easy Halloween dessert, cookie cake recipe, spooky cake


