Love this? Save it for later!
Share the inspiration with your friends
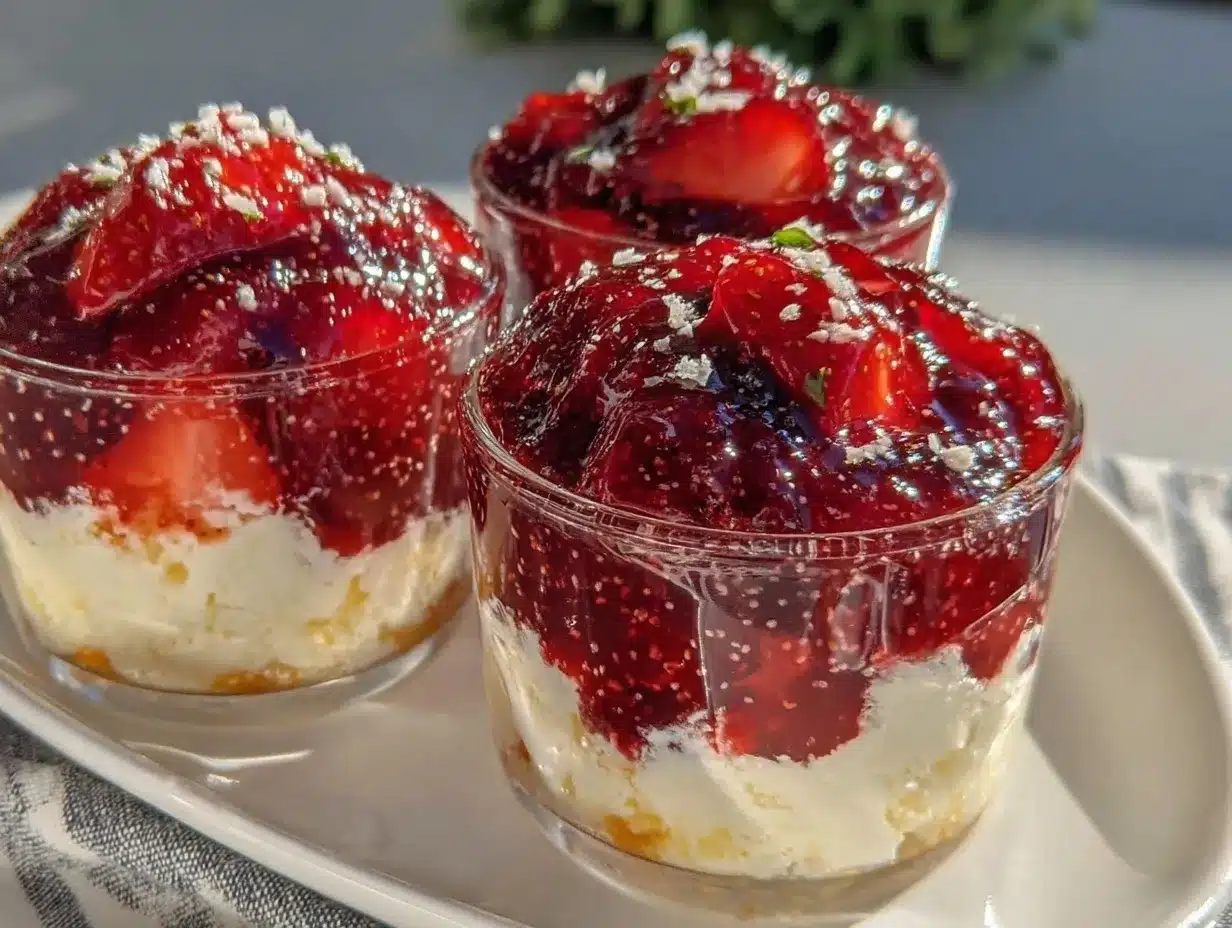
This was supposed to be a simple batch of fruit salad for the Fourth of July picnic. I grabbed the wrong gelatin box — raspberry instead of strawberry — the freezer was packed with ice cream that wouldn’t fit, and I was already running late for the neighborhood potluck. What came out was nothing like the plan — a colorful mess of red, white, and blue layered jello cups that somehow stole the show.
Honestly, I was pretty skeptical at first. I mean, layered jello always seemed a little too retro, like something my grandma might have made back in the seventies. But as the layers set, one after another, in those clear plastic cups, the colors popped brighter than I expected. And when I finally took a bite, that cool, wobbly texture with the bursts of berry and cream flavors was unexpectedly delightful. Maybe you’ve been there — juggling last-minute prep with a kitchen that feels more chaotic than calm.
That cracked mixing bowl I forgot to wash from breakfast, the spilled sugar that stuck to the counter, the timer that went off just as I was stirring the final layer — they all felt like little kitchen disasters. But somehow, these Festive Red White and Blue Layered Jello Cups became the star of the table, and I’ve been making them every summer since. Let me tell you, this recipe isn’t just a patriotic showstopper; it’s a reminder that sometimes, the best dishes come from the messiest moments.
Why You’ll Love This Recipe
If you’re looking for a dessert that’s as fun to make as it is to eat, these Festive Red White and Blue Layered Jello Cups fit the bill perfectly. I’ve made this recipe for everything from casual barbecues to more formal holiday gatherings, and it always gets rave reviews. Here’s why it’s a keeper:
- Quick & Easy: The whole recipe comes together in about 30 minutes, with some chilling time, making it perfect for last-minute celebrations or busy summer afternoons.
- Simple Ingredients: No need for fancy or hard-to-find items — just basic jello flavors, some whipped topping, and a few pantry staples.
- Perfect for Patriotic Occasions: These layered cups bring instant festive vibes to Fourth of July parties, Memorial Day, or even Labor Day cookouts.
- Crowd-Pleaser: Kids love the bright colors and fun texture, while adults appreciate the nostalgic yet fresh taste.
- Unbelievably Delicious: The smooth creamy white layer balances the fruity jello perfectly, creating a texture and flavor combo that’s honestly addictive.
What makes this recipe stand out is the technique of carefully layering each color so the cups look like mini works of art. Plus, using whipped cream folded into the middle layer gives it a light, fluffy texture that’s unlike typical jello desserts. It’s not just a treat; it’s a conversation starter that makes everyone smile. Whether you’re a seasoned home cook or a kitchen newbie, these cups are forgiving and fun — trust me, I’ve dropped a layer or two in the past and it still turned out great!
What Ingredients You Will Need
This recipe uses simple, wholesome ingredients to deliver bold color and satisfying texture without any fuss. You probably have most of these in your kitchen already, and substitutions are easy if needed.
- Red Jello: 1 package (3 oz / 85 g) strawberry or raspberry gelatin mix (I prefer Jell-O for consistent flavor and bright color)
- Blue Jello: 1 package (3 oz / 85 g) blueberry or berry blue gelatin mix (berry blue gives that iconic vibrant blue shade)
- White Layer: 1 cup (240 ml) heavy cream or half-and-half (for richness)
- Sweetened Condensed Milk: 1/2 cup (120 ml) (adds creamy sweetness, can swap with coconut milk condensed for dairy-free option)
- Whipped Topping: 1 cup (240 ml) whipped cream or store-bought whipped topping (folded into white layer for fluffiness)
- Boiling Water: Approximately 2.5 cups (600 ml) total for dissolving gelatin
- Cold Water: 2 cups (480 ml) to mix with gelatin after the hot water step
- Fresh Blueberries and Strawberries: Optional, for garnish (adds fresh texture and a natural touch)
- Mint Leaves: Optional garnish for a pop of green and freshness
For substitutions, if you want to make this gluten-free or vegan, look for gelatin alternatives like agar-agar (though texture may differ). You can also swap dairy ingredients with plant-based options such as almond milk or coconut cream, but be aware the creamy layer’s texture will be less traditional.
Equipment Needed
To make these Festive Red White and Blue Layered Jello Cups, you don’t need anything too fancy, which is part of the charm. Here’s what I used and recommend:
- Clear Plastic or Glass Cups: Small clear cups (about 8 oz / 240 ml) work best to show off the layers. I like using disposable plastic ones for easy cleanup at parties, but glass dessert cups add a touch of elegance.
- Mixing Bowls: At least two medium bowls for mixing the jello layers separately. Using glass or heat-safe bowls helps with handling the hot liquid safely.
- Measuring Cups and Spoons: For precise measurements of liquids and powders — accuracy helps the layers set properly.
- Whisk or Spoon: To dissolve gelatin completely and fold in the whipped topping.
- Refrigerator Space: You’ll need room to chill the cups between layers for about 15–20 minutes each.
If you don’t have small clear cups handy, you can use mason jars or even small bowls. Just be sure they’re heat-safe since you’ll be pouring warm liquid. For whisking, a fork can work in a pinch, but a proper whisk makes dissolving the gelatin smoother. I once tried layering in a hurry without letting each layer set properly — that was a sticky, colorful mess — so patience and proper chilling are key.
Preparation Method
- Prepare the Red Jello Layer: In a medium bowl, dissolve 1 package (3 oz / 85 g) of red gelatin mix in 1 cup (240 ml) boiling water. Stir for about 2 minutes until fully dissolved. Add 1/2 cup (120 ml) cold water to the mixture and stir. Pour about 1/3 cup (80 ml) of this red jello into each clear cup. Place cups in the refrigerator for 15–20 minutes until the layer is firm but still slightly tacky.
- Make the White Creamy Layer: While the red layer chills, whisk together 1 cup (240 ml) heavy cream with 1/2 cup (120 ml) sweetened condensed milk until smooth. Gently fold in 1 cup (240 ml) whipped topping until light and fluffy. This mixture is what gives the dessert its creamy texture.
- Pour the White Layer: Carefully spoon or pour about 1/3 cup (80 ml) of the white creamy mixture over the set red jello layer in each cup. Chill again for 15–20 minutes to allow it to set properly.
- Prepare the Blue Jello Layer: Dissolve the blue gelatin package in 1 cup (240 ml) boiling water, stirring for 2 minutes. Add 1/2 cup (120 ml) cold water and stir. Gently pour about 1/3 cup (80 ml) of blue jello on top of the white layer in each cup. Return to the fridge and chill for at least 30 minutes, or until fully set.
- Garnish and Serve: Once fully set, top with fresh blueberries, sliced strawberries, and a sprig of mint if desired. Serve chilled for the best wobbly, festive experience.
Tip: Pour the layers slowly over the back of a spoon to avoid mixing colors. Also, make sure each layer is sufficiently set before adding the next; otherwise, the layers will blend and lose their distinct stripes.
Warning: Avoid rushing the chilling times. I learned the hard way that impatient layering leads to sad color blends and a sticky mess on the sides. A kitchen timer is your best friend here!
Cooking Tips & Techniques
Making layered jello cups looks impressive, but it’s all about a few key tricks I’ve picked up over many attempts:
- Patience is crucial. Each layer needs time to firm up so the layers don’t mix. Setting the layers just until tacky (not fully hardened) helps the next layer stick without bleeding colors.
- Use the back of a spoon or steady hand. Pouring the jello over the spoon breaks the fall and prevents splashes that can ruin the layers.
- Whip the creamy white layer gently. Folding the whipped cream or topping into the condensed milk and cream mixture keeps it light and airy, preventing the dessert from feeling heavy.
- Keep gelatin powder fresh. Old gelatin can lose its setting power, so always check expiration dates. I once wasted a batch because the gelatin was stale — lesson learned!
- Multitasking helps. While the red layer chills, prepare the white mix, and then the blue layer, so you’re not waiting unnecessarily. Setting a timer for each step keeps everything on track.
One mistake I made early on was skipping the cold water after dissolving gelatin in boiling water — it made the jello too hot and watery, causing the layers to run. So, don’t skip that step! Also, when folding in whipped topping, gently fold rather than stir vigorously to keep the texture light.
Variations & Adaptations
Feel free to customize these festive jello cups to suit your tastes or dietary needs. Here are some ideas I’ve tried or recommend:
- Fruit Variations: Swap strawberries and blueberries with raspberries and blackberries for a slightly different flavor and color vibe.
- Layer Flavors: Try lemon or coconut jello for the white layer instead of creamy whipped topping, or use lime for a green twist for other holidays.
- Non-Dairy Version: Use coconut cream and dairy-free whipped topping with agar-agar gelatin alternatives for vegan-friendly cups.
- Alcohol-Infused: For adult parties, add a splash of vodka or rum to the jello before chilling (reduce the water slightly to compensate).
- Different Serving Styles: Instead of cups, make this in a large trifle bowl for a shareable dessert bowl with the same layered effect.
One personal favorite twist is layering in mini mason jars and adding a layer of crushed graham crackers between the white and blue layers for a subtle crunch and texture contrast. It feels a bit like a festive cheesecake-jello mashup!
Serving & Storage Suggestions
Serve these jello cups chilled straight from the fridge for that perfect wobble and refreshing taste. They look fantastic lined up on a dessert table or carried to a picnic in a cooler.
Pair them with light, summery dishes like grilled chicken skewers or a crisp green salad, and for drinks, lemonade or iced tea complement the sweet, fruity flavors nicely.
To store, cover the cups tightly with plastic wrap or lids and keep refrigerated for up to 3 days. The layers hold up well, but the whipped cream layer might soften slightly over time.
For reheating — well, you don’t want to microwave jello! Instead, just let the cups sit at room temperature for 5–10 minutes before serving if too cold. Flavors actually meld nicely when chilled overnight, so these cups can be made a day ahead.
Nutritional Information & Benefits
Each festive jello cup roughly contains:
| Calories | 150-180 kcal |
|---|---|
| Carbohydrates | 30-35 g |
| Fat | 3-5 g |
| Protein | 1-2 g |
The key ingredients offer some perks: gelatin contains collagen which might support skin and joint health, and the fresh berries add antioxidants and vitamin C. Using real cream adds richness but also fat, so this dessert is best enjoyed as a treat rather than everyday fare.
This recipe is naturally gluten-free, and with simple swaps, it can be made dairy-free or vegan. Just be sure to check ingredient labels if allergies are a concern.
Conclusion
These Festive Red White and Blue Layered Jello Cups are proof that sometimes kitchen mishaps lead to the most memorable recipes. They’re easy, fun, and bring a nostalgic yet fresh twist to patriotic celebrations. I keep coming back to this recipe because it’s a cheerful crowd-pleaser that’s forgiving to make — even when the kitchen is chaos.
Feel free to play around with the flavors and garnishes to make it your own. I’d love to hear how you customize your jello cups — please share your thoughts or photos in the comments below! Give this recipe a try at your next summer gathering and watch it become a staple for years to come.
Remember, sometimes the best dishes come from those imperfect, hectic moments — and this dessert definitely proves it.
FAQs
How long does it take for each jello layer to set?
Each layer typically needs about 15–20 minutes in the refrigerator to become firm enough to hold the next layer without mixing.
Can I make these jello cups ahead of time?
Yes! Prepare them up to 2 days in advance and keep refrigerated. The flavors develop nicely, though the whipped layer may soften slightly over time.
What if I don’t have clear cups to show off the layers?
You can use small bowls or mason jars, but clear containers work best to highlight the festive colors.
Can I substitute gelatin with a vegetarian alternative?
Yes, agar-agar is a good vegetarian substitute, but the texture will be a bit different and may require some recipe adjustments.
How do I prevent the layers from mixing?
Make sure each layer is chilled and just set (tacky) before adding the next one. Pour the new layer slowly over the back of a spoon to avoid disturbing the layer below.
Pin This Recipe!
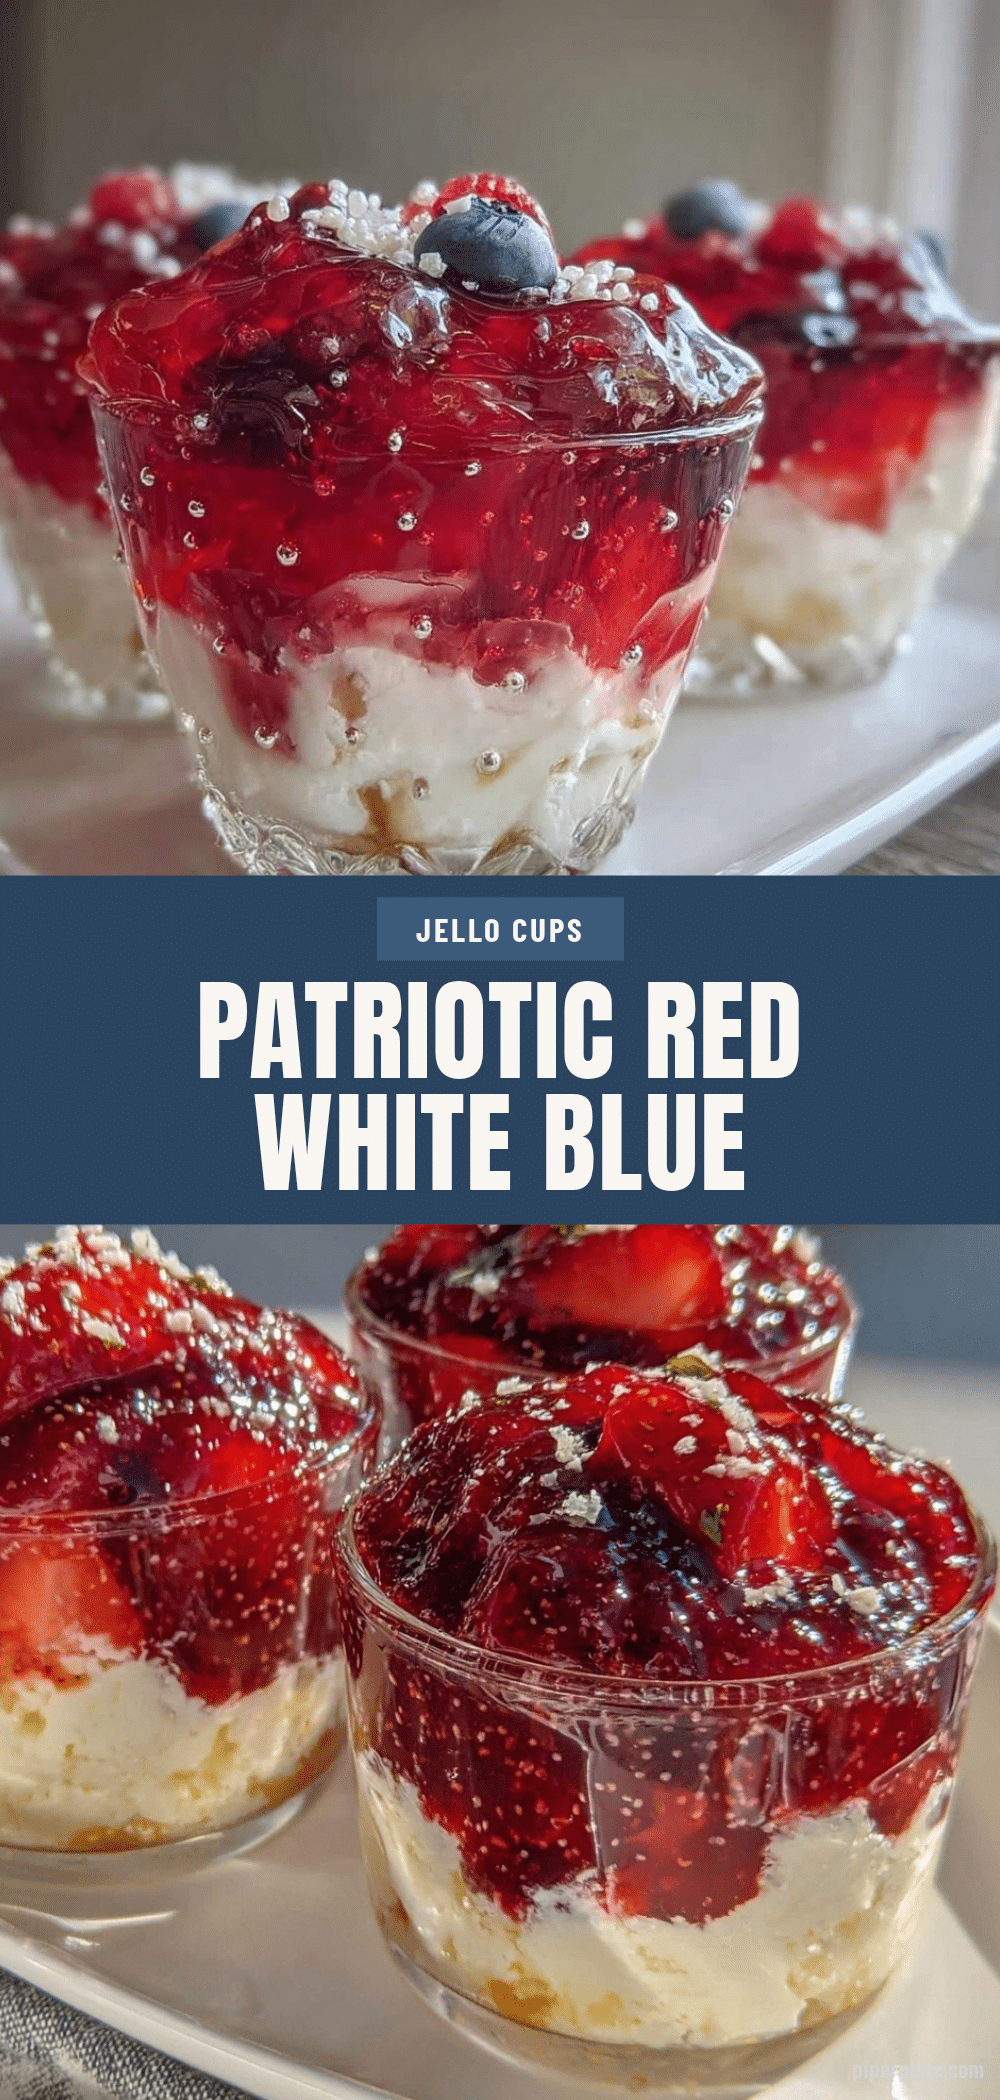
Festive Red White and Blue Layered Jello Cups Easy Patriotic Dessert Recipe
A fun and easy patriotic dessert featuring vibrant red, white, and blue layered jello cups with a creamy middle layer, perfect for Fourth of July and other summer celebrations.
- Prep Time: 10 minutes
- Cook Time: 20 minutes
- Total Time: 1 hour 15 minutes
- Yield: 8 servings 1x
- Category: Dessert
- Cuisine: American
Ingredients
- 1 package (3 oz / 85 g) strawberry or raspberry gelatin mix
- 1 package (3 oz / 85 g) blueberry or berry blue gelatin mix
- 1 cup (240 ml) heavy cream or half-and-half
- 1/2 cup (120 ml) sweetened condensed milk
- 1 cup (240 ml) whipped cream or store-bought whipped topping
- Approximately 2.5 cups (600 ml) boiling water
- 2 cups (480 ml) cold water
- Fresh blueberries and strawberries (optional, for garnish)
- Mint leaves (optional, for garnish)
Instructions
- Prepare the Red Jello Layer: In a medium bowl, dissolve 1 package (3 oz / 85 g) of red gelatin mix in 1 cup (240 ml) boiling water. Stir for about 2 minutes until fully dissolved. Add 1/2 cup (120 ml) cold water to the mixture and stir. Pour about 1/3 cup (80 ml) of this red jello into each clear cup. Place cups in the refrigerator for 15–20 minutes until the layer is firm but still slightly tacky.
- Make the White Creamy Layer: While the red layer chills, whisk together 1 cup (240 ml) heavy cream with 1/2 cup (120 ml) sweetened condensed milk until smooth. Gently fold in 1 cup (240 ml) whipped topping until light and fluffy.
- Pour the White Layer: Carefully spoon or pour about 1/3 cup (80 ml) of the white creamy mixture over the set red jello layer in each cup. Chill again for 15–20 minutes to allow it to set properly.
- Prepare the Blue Jello Layer: Dissolve the blue gelatin package in 1 cup (240 ml) boiling water, stirring for 2 minutes. Add 1/2 cup (120 ml) cold water and stir. Gently pour about 1/3 cup (80 ml) of blue jello on top of the white layer in each cup. Return to the fridge and chill for at least 30 minutes, or until fully set.
- Garnish and Serve: Once fully set, top with fresh blueberries, sliced strawberries, and a sprig of mint if desired. Serve chilled.
Notes
Pour layers slowly over the back of a spoon to avoid mixing colors. Make sure each layer is sufficiently set (tacky) before adding the next to maintain distinct layers. Use a kitchen timer to keep track of chilling times. For dairy-free or vegan versions, substitute dairy ingredients with plant-based alternatives and use agar-agar instead of gelatin.
Nutrition
- Serving Size: 1 cup (about 8 oz /
- Calories: 165
- Sugar: 28
- Sodium: 60
- Fat: 4
- Saturated Fat: 2.5
- Carbohydrates: 32
- Fiber: 1
- Protein: 1.5
Keywords: layered jello cups, patriotic dessert, Fourth of July dessert, easy jello recipe, red white and blue dessert, summer dessert, layered gelatin cups