Love this? Save it for later!
Share the inspiration with your friends
Lisa wasn’t trying to impress anyone. I’d stopped by her place on a random Thursday afternoon to pick up a book I’d lent her, and the smell hit me before I even got past the screen door. It was warm and spicy, like autumn had decided to take up residence in her tiny kitchen. She was bent over a baking sheet, a smear of flour on her cheek, muttering something about the timer being broken.
“What is that?” I asked, peering over her shoulder. Sitting on the counter were these little cookies shaped like witches’ hats, all dark and glossy with a dusting of what looked like orange sugar. They were ridiculous and adorable and completely unexpected for a random weekday afternoon.
“Oh, just something I threw together for the kids’ school thing,” she said, waving her hand like it was nothing. “Pumpkin spice mix I had in the cupboard. It’s not a big deal.”
But it was a big deal. I mean, let me tell you—I took one bite and honestly, I almost forgot why I’d come over. The cookie itself was soft and tender, not too sweet, with that cozy pumpkin spice warmth that makes you want to curl up under a blanket. And the chocolate hat on top? Perfectly crisp, with a little orange sprinkle crown that made me smile like an idiot.
Maybe you’ve been there—you taste something so unexpectedly perfect that you can’t stop thinking about it. That’s what these wholesome pumpkin spice witches’ hat cookies did to me. I asked her for the recipe three times before she finally wrote it down on a napkin, and I’ve been making them ever since. They’re not just for Halloween, honestly. They’re for those days when you need a little magic without all the fuss.
Why You’ll Love This Recipe
These aren’t your average Halloween cookies. After testing this recipe at least a dozen times (and yes, I ate every single failed batch), I can tell you exactly why these wholesome pumpkin spice witches’ hat cookies are worth every minute in the kitchen.
- Quick & Easy: From start to finish, you’re looking at about 35 minutes. The dough comes together in one bowl, and there’s no chilling time required. Perfect for those last-minute Halloween parties or when the kids suddenly announce they need treats for tomorrow.
- Simple Ingredients: You probably have most of these in your pantry right now. Canned pumpkin, pumpkin pie spice, butter, sugar, flour—nothing weird or hard to find. I tested this with both store-brand and name-brand ingredients, and honestly, it works beautifully either way.
- Perfect for Halloween: These cookies look like little witches’ hats, which means they’re basically the cutest thing on any dessert table. But they’re not loaded with artificial colors or scary amounts of sugar, so you can feel good about serving them to kids and adults alike.
- Crowd-Pleaser: I brought these to a neighborhood potluck last October, and I swear, people grabbed them before they even looked at the candy corn. Kids love the hat shape, and adults love the warm pumpkin spice flavor that isn’t overwhelming.
- Unbelievably Delicious: Here’s the thing—the cookie base is soft and almost cake-like, the chocolate hat adds this satisfying snap, and the orange sugar on top gives it a little crunch. The texture combination is honestly next-level comfort food.
What makes this recipe different from all the other Halloween cookies out there? It’s the balance. Most witch hat cookies use a sugar cookie base that’s either too sweet or too dry. This one uses real pumpkin and just the right amount of spice, so you get that wholesome fall flavor without feeling like you’re eating a candle. Plus, the technique of pressing a chocolate kiss into the warm cookie creates that perfect hat shape without any complicated piping or molding. It’s genius in its simplicity, and I wish I could take credit for it, but nope—that was all Lisa’s casual brilliance.
This recipe is the kind that makes you close your eyes after the first bite. It’s comfort food reimagined—healthier than most Halloween treats, faster than you’d expect, but with the same soul-soothing satisfaction that makes you reach for another one before you’ve even finished the first.
What Ingredients You Will Need
This recipe uses simple, wholesome ingredients to deliver that cozy pumpkin spice flavor and the perfect cookie texture. Most of these are pantry staples, especially if you’re already in the fall baking mindset. Here’s what you’ll need and why each one matters:
For the Cookie Dough
- Canned pumpkin puree, ½ cup (not pumpkin pie filling—make sure it’s 100% pure pumpkin). I prefer Libby’s for its consistent texture, but any brand works. The pumpkin adds moisture and that subtle earthy sweetness without making the cookies taste like vegetables.
- Unsalted butter, ½ cup (1 stick), softened to room temperature. If you forget to take it out ahead of time, microwave it for about 10 seconds—just don’t melt it completely. Salted butter works too, just reduce the added salt by a pinch.
- Granulated sugar, ½ cup. This gives the cookies structure and sweetness. You can reduce it to ⅓ cup if you prefer less sweet cookies, but don’t go lower or the texture will suffer.
- Light brown sugar, ¼ cup, packed. This adds moisture and a hint of molasses flavor that pairs beautifully with the pumpkin spice. Dark brown sugar works too if that’s what you have.
- Large egg, 1, at room temperature. The egg binds everything together and helps the cookies rise just a bit. If your egg is cold, place it in a bowl of warm water for 5 minutes.
- Vanilla extract, 1 teaspoon. Pure vanilla is best, but imitation works in a pinch. It enhances all the warm spices without overpowering them.
- All-purpose flour, 1¾ cups. Spoon and level your flour—don’t scoop directly from the bag or you’ll end up with dense cookies. For a gluten-free version, use a 1:1 gluten-free baking flour blend.
- Pumpkin pie spice, 1½ teaspoons. You can use store-bought or make your own by mixing ½ teaspoon cinnamon, ¼ teaspoon nutmeg, ¼ teaspoon ginger, and ⅛ teaspoon cloves. I honestly prefer the homemade version—it tastes brighter somehow.
- Baking powder, 1 teaspoon. This gives the cookies a little lift so they’re not flat and sad.
- Salt, ¼ teaspoon. Don’t skip this—salt balances the sweetness and makes the spices pop.
For the Hats and Decoration
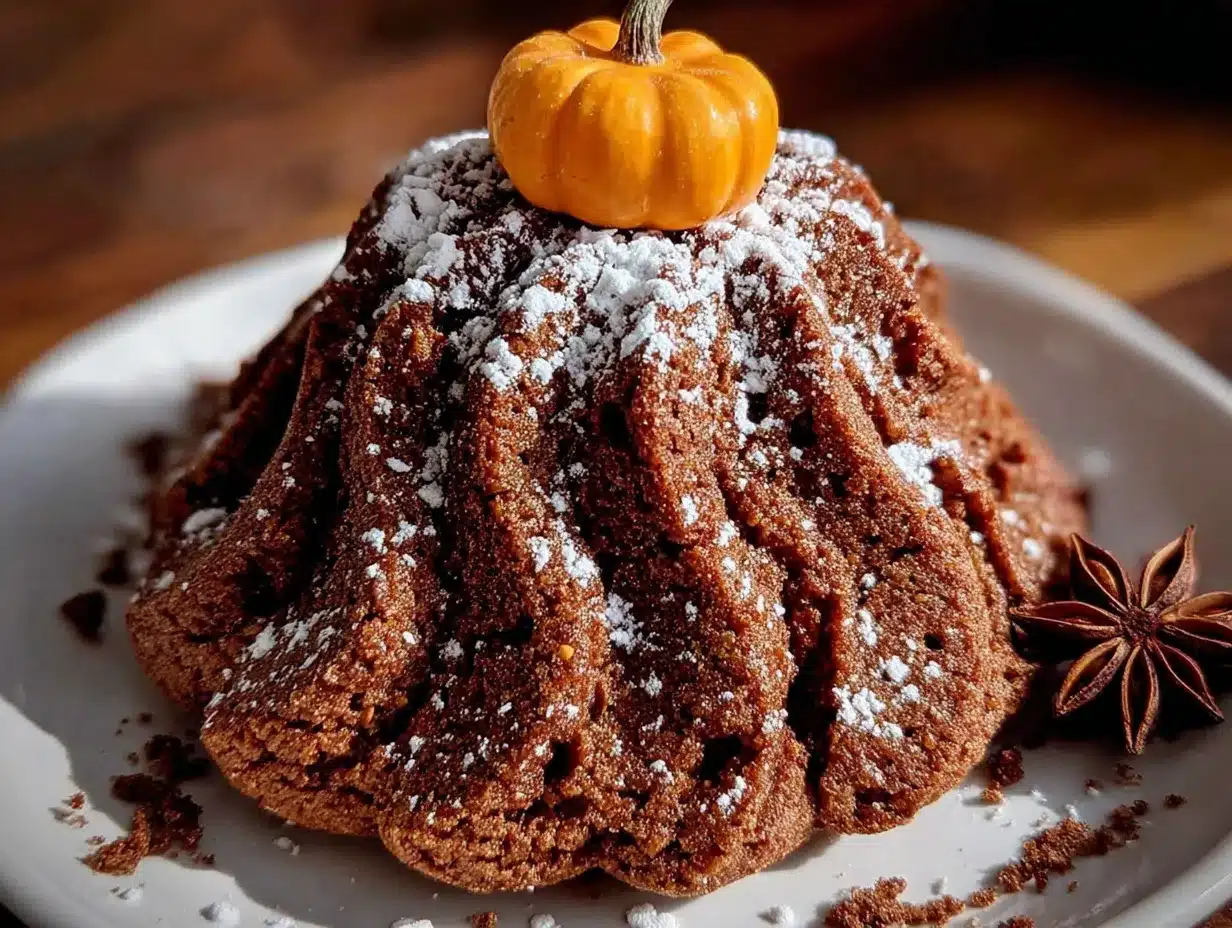
- Chocolate kisses, about 24-30, unwrapped. Hershey’s are the classic choice, but any brand works. You want them to have a flat bottom so they sit nicely on the cookie. If you’re dairy-free, there are great vegan chocolate options available now.
- Orange sanding sugar, 2-3 tablespoons. This gives the hats that festive Halloween look. You can find it in the baking aisle, or make your own by mixing granulated sugar with a drop of orange food coloring and letting it dry.
- Powdered sugar, optional, for dusting. A light sprinkle makes them look like they’re covered in autumn frost, but it’s totally optional.
One thing I learned the hard way—make sure your pumpkin puree isn’t watery. If there’s liquid sitting on top of the opened can, pour it off before measuring. Too much moisture will make the cookies spread out flat instead of staying nice and thick. Also, I recommend using a cookie scoop for consistent sizes. It’s not required, but it makes a huge difference in how evenly they bake.
Equipment Needed
You don’t need a fancy kitchen to make these wholesome pumpkin spice witches’ hat cookies. Here’s what you’ll actually use:
- Large mixing bowl—any bowl works, but a wide one makes creaming the butter and sugar easier
- Electric hand mixer or stand mixer—you can do this by hand with a wooden spoon, but your arm will thank you for using a mixer
- Baking sheets—2 standard-sized sheets, preferably light-colored (dark sheets can cause over-browning)
- Parchment paper or silicone baking mat—non-negotiable for easy cleanup and preventing sticking
- Cookie scoop—a 1½-tablespoon scoop gives you perfectly uniform cookies. I bought mine for $8 at a kitchen supply store and use it constantly
- Cooling rack—wire rack is best so the cookies cool evenly and the chocolate sets properly
- Small bowl—for the orange sanding sugar
- Spatula—for transferring cookies to the cooling rack
If you don’t have a cookie scoop, just use two spoons to portion the dough. Your cookies won’t be perfectly uniform, but honestly, that gives them a more homemade look. And if you don’t have a cooling rack, you can cool the cookies on a clean towel—just make sure they’re completely cool before adding the chocolate kisses.
Preparation Method
Alright, let’s make some magic happen. Here’s how to make these wholesome pumpkin spice witches’ hat cookies step by step:
- Preheat your oven to 350°F (175°C). Line two baking sheets with parchment paper or silicone mats. Trust me on this—don’t skip the parchment. I once tried baking these directly on a greased pan, and the bottoms got too dark while the centers were still soft.
- Cream the butter and sugars together. In your large mixing bowl, beat the softened butter, granulated sugar, and brown sugar together until light and fluffy, about 2-3 minutes. You want it to look pale and a little airy. Scrape down the sides of the bowl halfway through. If you’re using a hand mixer, this is a good arm workout—I usually switch arms halfway through.
- Add the wet ingredients. Beat in the pumpkin puree, egg, and vanilla extract until everything is well combined. The mixture might look a little curdled at this point—don’t panic, that’s normal. The pumpkin and butter don’t always want to be friends right away, but they’ll come together once you add the dry ingredients.
- Mix the dry ingredients separately. In a separate medium bowl, whisk together the flour, pumpkin pie spice, baking powder, and salt. This ensures the spices are evenly distributed so you don’t get one cookie that’s super spicy and another that’s bland. I learned this after my first batch had a rogue clump of cloves in one cookie—not pleasant.
- Combine wet and dry ingredients. Gradually add the dry ingredients to the wet mixture, mixing on low speed or stirring with a spatula until just combined. Do not overmix! Stop as soon as you don’t see any more streaks of flour. Overmixing develops gluten and makes the cookies tough, and nobody wants a tough witch hat.
- Portion the dough. Using your cookie scoop or a tablespoon, drop rounded scoops of dough onto the prepared baking sheets, spacing them about 2 inches apart. You should get about 24-30 cookies depending on how generous you are with your scoops. I usually get exactly 28, which means 14 per baking sheet.
- Bake the cookies. Place one baking sheet at a time in the preheated oven. Bake for 10-12 minutes, or until the edges are set and lightly golden. The centers will still look soft and slightly underdone—that’s exactly what you want. They’ll continue cooking on the hot baking sheet after you take them out. For softer, cakier cookies, bake for 10 minutes. For slightly firmer cookies, go for 12.
- Shape the hats immediately. This is the crucial step. As soon as the cookies come out of the oven, while they’re still hot, gently press a chocolate kiss into the center of each cookie, pointed side up. The cookie should be soft enough that the kiss sinks in slightly, creating that hat shape. Don’t press too hard or the kiss will disappear into the cookie—you want it to sit about halfway in. Work quickly because the cookies firm up fast.
- Add the orange sugar. While the chocolate is still soft from the heat, sprinkle a pinch of orange sanding sugar around the base of each kiss. This creates the hatband effect and adds that festive Halloween touch. If you wait too long, the sugar won’t stick.
- Cool completely. Let the cookies cool on the baking sheet for about 5 minutes, then transfer them to a wire rack to cool completely. The chocolate kisses need time to set, so resist the urge to eat them right away—I know it’s hard. Once fully cooled, the chocolate will be firm and the cookies will be perfectly tender.
One more thing—if your kitchen is warm, the chocolate kisses might get a little melty. Pop the cookies in the fridge for 10 minutes to help the chocolate set. This also makes them easier to stack for storage.
Cooking Tips & Techniques
After making these wholesome pumpkin spice witches’ hat cookies more times than I care to admit, I’ve collected a few tips that make the process smoother and the results better. Let me save you from my mistakes.
Don’t overbake. This is the number one mistake I see people make with pumpkin cookies. Pumpkin puree makes baked goods naturally moist, so they can look underdone even when they’re perfectly cooked. If you wait until the cookies look fully set and golden all over, they’ll be dry and crumbly. Take them out when the edges are set and the centers still look slightly soft. They’ll firm up as they cool.
Use room temperature ingredients. Cold butter doesn’t cream properly with sugar, and cold egg can seize up your batter. Take everything out of the fridge about 30 minutes before you start baking. If you forgot, you can soften the butter in the microwave in 5-second bursts, and place the egg in a bowl of warm water for 5 minutes.
Work in batches. Don’t try to bake both sheets at the same time unless your oven has true convection and you know it bakes evenly. Most ovens have hot spots, and rotating one sheet at a time gives you more control. The first batch can be cooling while the second batch bakes.
Keep the kisses cold. Unwrap your chocolate kisses and keep them in the fridge until you’re ready to use them. Cold kisses hold their shape better when pressed into the hot cookies. If they’re room temperature, they’ll get too soft and might melt into a puddle instead of staying hat-shaped.
Have a backup plan for broken kisses. Sometimes chocolate kisses break when you unwrap them. Don’t throw them away—just chop them up and sprinkle the pieces over the cookies instead. They won’t look like hats, but they’ll taste just as good. Or you can melt them and drizzle over the cooled cookies for a different look.
One thing I wish I’d known earlier—if you’re making these with kids, let them handle the unwrapping and pressing of the kisses. It’s a perfect job for little hands, and they love seeing the hats come together. Just be prepared for a few kisses to mysteriously disappear into little mouths.
Variations & Adaptations
These wholesome pumpkin spice witches’ hat cookies are pretty perfect as written, but I’ve played around with a few variations that turned out surprisingly well. Here are some ways to make them your own:
Gluten-Free Version: Substitute the all-purpose flour with a 1:1 gluten-free baking flour blend. I’ve tested this with Bob’s Red Mill and King Arthur Measure for Measure, and both worked beautifully. The cookies might be slightly more tender, so handle them gently when transferring to the cooling rack. No other adjustments needed—the pumpkin helps keep them moist even without gluten.
Vegan Adaptation: Use a flax egg (1 tablespoon ground flaxseed mixed with 3 tablespoons water, let sit for 5 minutes) instead of the regular egg, and substitute the butter with a high-quality vegan butter like Earth Balance. For the chocolate kisses, look for dairy-free options—Enjoy Life makes great ones. The texture will be slightly different, more cake-like, but the flavor is still spot-on.
Spice It Up: If you’re a spice lover like me, add an extra ½ teaspoon of cinnamon and a pinch of cardamom to the dough. It gives the cookies a more complex, chai-like flavor that’s incredible with the pumpkin. I made this version for a friend who said regular pumpkin spice was “too basic,” and she asked for the recipe twice.
Different Chocolate Shapes: Not feeling the witch hat look? Use caramel-filled chocolate candies instead of kisses for a gooey surprise center. Or press a white chocolate kiss into the center for a ghostly look. You can even use mini peanut butter cups for a completely different flavor profile.
Add Mix-Ins: Fold in ½ cup of mini chocolate chips or chopped pecans before baking. The chips add extra chocolate throughout, and the pecans give a nice crunch that contrasts with the soft cookie. I made a batch with white chocolate chips and dried cranberries for a holiday version, and they were a huge hit.
One variation I tried that didn’t work—adding cream cheese to the dough. I thought it would make them extra creamy, but it made them too soft and they spread into flat puddles. Stick with the original recipe unless you’re feeling particularly experimental.
Serving & Storage Suggestions
These wholesome pumpkin spice witches’ hat cookies are best served at room temperature, which lets the chocolate set properly and the cookie stay soft. Here’s how to make the most of them:
Serving Temperature: Pull them out of the fridge about 15 minutes before serving if you’ve stored them cold. The chocolate should be firm but not rock-hard, and the cookie should be tender. If you’re serving them at a party, arrange them on a platter with a dusting of powdered sugar for a snowy effect. They look adorable next to a bowl of candy corn or caramel apples.
Presentation Ideas: For Halloween parties, I like to arrange them on a black or orange platter with a few fake spiderwebs or plastic spiders scattered around. For a more elegant look, stack them on a cake stand with a sprinkle of orange sanding sugar on the plate. They also look great in clear treat bags tied with orange ribbon—perfect for party favors or school treat bags.
Storage: Store the cookies in an airtight container at room temperature for up to 5 days. Layer them between sheets of parchment paper to prevent sticking and to protect the chocolate hats. If your kitchen is warm (above 70°F), store them in the fridge to keep the chocolate from getting soft.
Freezing: These cookies freeze beautifully. Place them in a single layer on a baking sheet and freeze until firm, about 1 hour, then transfer to a freezer-safe container or bag. They’ll keep for up to 3 months. To thaw, let them sit at room temperature for about 20 minutes. The chocolate might get a little white from condensation, but it’ll clear up as they warm.
Reheating: If you want that just-baked warmth, pop a cookie in the microwave for 8-10 seconds. Don’t go longer or the chocolate will melt into a puddle. For a larger batch, warm them in a 300°F oven for 3-4 minutes.
One thing I love about these cookies—they actually taste better the next day. The pumpkin flavor deepens and the spices meld together overnight. So if you can resist eating them all right away, you’re in for a treat.
Nutritional Information & Benefits
Let’s be real—these are still cookies, so they’re not health food. But compared to most Halloween treats, these wholesome pumpkin spice witches’ hat cookies are actually pretty reasonable. Here’s the estimated breakdown per cookie (based on 28 cookies):
| Nutrient | Amount Per Cookie |
|---|---|
| Calories | 145 |
| Total Fat | 7g |
| Saturated Fat | 4g |
| Carbohydrates | 20g |
| Sugar | 12g |
| Fiber | 1g |
| Protein | 2g |
The pumpkin in these cookies adds a decent amount of vitamin A and fiber, which is more than you can say for most Halloween sweets. Pumpkin is also rich in antioxidants and can support eye health—not that you’re eating these for health reasons, but it’s nice to know there’s something beneficial hiding in there.
These cookies are also lower in sugar than many Halloween recipes because the pumpkin adds natural sweetness and moisture, allowing you to use less sugar without sacrificing flavor. If you’re watching your sugar intake, you can reduce the granulated sugar to ⅓ cup without affecting the texture too much.
For anyone with dietary concerns, this recipe can be made gluten-free and vegan with the substitutions I mentioned earlier. It’s naturally nut-free if you skip the pecan variation, but check your chocolate kisses for potential cross-contamination if allergies are a concern. The cookies do contain dairy and eggs in their standard form.
Personally, I feel good about serving these to my family because they’re made with real ingredients—no artificial flavors, no preservatives, just butter, pumpkin, and warm spices. They’re a treat, absolutely, but they’re a treat made with intention. And honestly, that matters more to me than any number on a nutrition label.
Conclusion
These wholesome pumpkin spice witches’ hat cookies have become a fall staple in my kitchen, and I have a feeling they’ll become one in yours too. They’re the kind of recipe that looks impressive but is secretly simple—the perfect combination for busy Halloween seasons when you want to bring something special without spending all day in the kitchen.
What I love most about these cookies is how they bring people together. Every time I make them, someone asks for the recipe. They spark conversations at parties, make kids’ eyes light up, and somehow manage to feel both festive and wholesome at the same time. That’s a rare thing in the world of Halloween treats.
I’d love to hear how these turn out for you. Did you try any of the variations? Did your kids help with the chocolate kisses? Did you come up with your own twist? Drop a comment below and let me know—I read every single one, and I’m always looking for new ideas to try. And if you share them on social media, tag me so I can see your beautiful witch hats in all their glory.
Happy baking, and may your kitchen smell like autumn magic!
Frequently Asked Questions
Can I use homemade pumpkin puree instead of canned?
Yes, you can use homemade pumpkin puree, but you’ll need to strain it first. Homemade puree tends to be more watery than canned, which can make the cookies spread too much. Place the puree in a cheesecloth-lined strainer over a bowl and let it drain for about 30 minutes before using. You want it to be about the same consistency as canned pumpkin.
Why did my cookies spread out flat?
This usually happens for one of three reasons: your butter was too soft or melted, your pumpkin puree was too watery, or you didn’t measure the flour correctly. Make sure your butter is softened but not melted, drain any excess liquid from the pumpkin, and spoon and level your flour instead of scooping directly from the bag. Chilling the dough for 15 minutes before baking can also help prevent spreading.
Can I make the dough ahead of time?
Absolutely! You can prepare the dough up to 2 days in advance and keep it covered in the refrigerator. Let it sit at room temperature for about 10 minutes before scooping and baking, as cold dough is harder to work with. You can also freeze the dough balls for up to 3 months—just bake them directly from frozen, adding 1-2 minutes to the baking time.
What if I can’t find orange sanding sugar?
No problem! You can make your own by mixing regular granulated sugar with a drop of orange food coloring. Spread the mixture on a baking sheet and let it dry for about 30 minutes before using. Alternatively, you can skip the colored sugar entirely and use regular sanding sugar, or sprinkle the cookies with a little cinnamon sugar for a different look.
How do I keep the chocolate kisses from falling over?
The key is pressing them in while the cookies are still hot and soft. If the kisses keep falling over, your cookies might have cooled too much before you added them. Try working with one baking sheet at a time and adding the kisses immediately after the cookies come out of the oven. If they still won’t stay upright, gently press them in at a slight angle—they’ll look like crooked witch hats, which is honestly kind of charming.
Pin This Recipe!
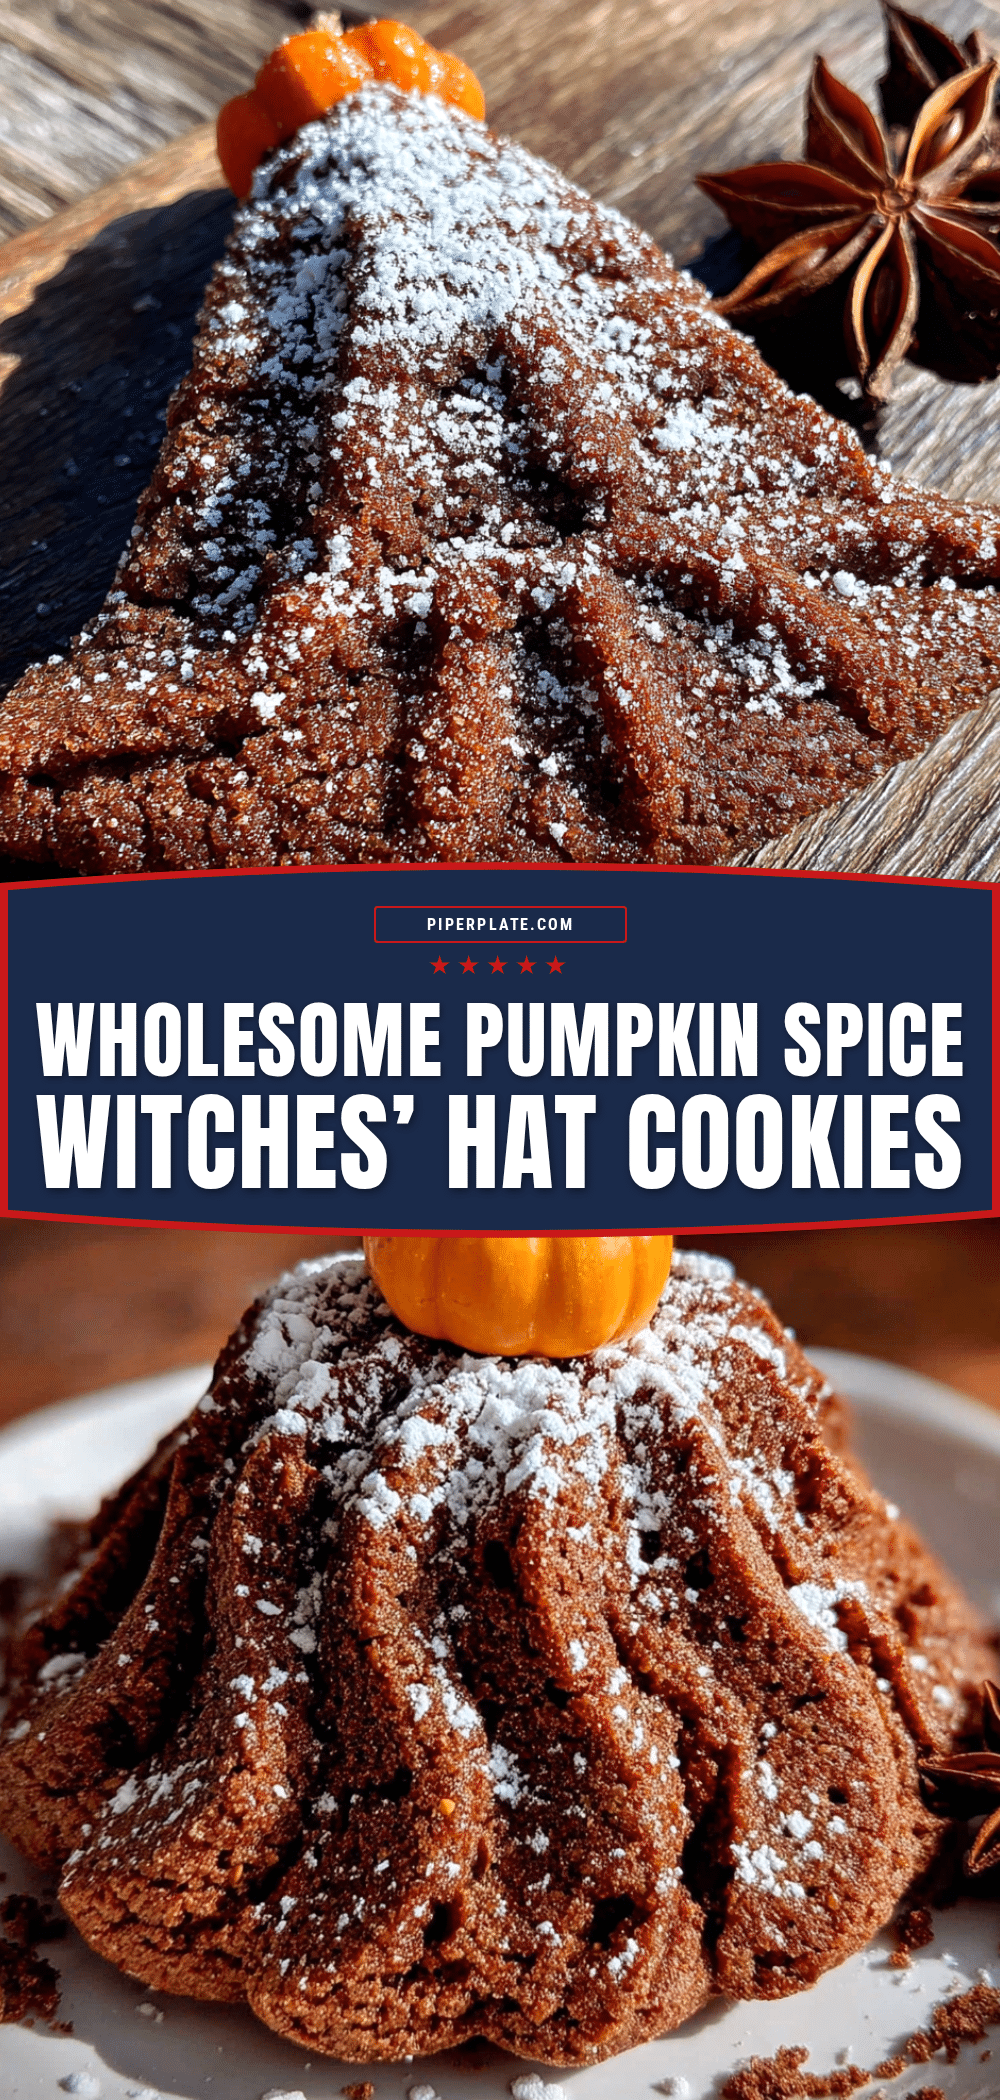
Wholesome Pumpkin Spice Witches Hat Cookies: Easy Halloween Treats
These soft and tender pumpkin spice cookies are shaped like little witches’ hats with a chocolate kiss crown and orange sugar trim. They’re quick, easy, and perfect for Halloween parties or cozy fall afternoons.
- Prep Time: 15 minutes
- Cook Time: 10-12 minutes per batch
- Total Time: 35 minutes
- Yield: 24-30 cookies 1x
- Category: Dessert
- Cuisine: American
Ingredients
- ½ cup canned pumpkin puree (not pumpkin pie filling)
- ½ cup unsalted butter, softened
- ½ cup granulated sugar
- ¼ cup light brown sugar, packed
- 1 large egg, at room temperature
- 1 teaspoon vanilla extract
- 1¾ cups all-purpose flour
- 1½ teaspoons pumpkin pie spice
- 1 teaspoon baking powder
- ¼ teaspoon salt
- 24–30 chocolate kisses, unwrapped
- 2–3 tablespoons orange sanding sugar
- Powdered sugar, optional for dusting
Instructions
- Preheat your oven to 350°F (175°C). Line two baking sheets with parchment paper or silicone mats.
- In a large mixing bowl, beat the softened butter, granulated sugar, and brown sugar together until light and fluffy, about 2-3 minutes. Scrape down the sides halfway through.
- Beat in the pumpkin puree, egg, and vanilla extract until well combined. The mixture may look slightly curdled.
- In a separate medium bowl, whisk together the flour, pumpkin pie spice, baking powder, and salt.
- Gradually add the dry ingredients to the wet mixture, mixing on low speed or stirring with a spatula until just combined. Do not overmix.
- Using a cookie scoop or tablespoon, drop rounded scoops of dough onto the prepared baking sheets, spacing them about 2 inches apart. You should get about 24-30 cookies.
- Bake one sheet at a time for 10-12 minutes, or until the edges are set and lightly golden. The centers will still look soft.
- Immediately after removing from the oven, gently press a chocolate kiss into the center of each cookie, pointed side up, so it sits about halfway in.
- While the chocolate is still soft, sprinkle a pinch of orange sanding sugar around the base of each kiss.
- Let the cookies cool on the baking sheet for about 5 minutes, then transfer to a wire rack to cool completely. The chocolate will firm up as they cool.
Notes
Make sure your pumpkin puree isn’t watery—pour off any liquid before measuring. Keep chocolate kisses cold until ready to use. If your kitchen is warm, refrigerate the cookies for 10 minutes to help the chocolate set. The cookies taste even better the next day as the flavors meld.
Nutrition
- Serving Size: 1 cookie
- Calories: 145
- Sugar: 12
- Sodium: 85
- Fat: 7
- Saturated Fat: 4
- Carbohydrates: 20
- Fiber: 1
- Protein: 2
Keywords: pumpkin spice, witches hat cookies, Halloween cookies, easy Halloween treats, pumpkin cookies, fall baking, chocolate kiss cookies


